This was my first time making fursuit head. I had an opportunity to check out another suit head by experienced maker, so it got a bit more understandable. Aside from that I also checked several YouTube videos on how head is made and how to sew correctly (as I have never sewed before lol).
There are several ways to create fursuit head, usually there are 2 options:
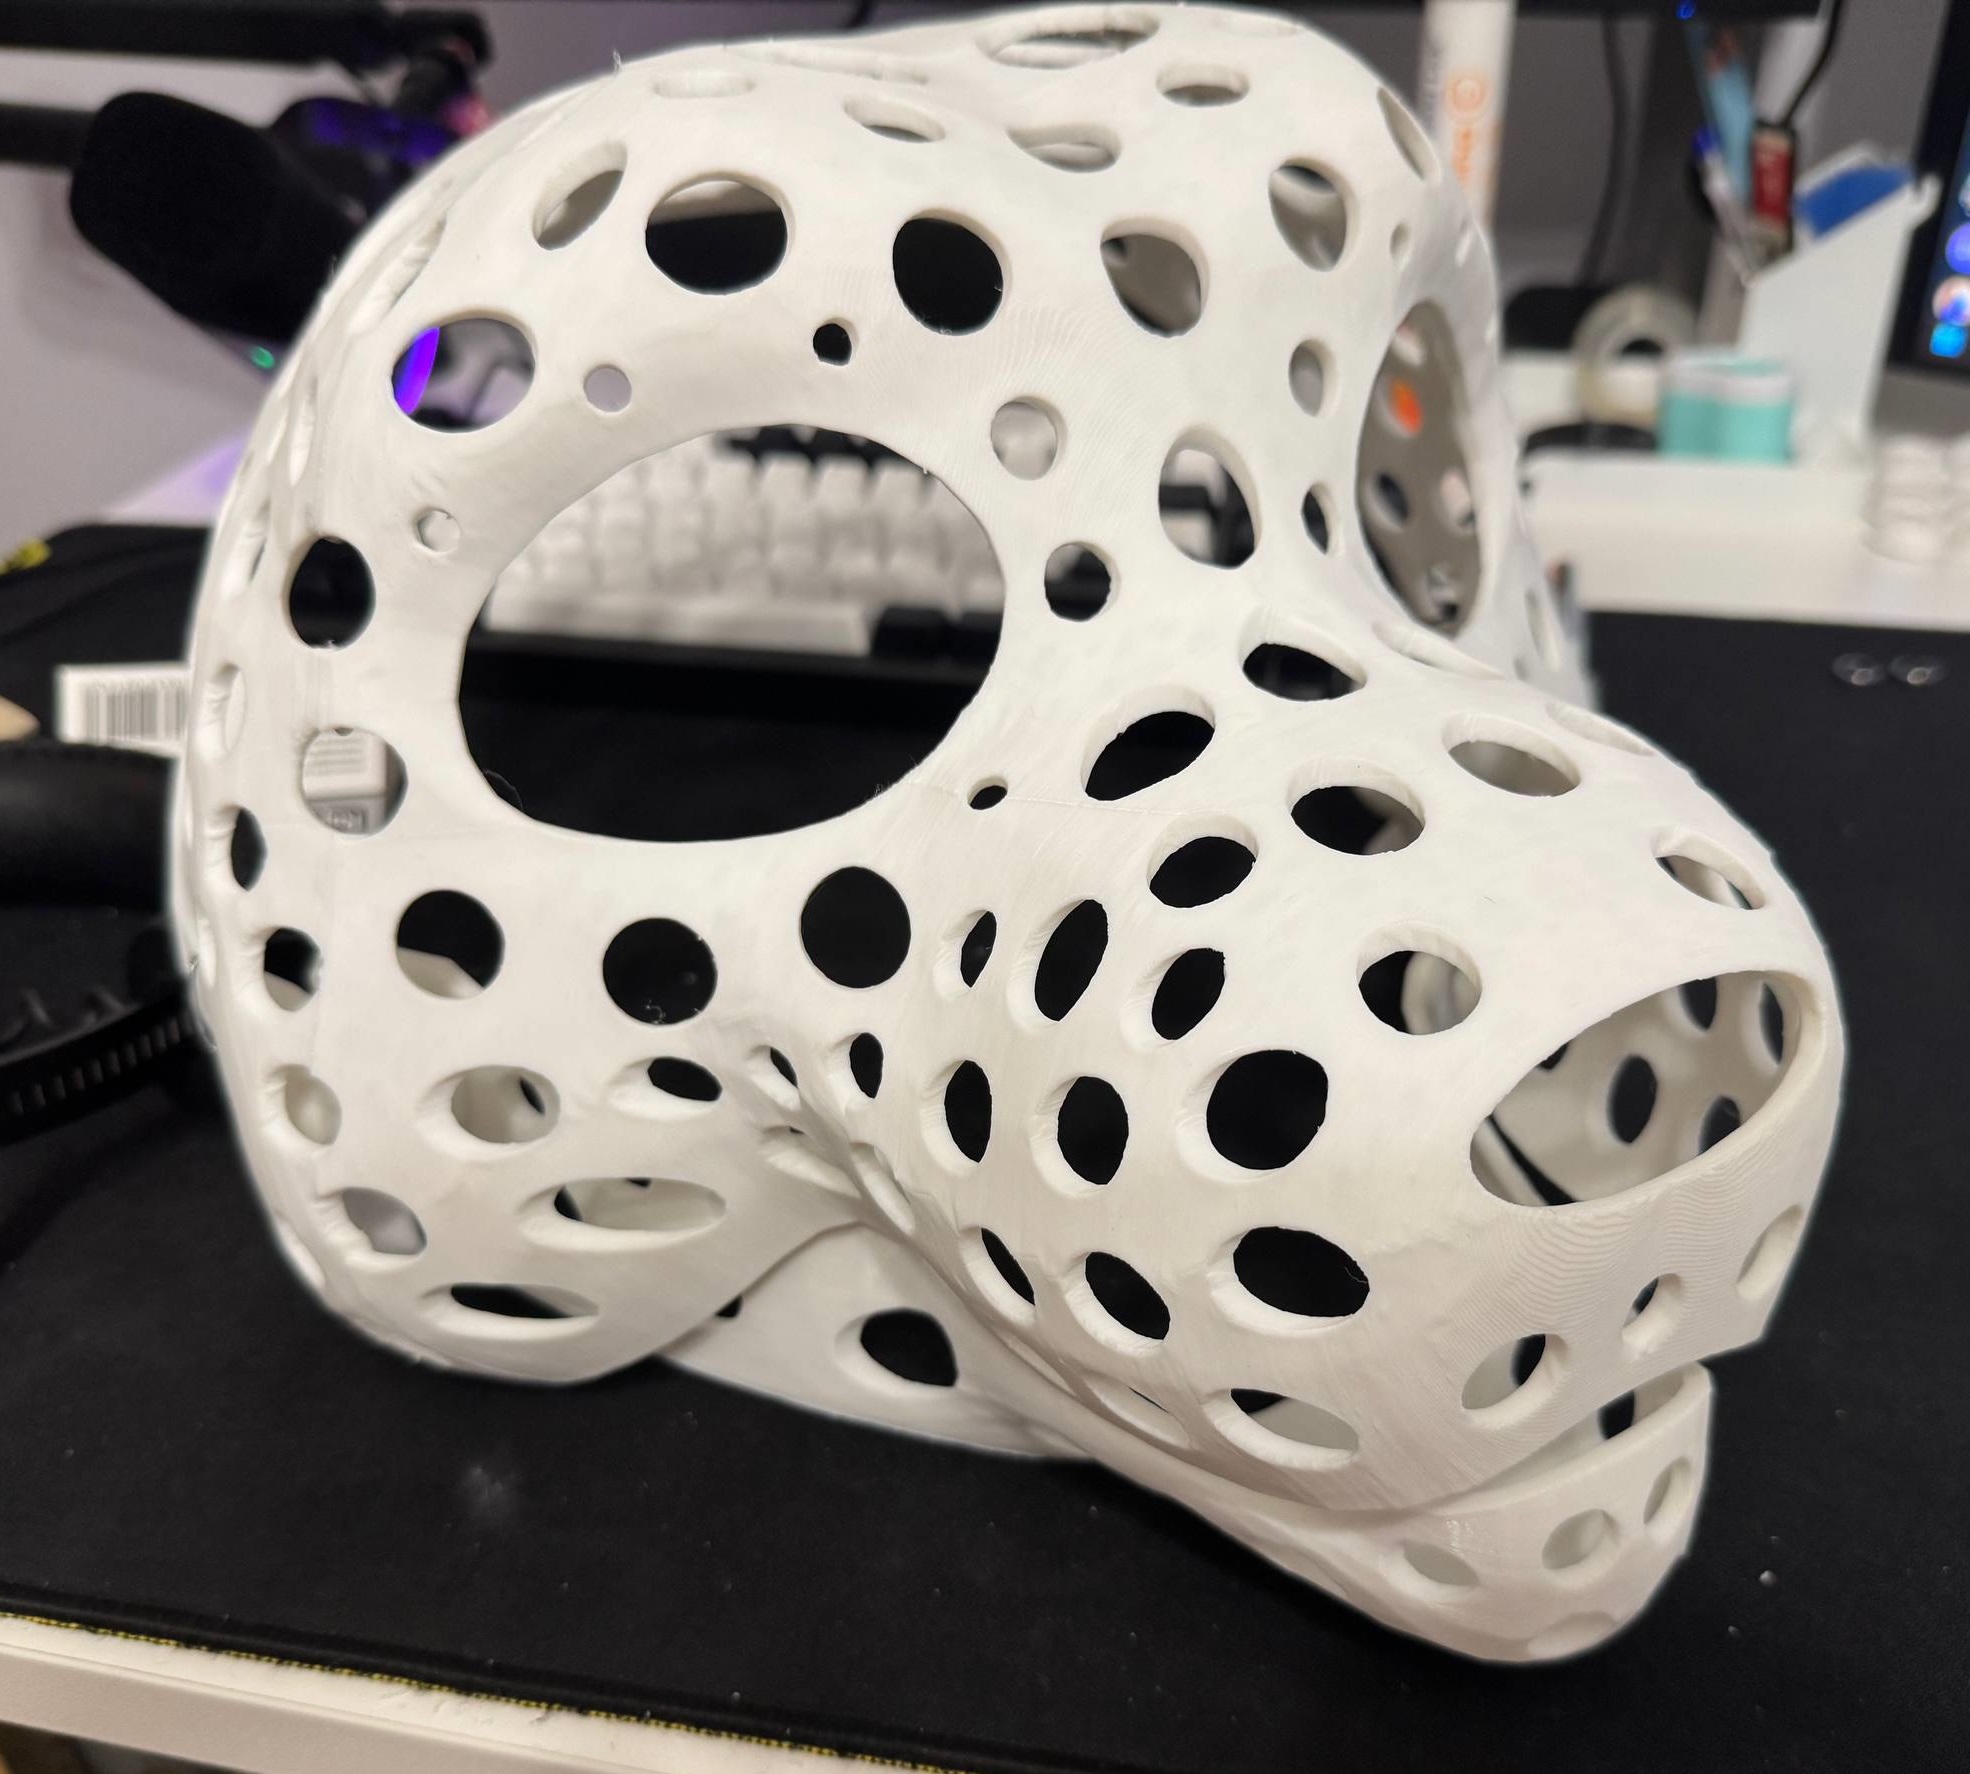
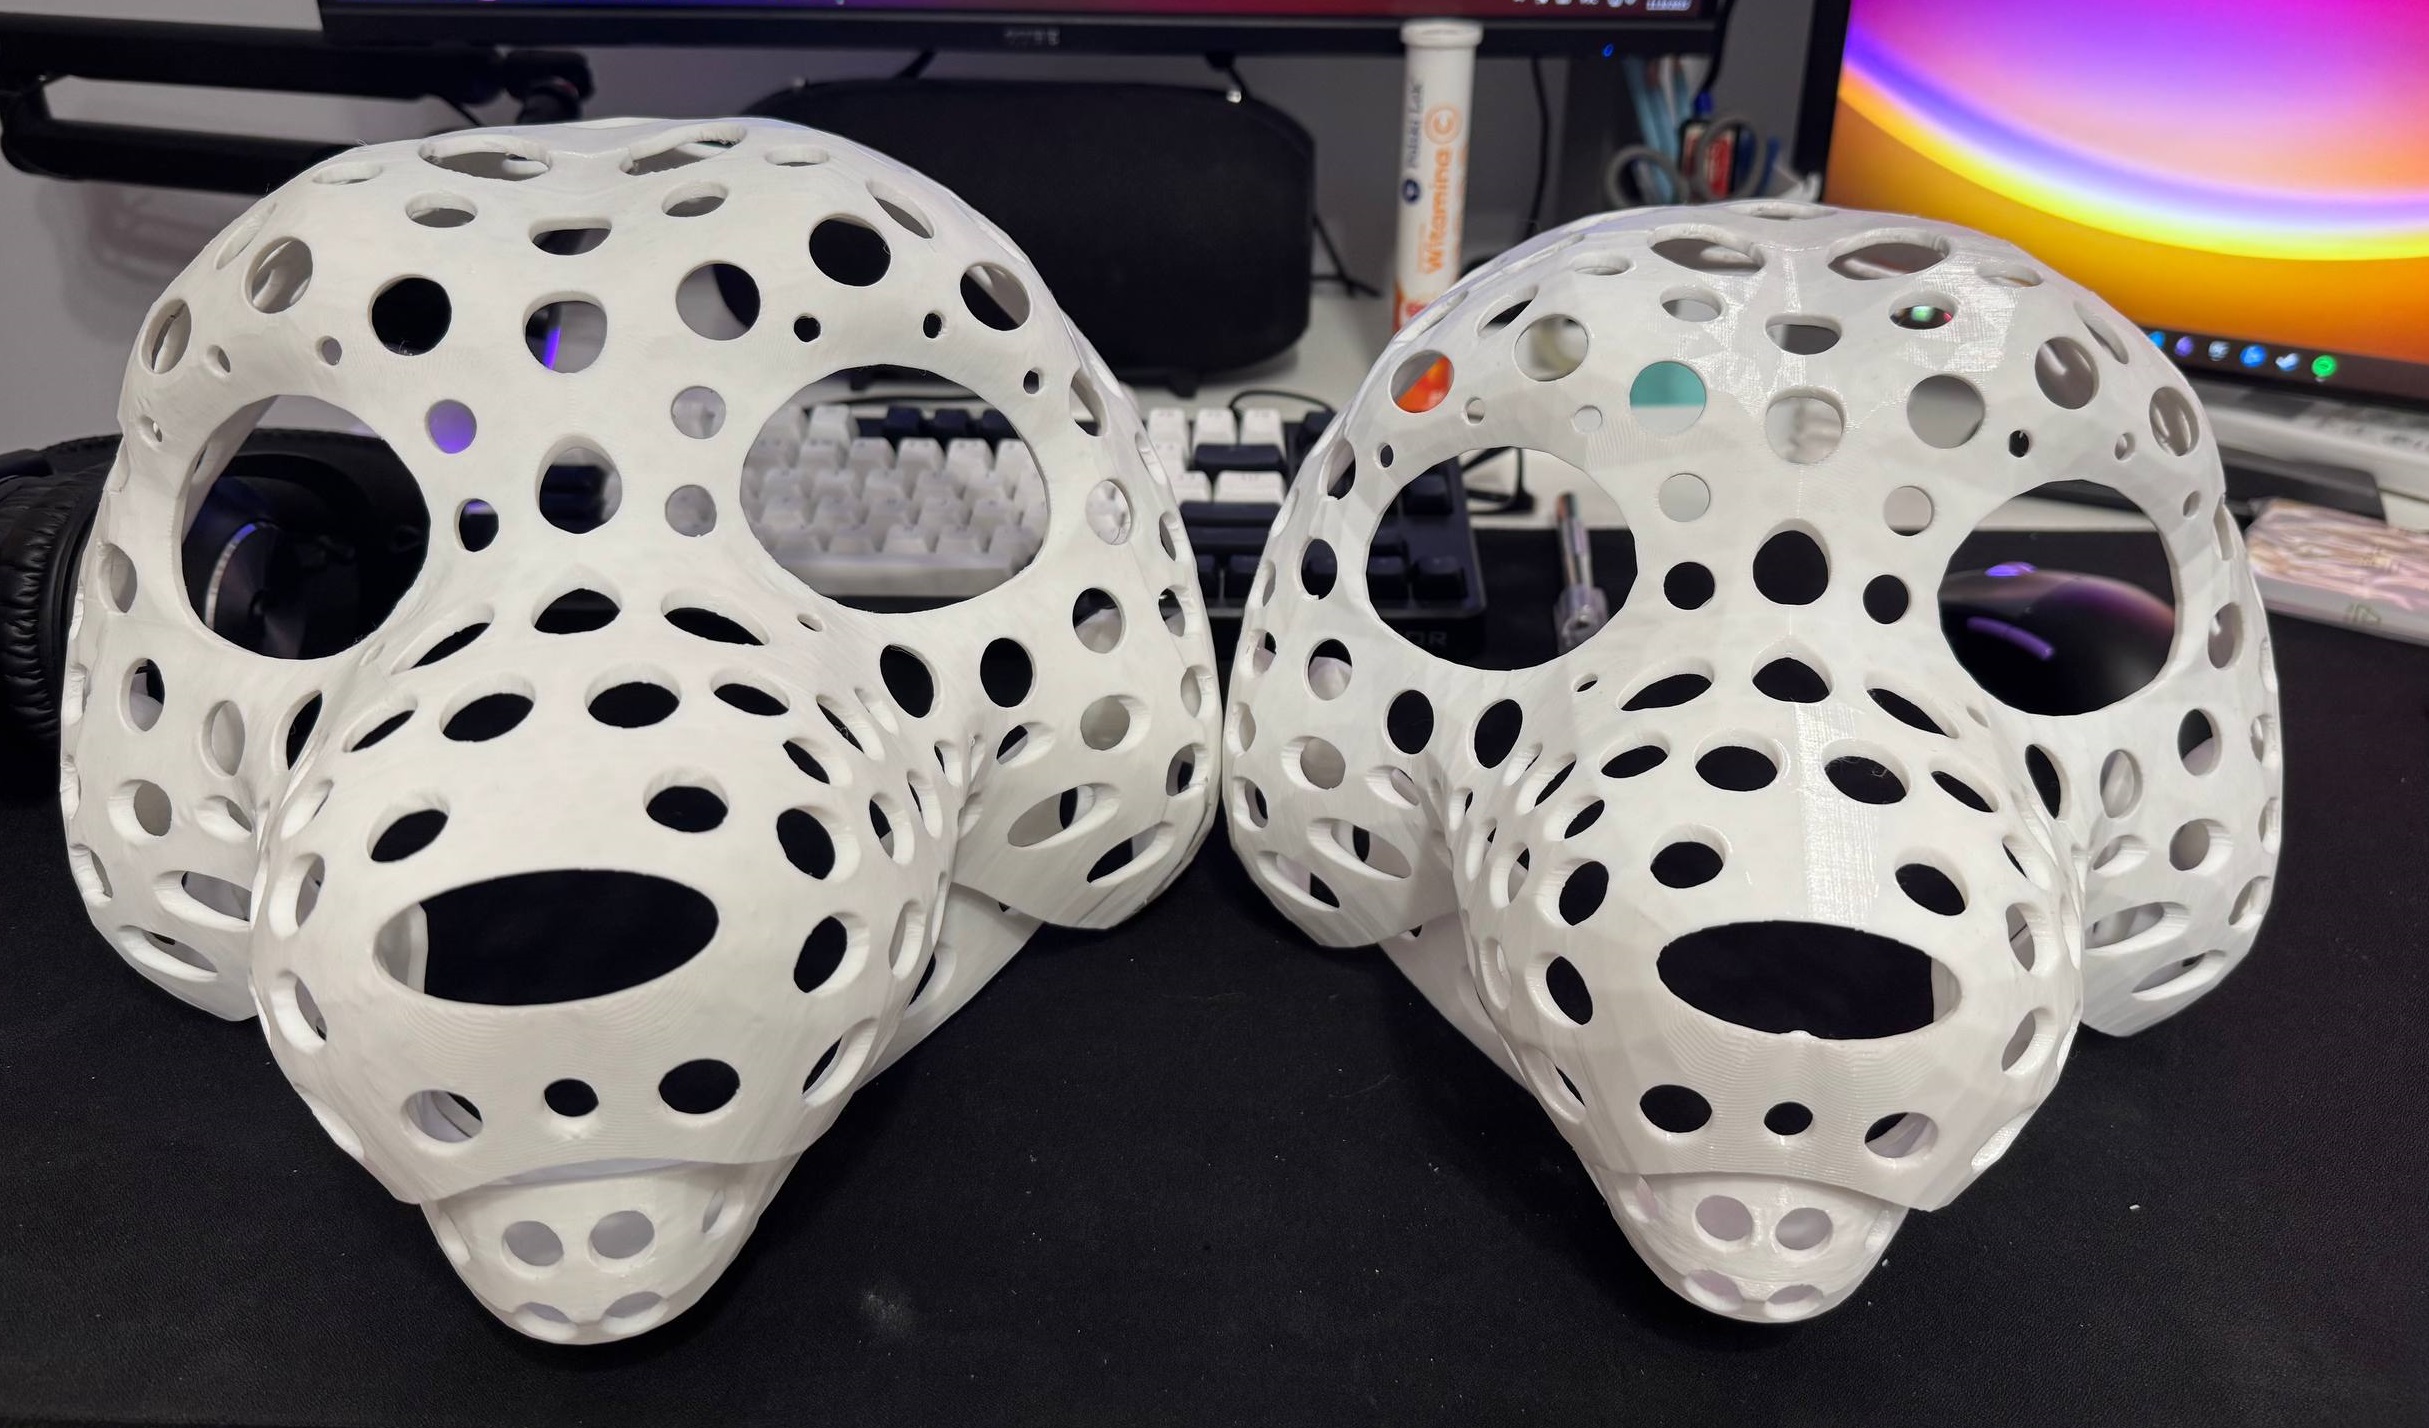
Because I have 3d printer at home (Elegoo Neptune 4 Plus) - I decided to print the base with PLA plastic.
I used model made by Tioh.
Initially I set size incorrectly, and it turned out too small.
It was printed in 2 parts, and then I glued them together with super-glue. To connect the jaw with the main part I used zip tie.
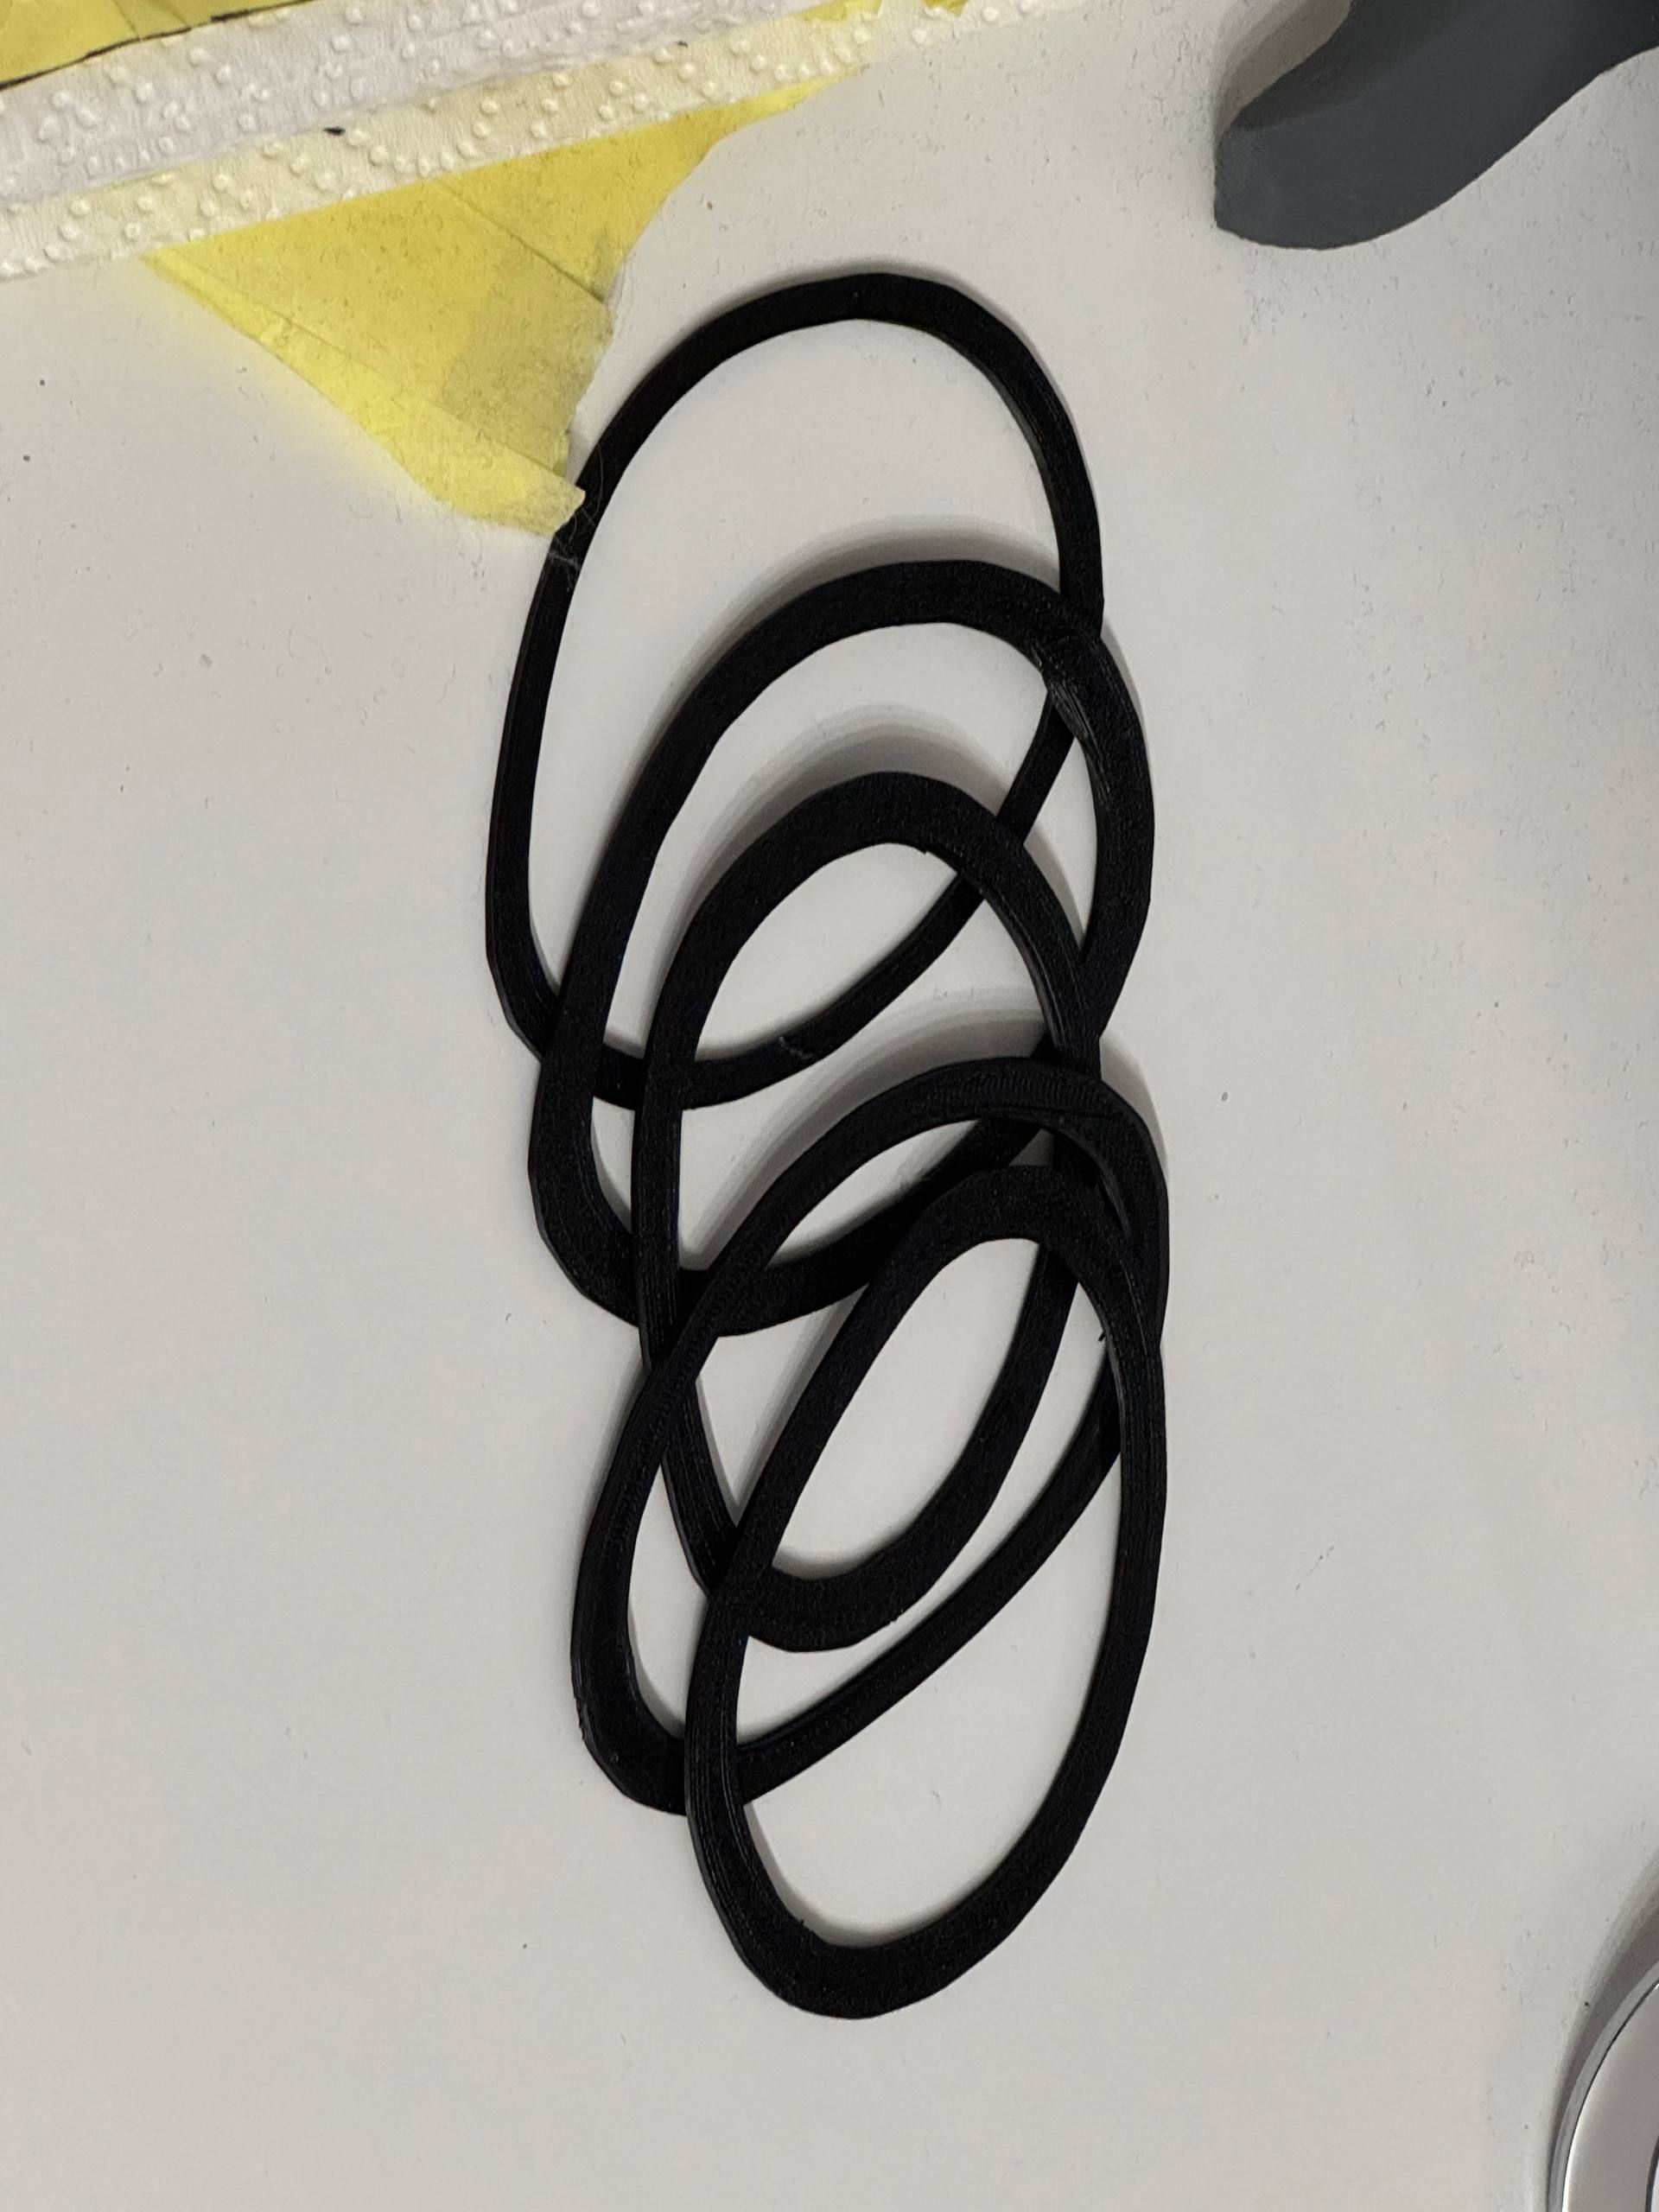
I took some model of ears, probably made by same creator and printed them using TPU filament with next infill settings:
Then I glued them to the base using some white thick glue and few pieces of fabric to enforce the connection (totally unnecessary).

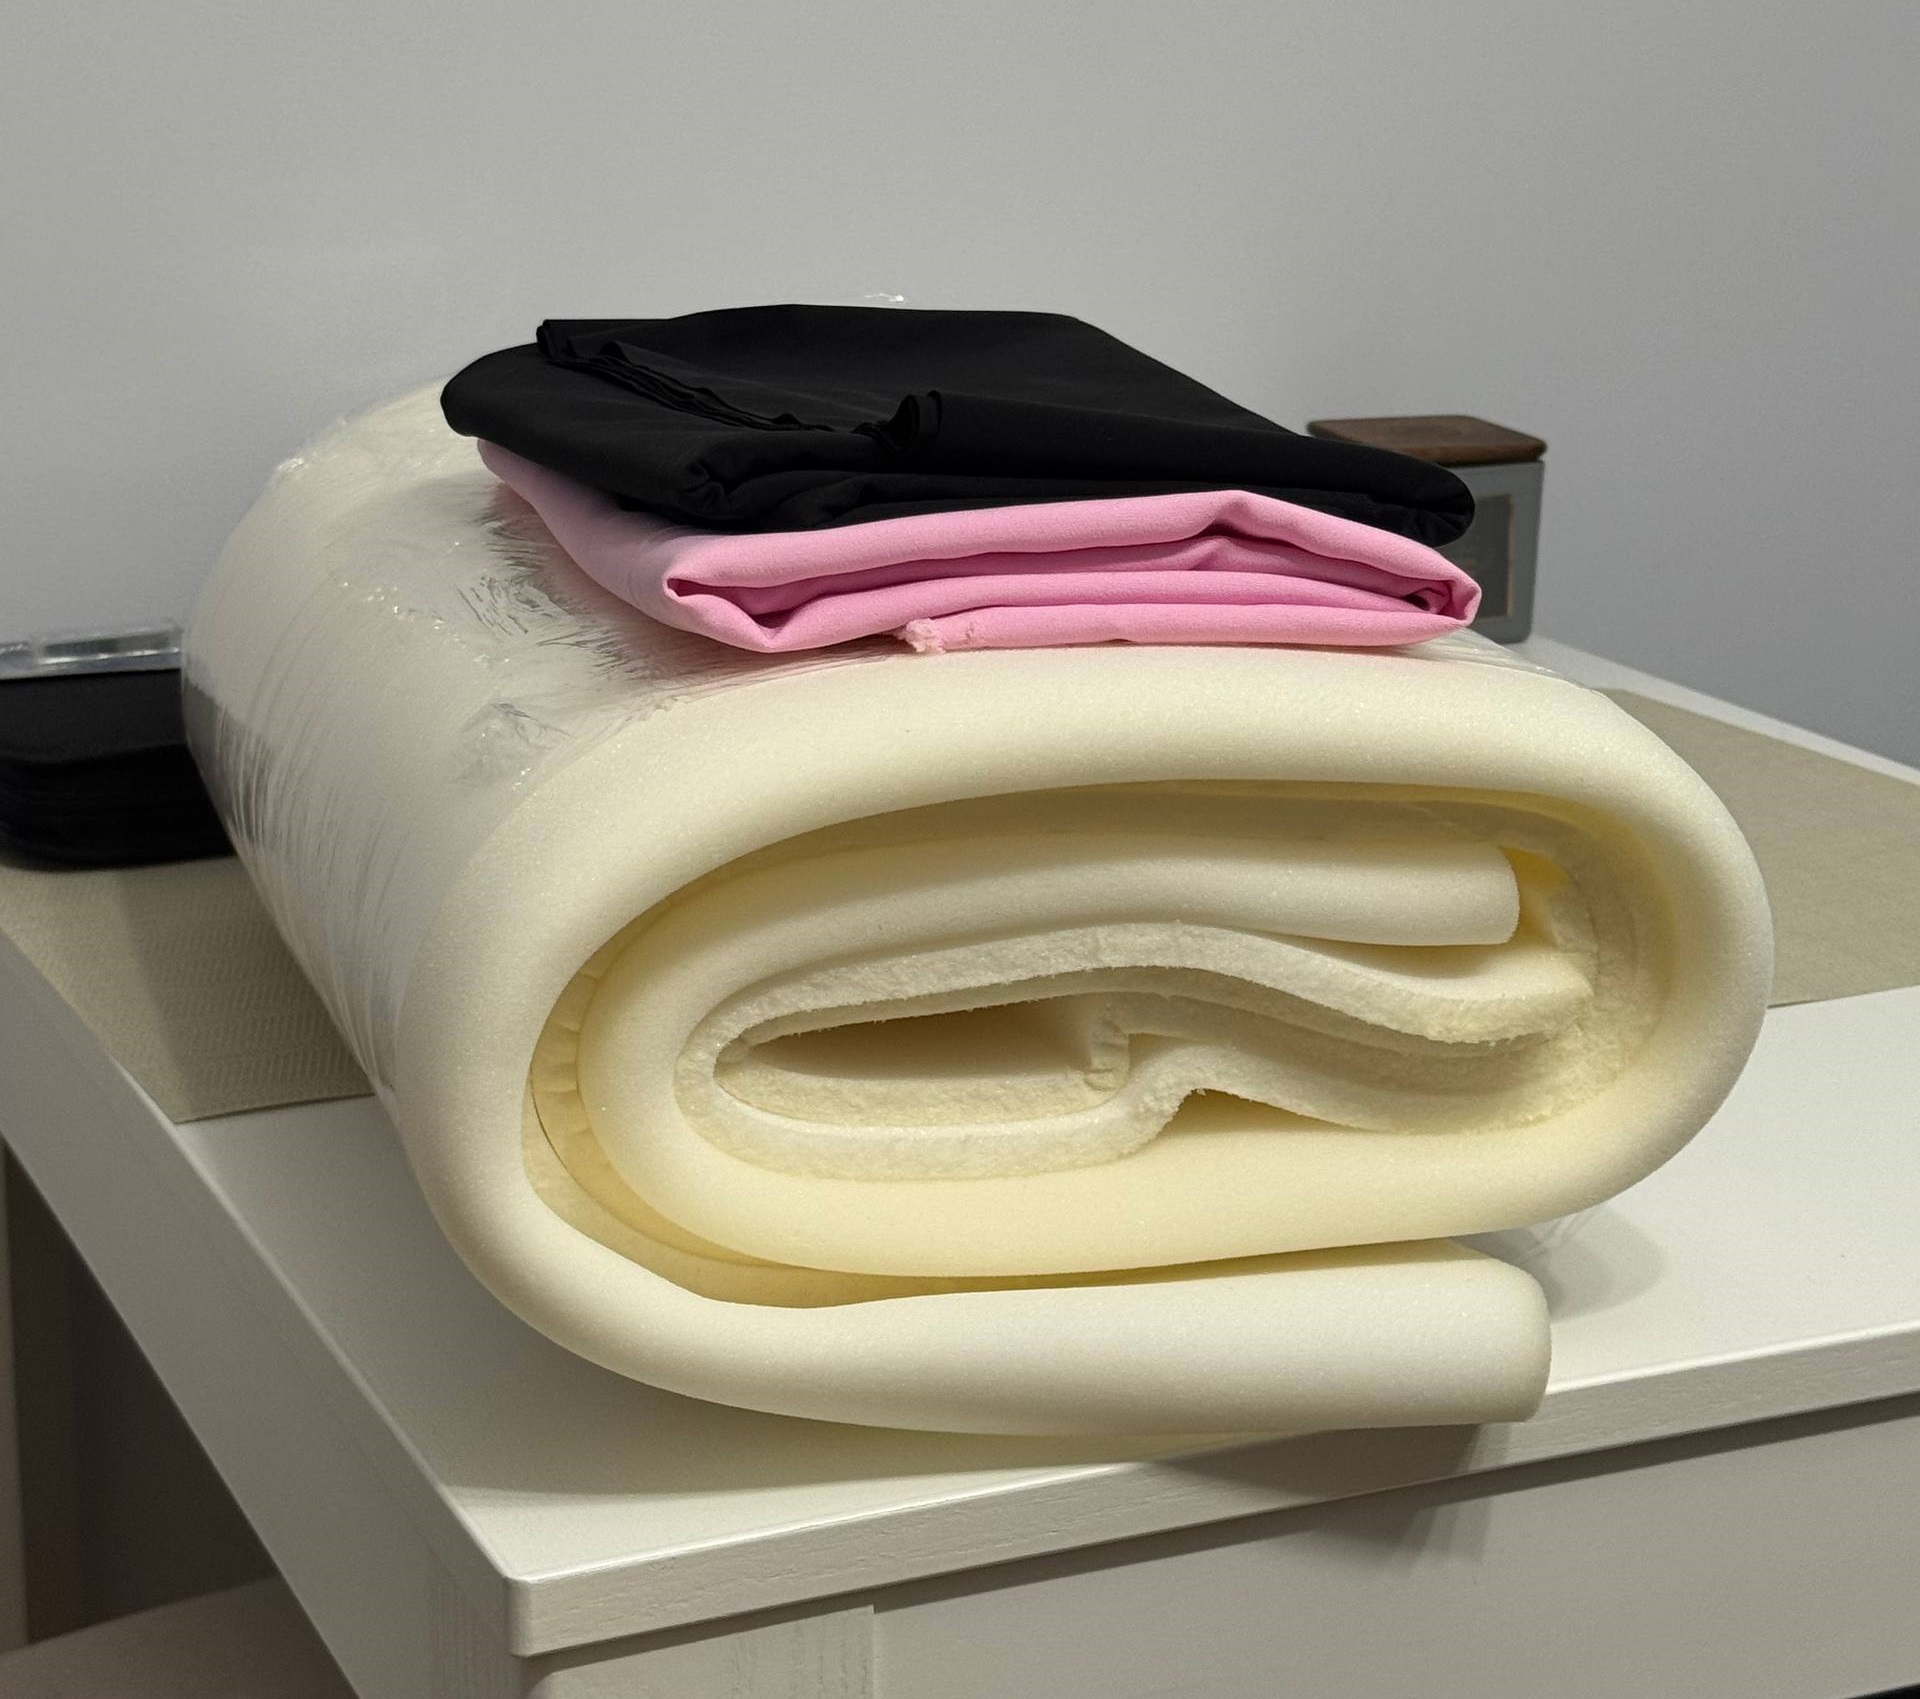
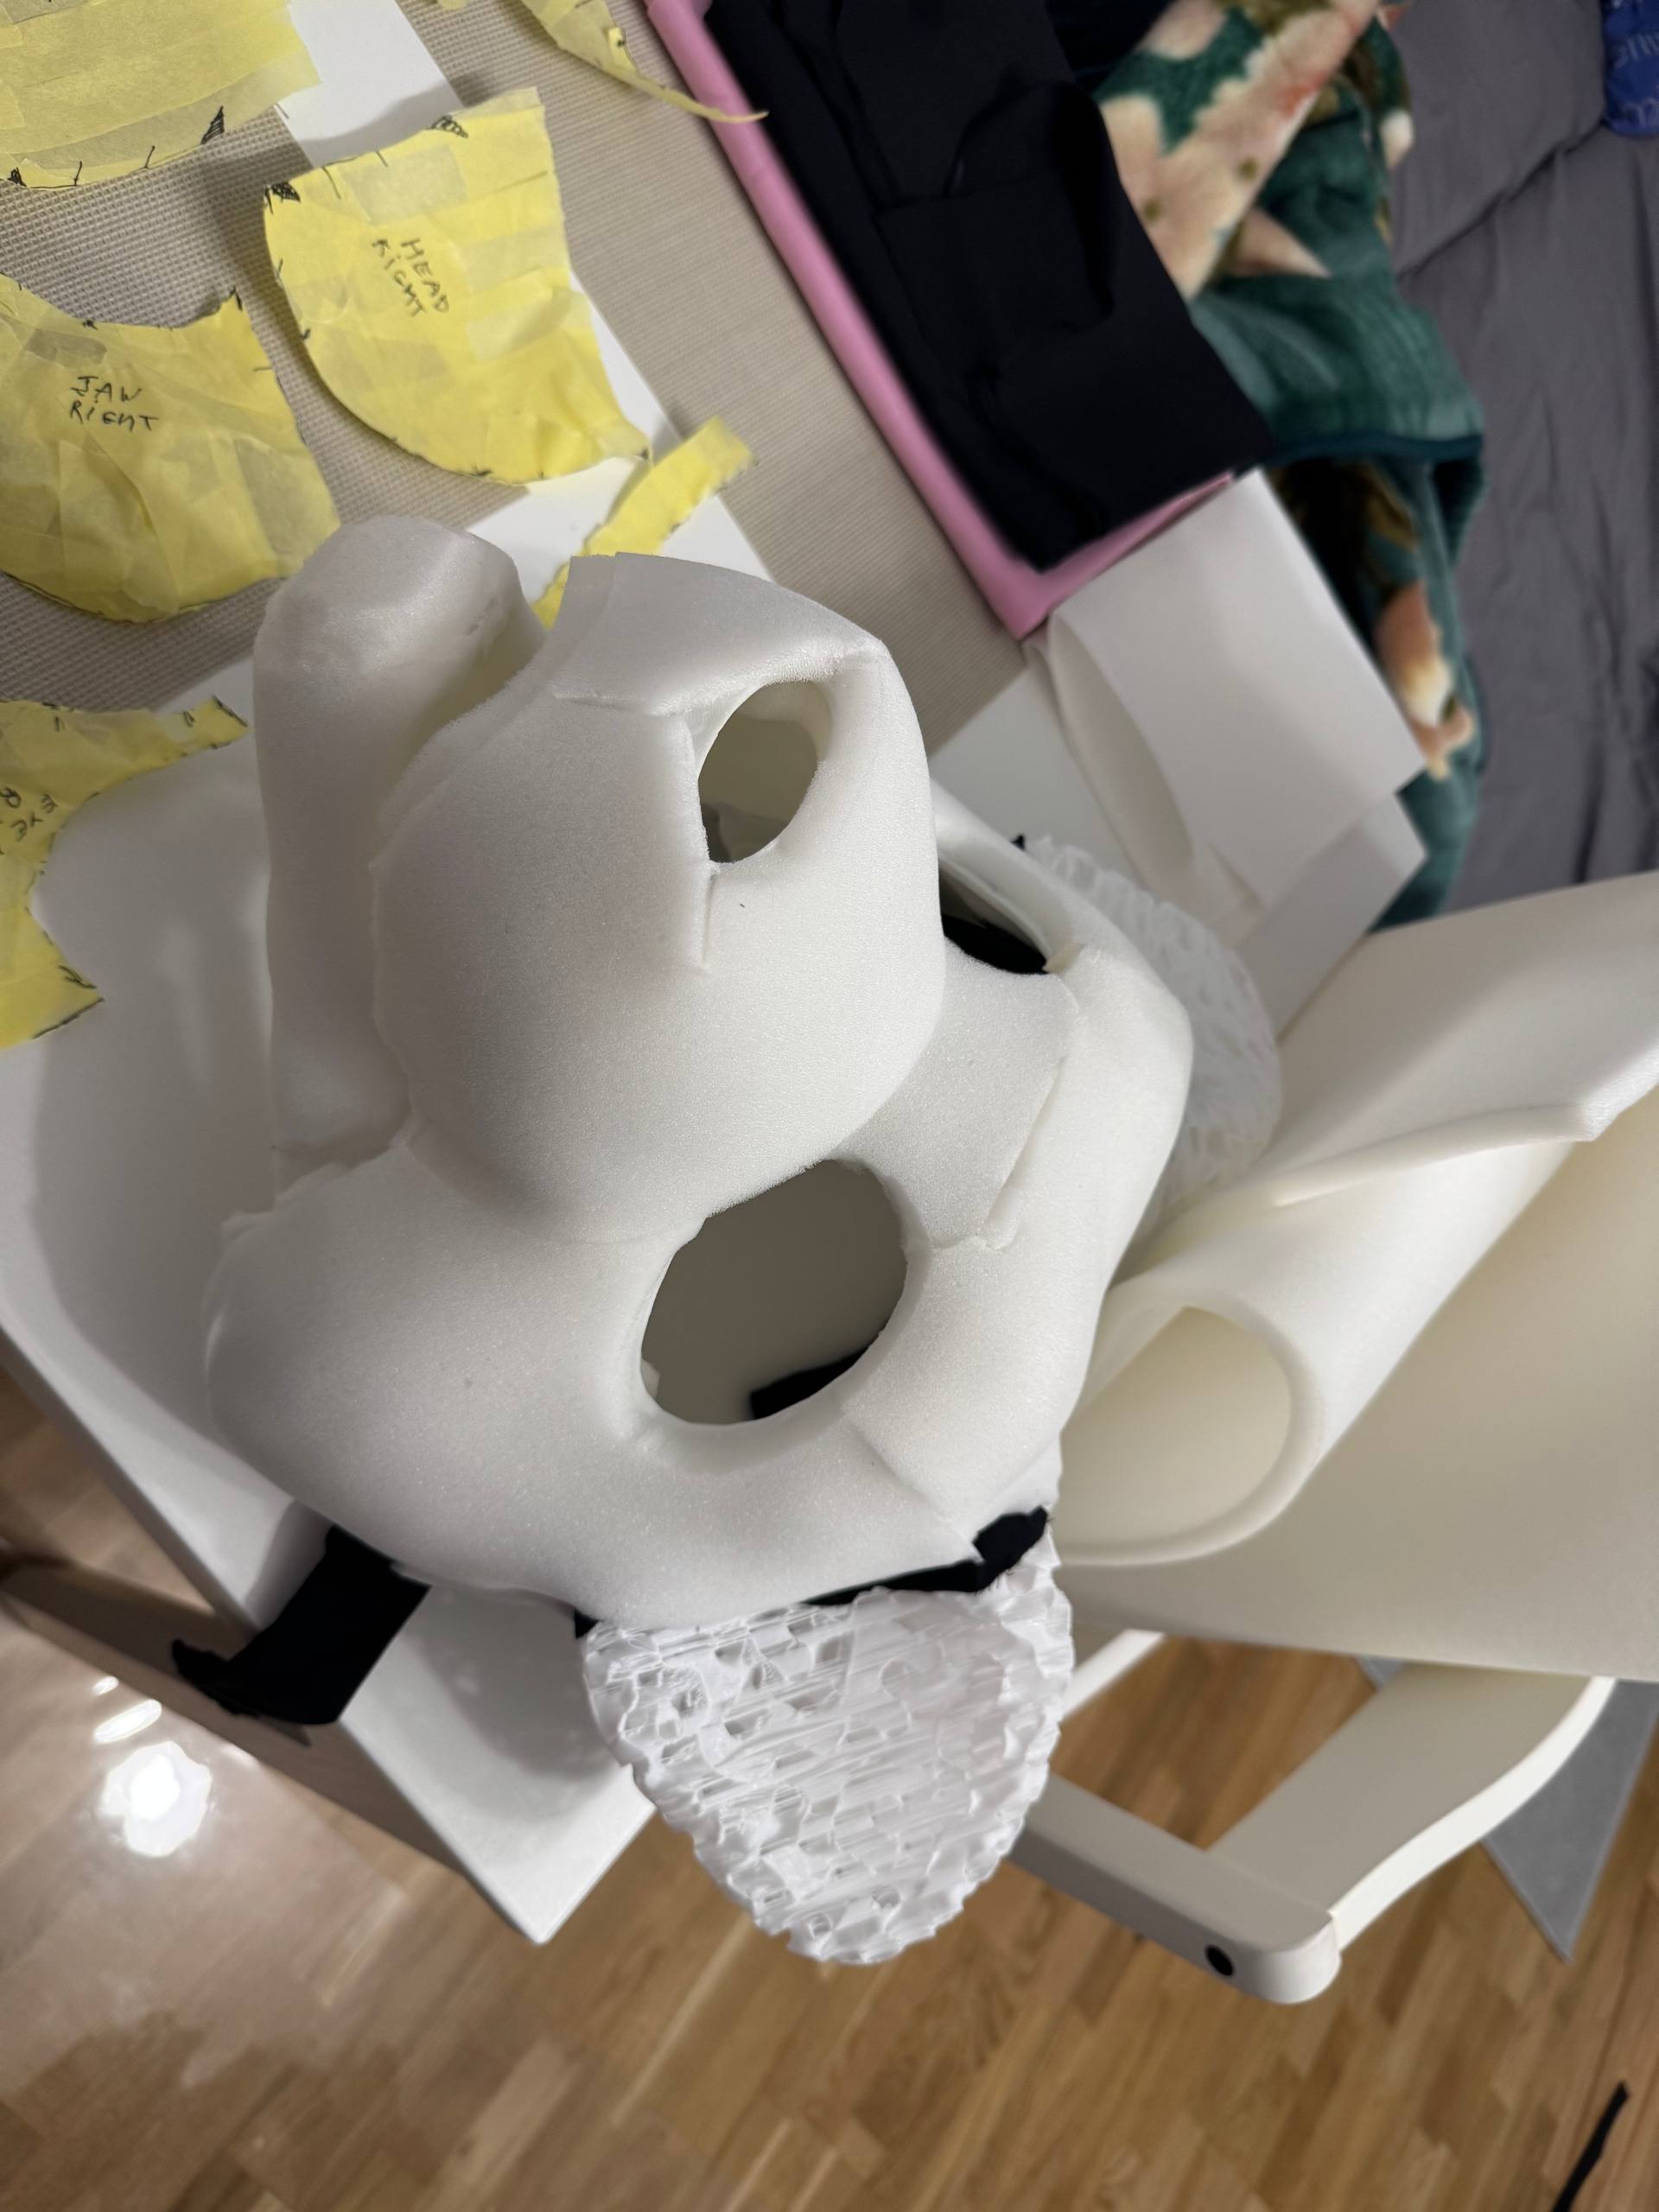
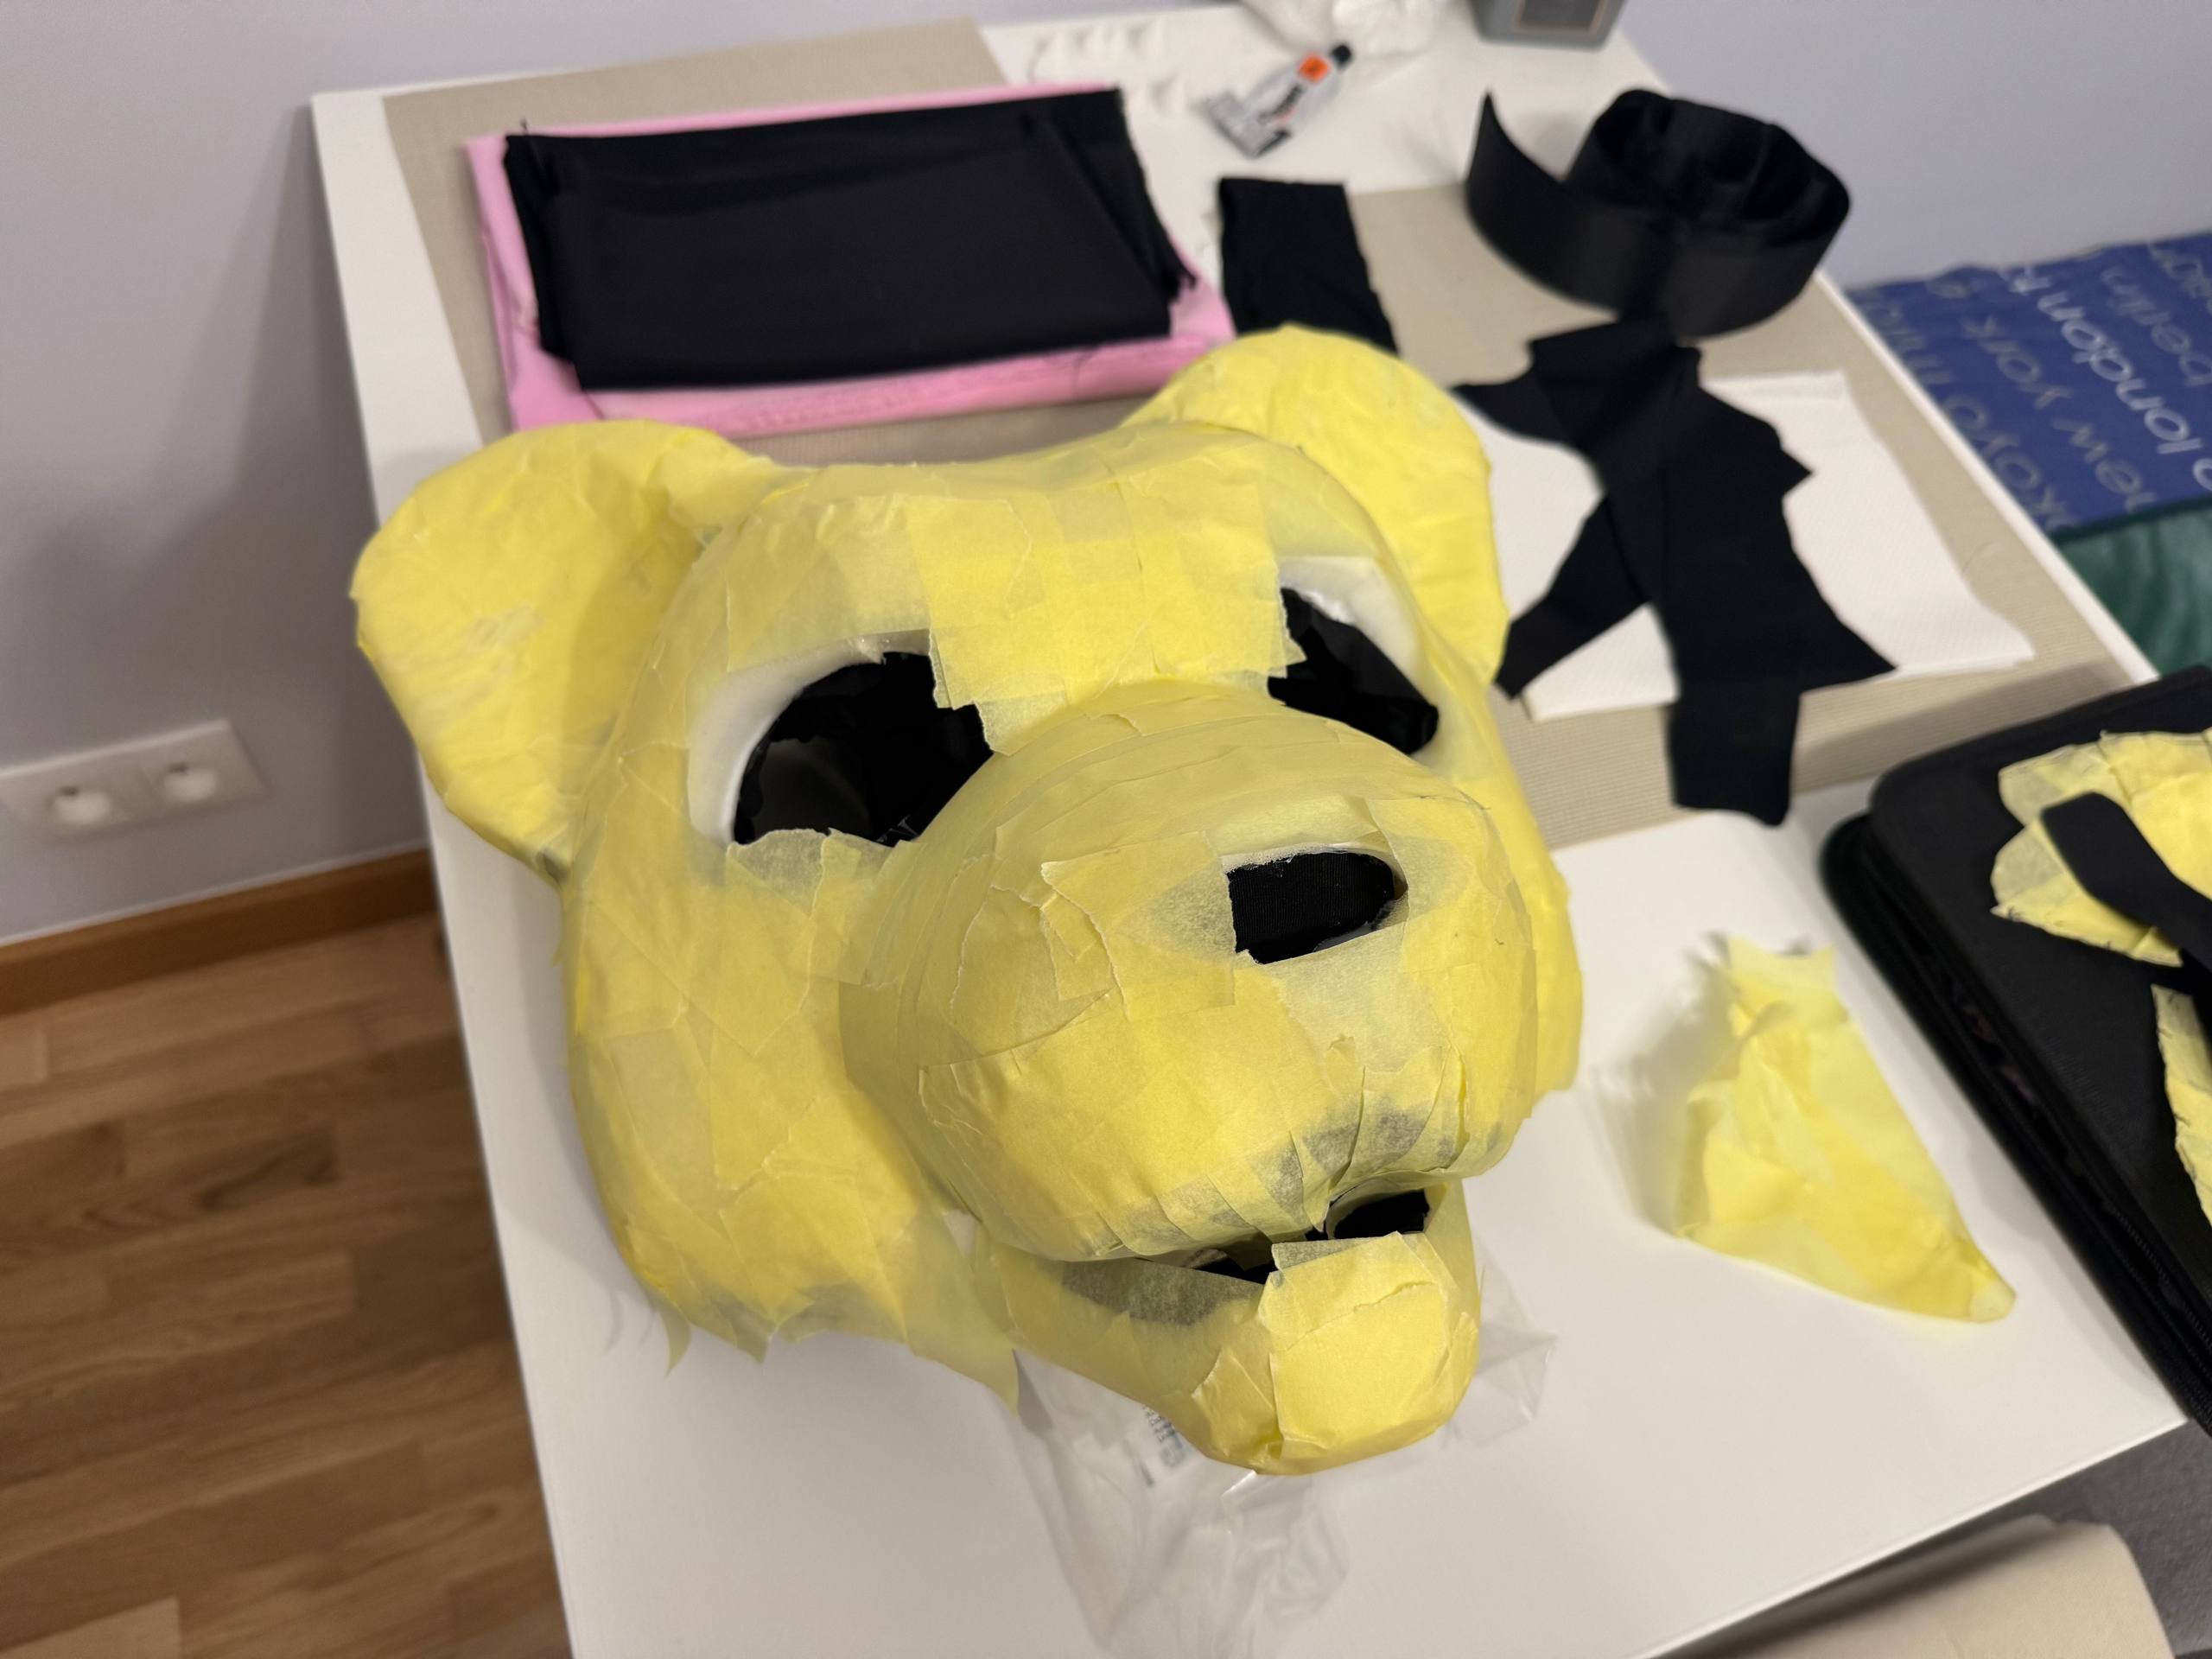
Also, I made a decision to cover up base with foam to make suit soft, but it was a bad idea xd, and later I will explain why.
To place it on my head I decided to use approach of combining supportive small pillows and strap over back of the head.
I decided that it is great idea to make strap by myself and oh boy, it was a terrible decision for sure xd. Because I have never sewed anything before - belt turned out very poor, also material was not fitting at all.
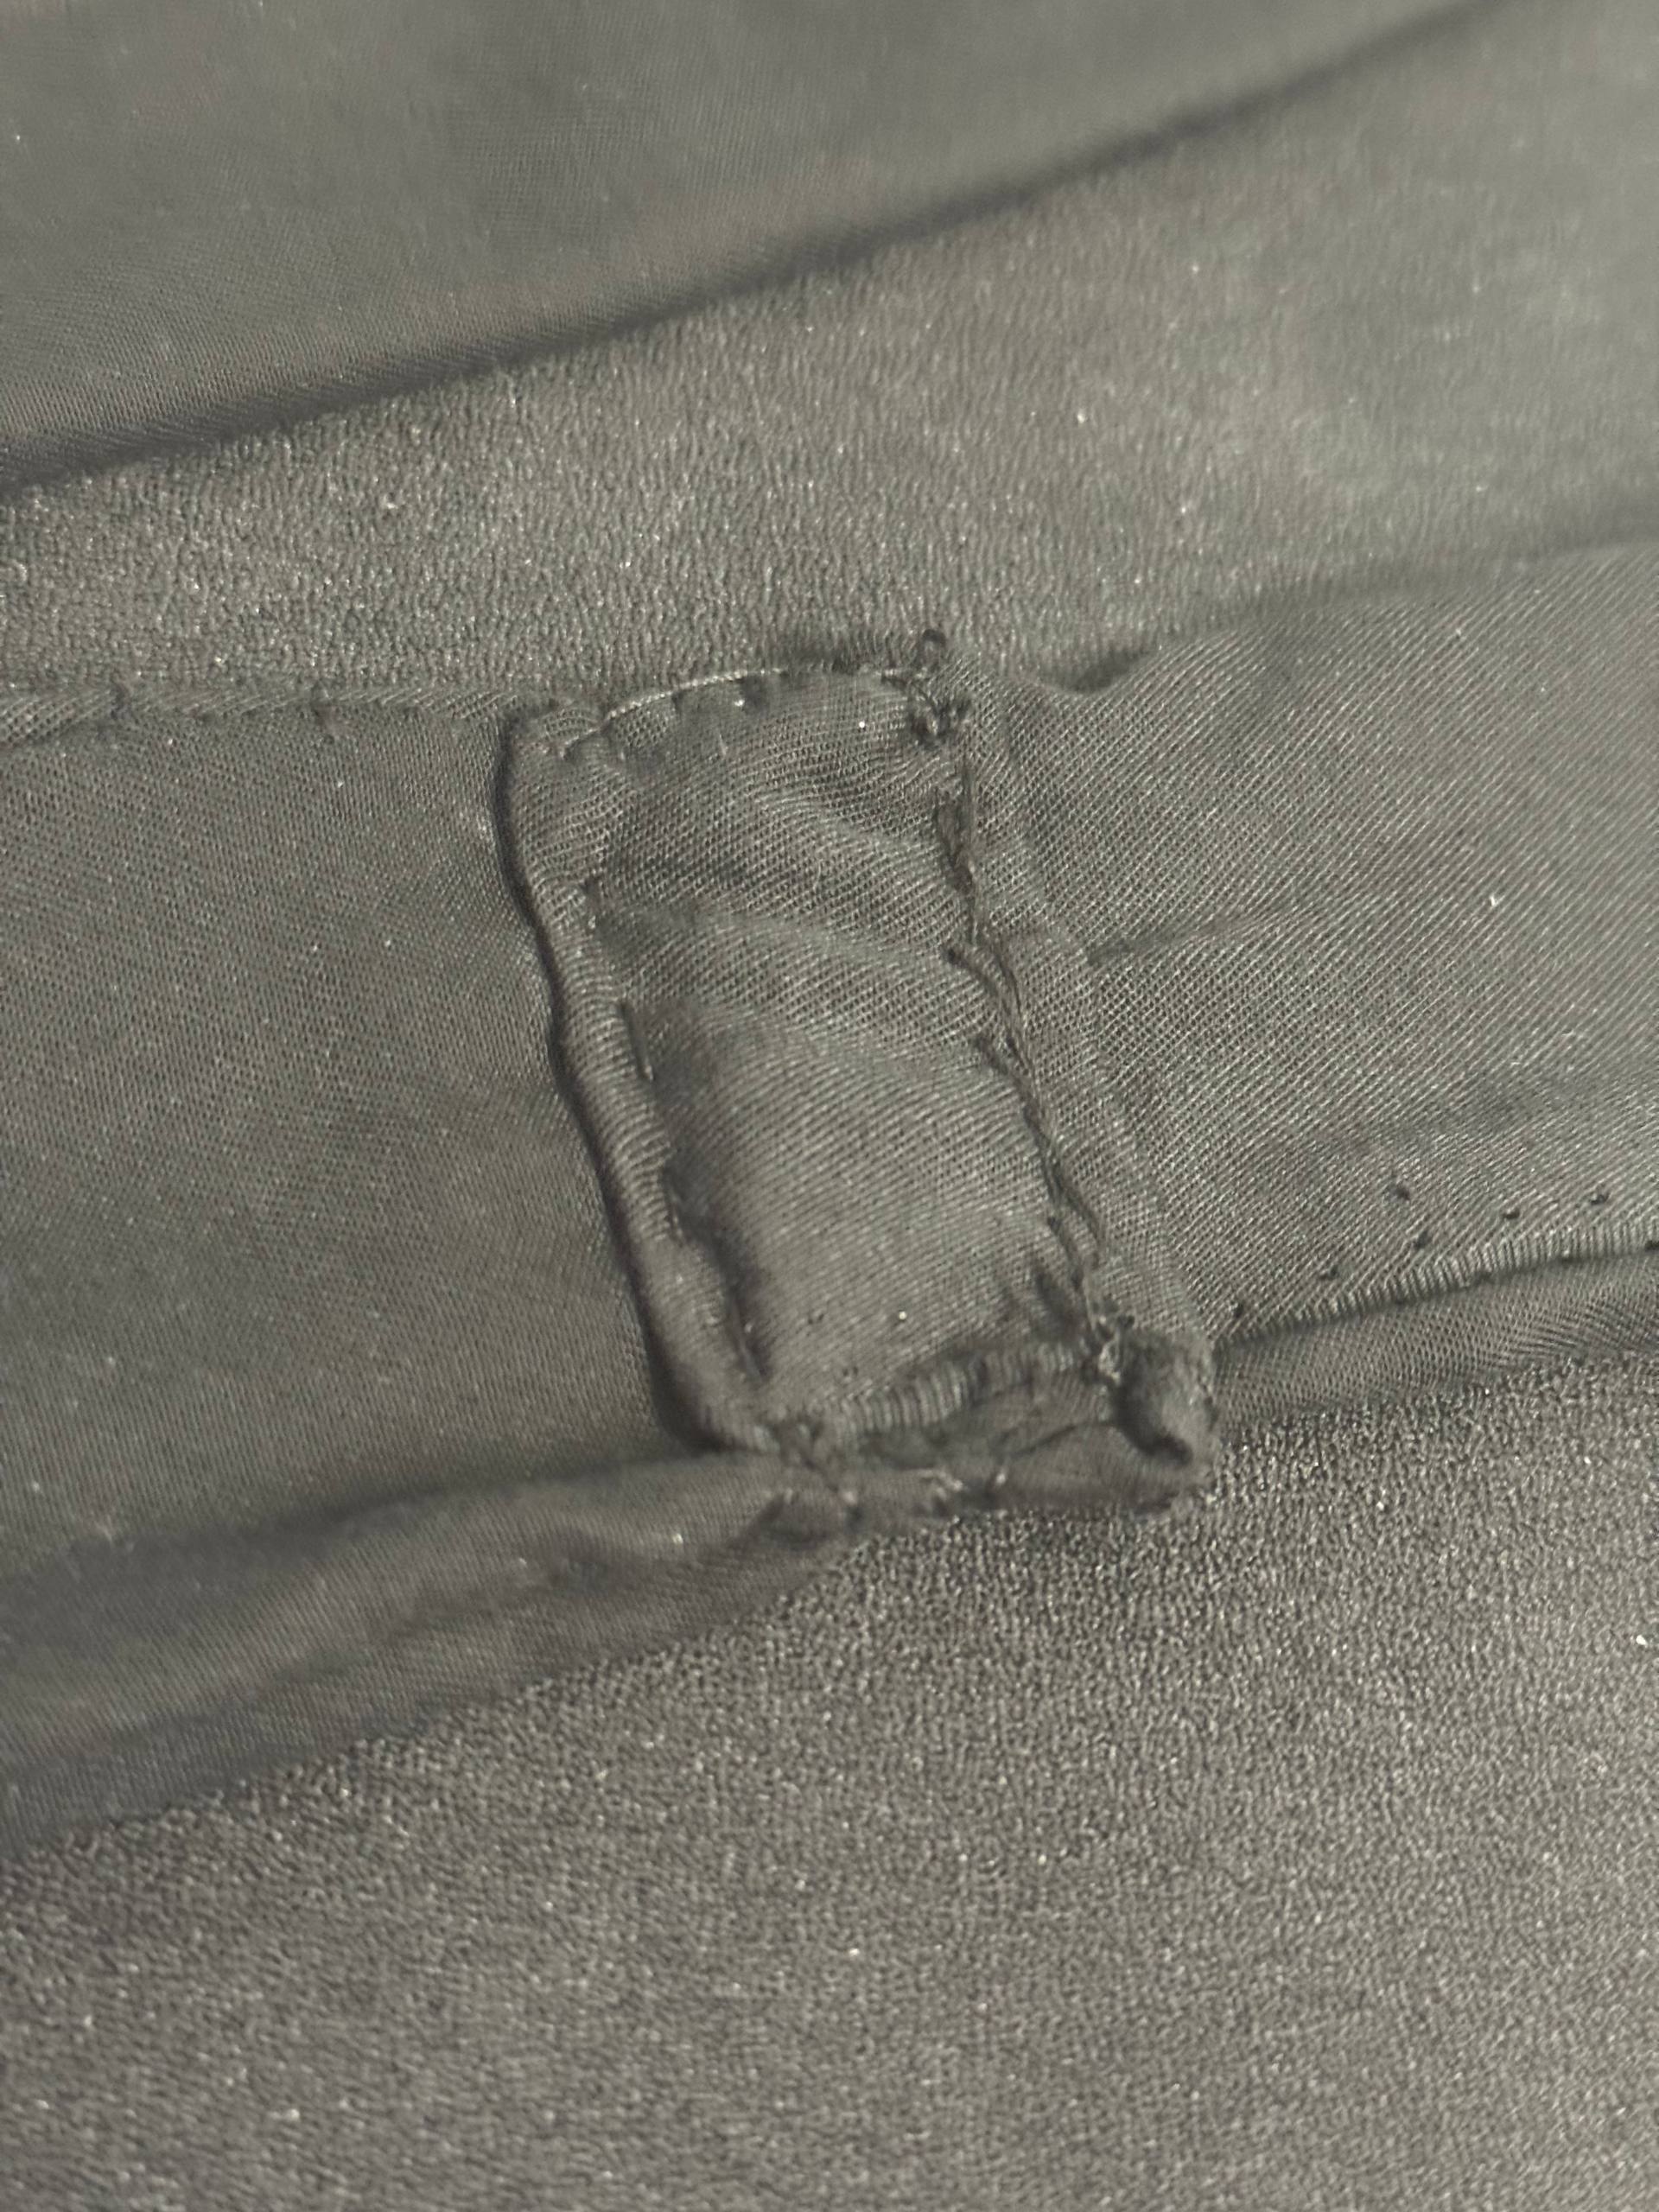
Note that the fewer pieces you make - the less you will sew, therefore the faster you will finish. In my opinion I made too much pieces. Also, please double-check sizes, make sure seam allowance is consistent and around 5 mm (feel free to adjust this number to you preference).
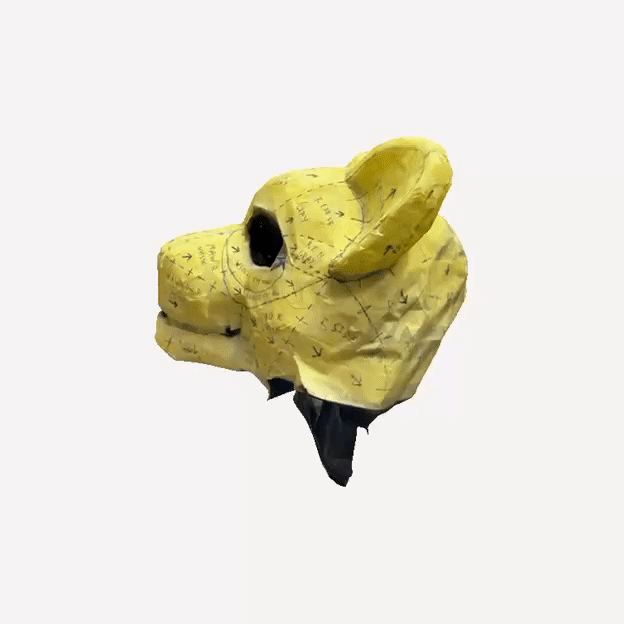
First of all I covered whole inner side of the head with duct tape to create pattern which I will later use for fabric, but I used metallic duct tape for that, it was a bit too thick, not flexible enough and I had some troubles keeping it in place.
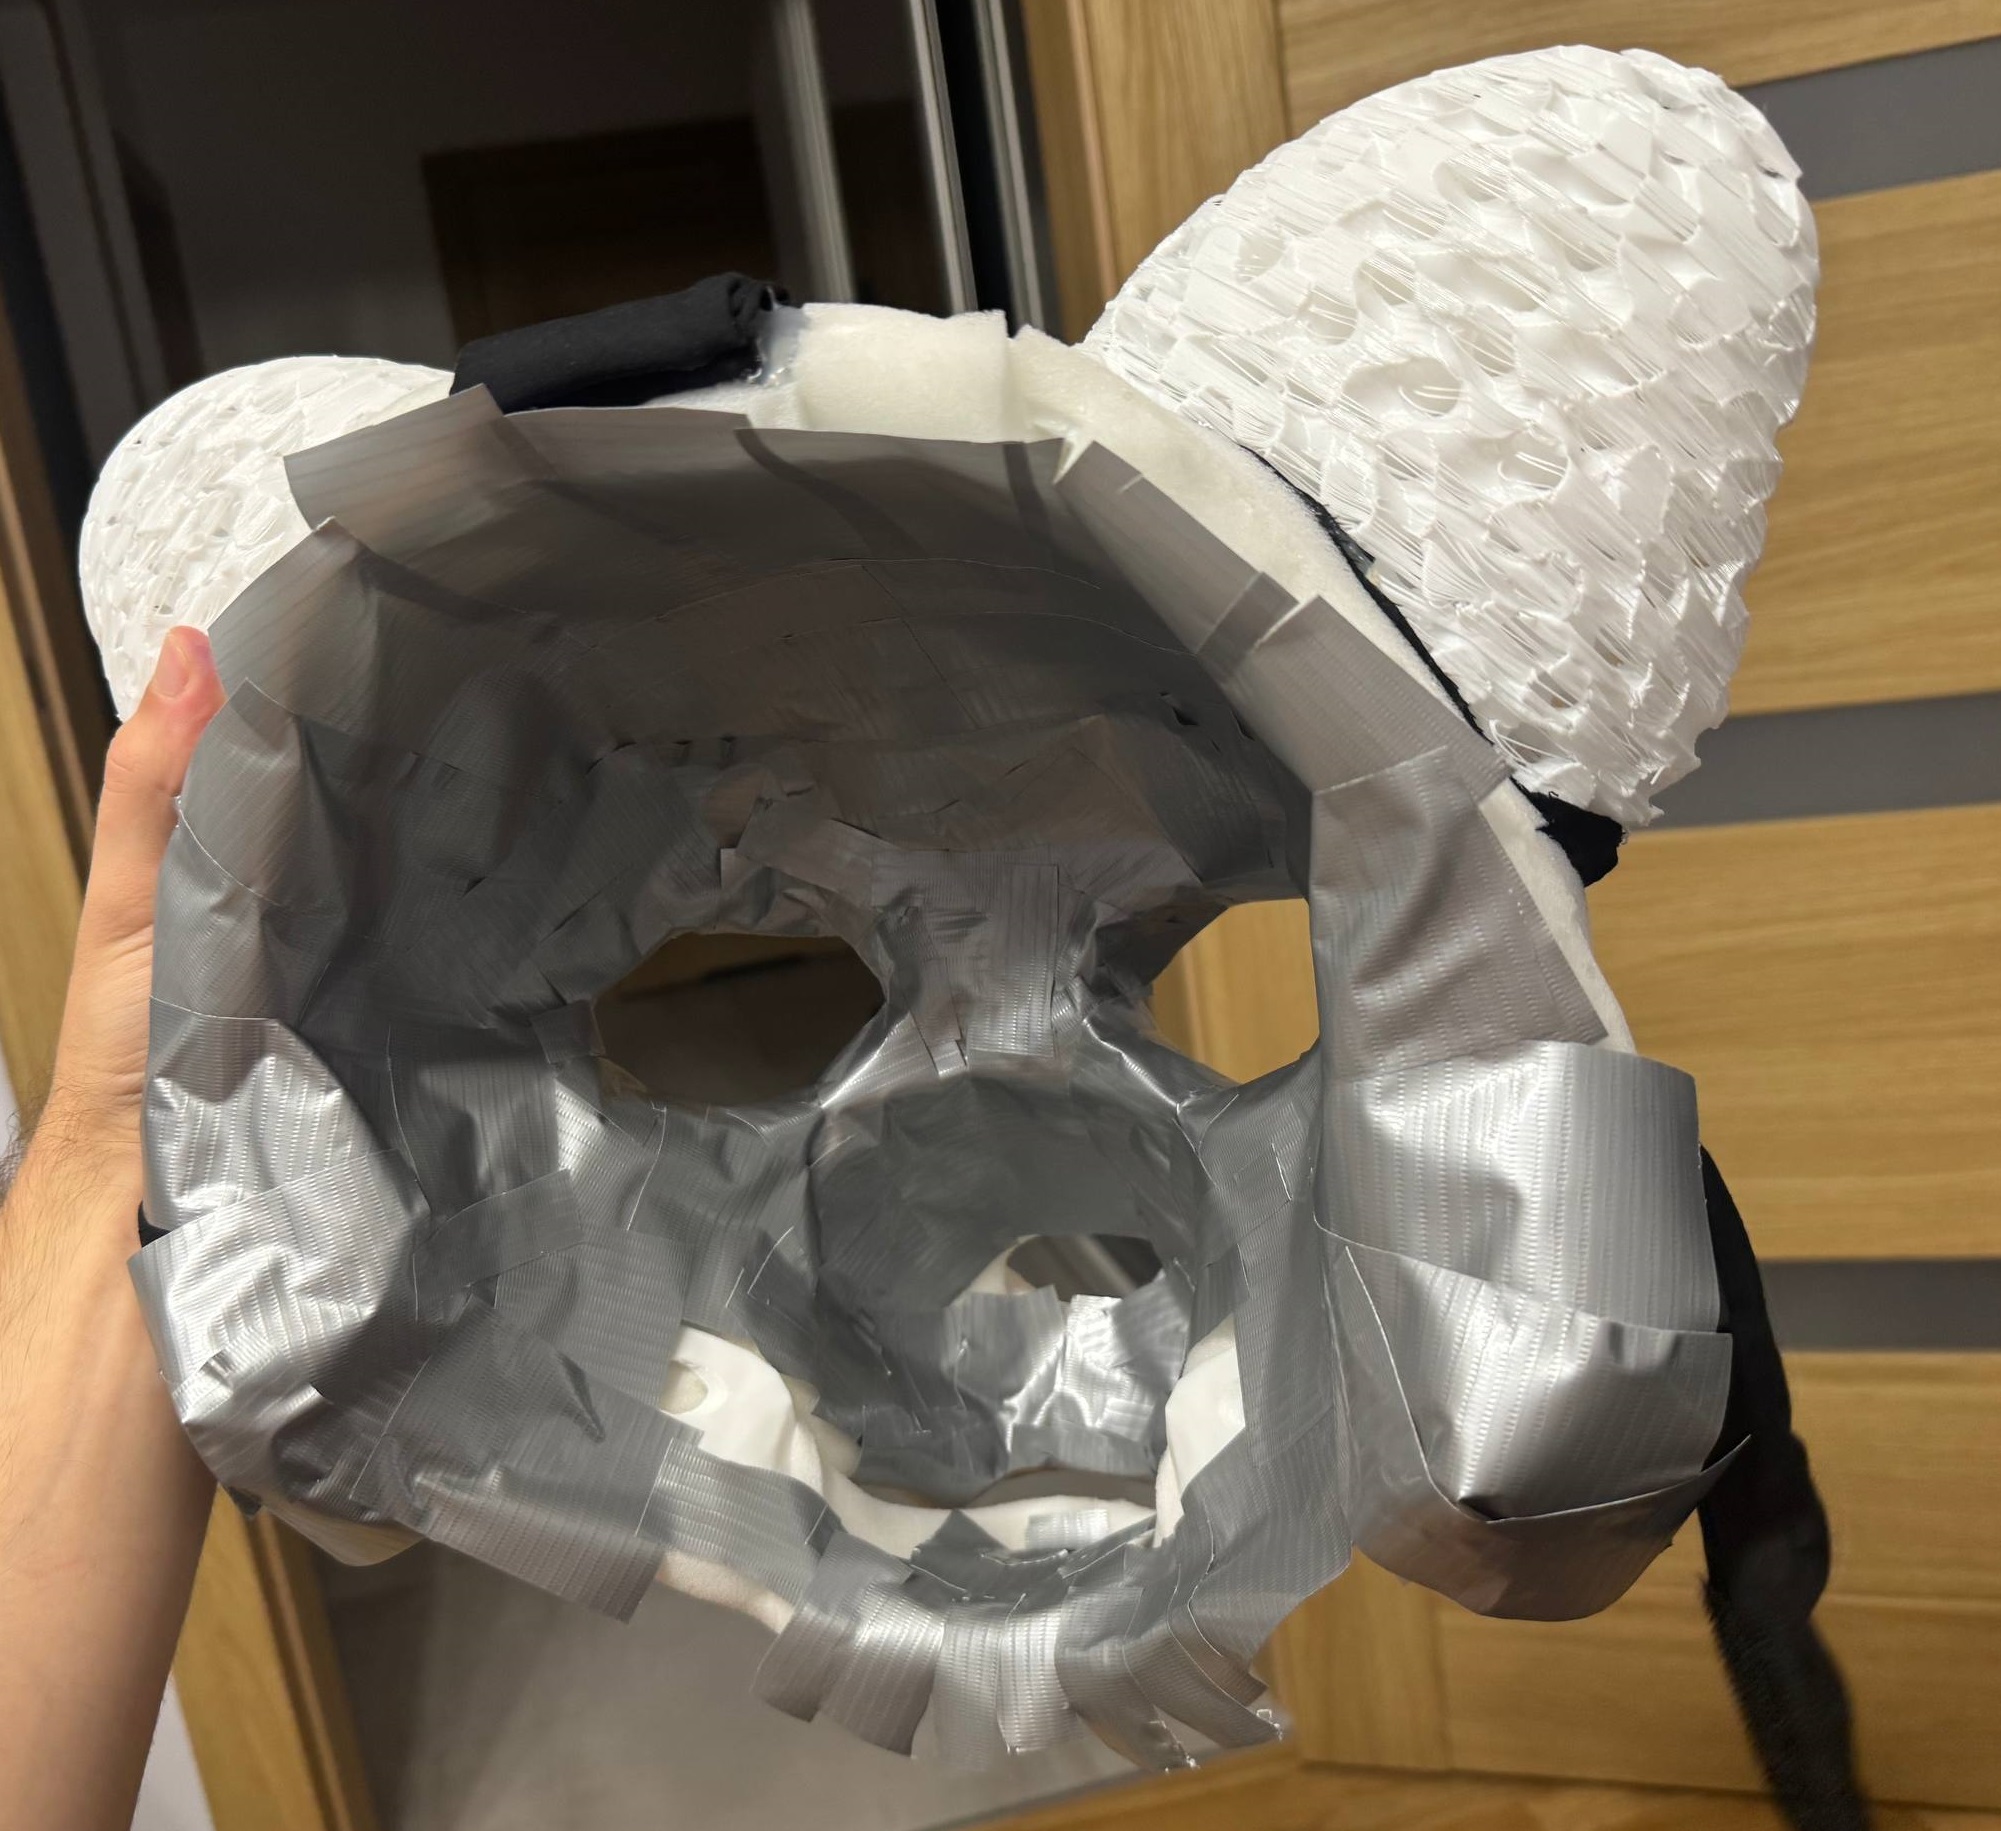
On this photo you can see that duct tape is too thick, and it does not follow the curve.
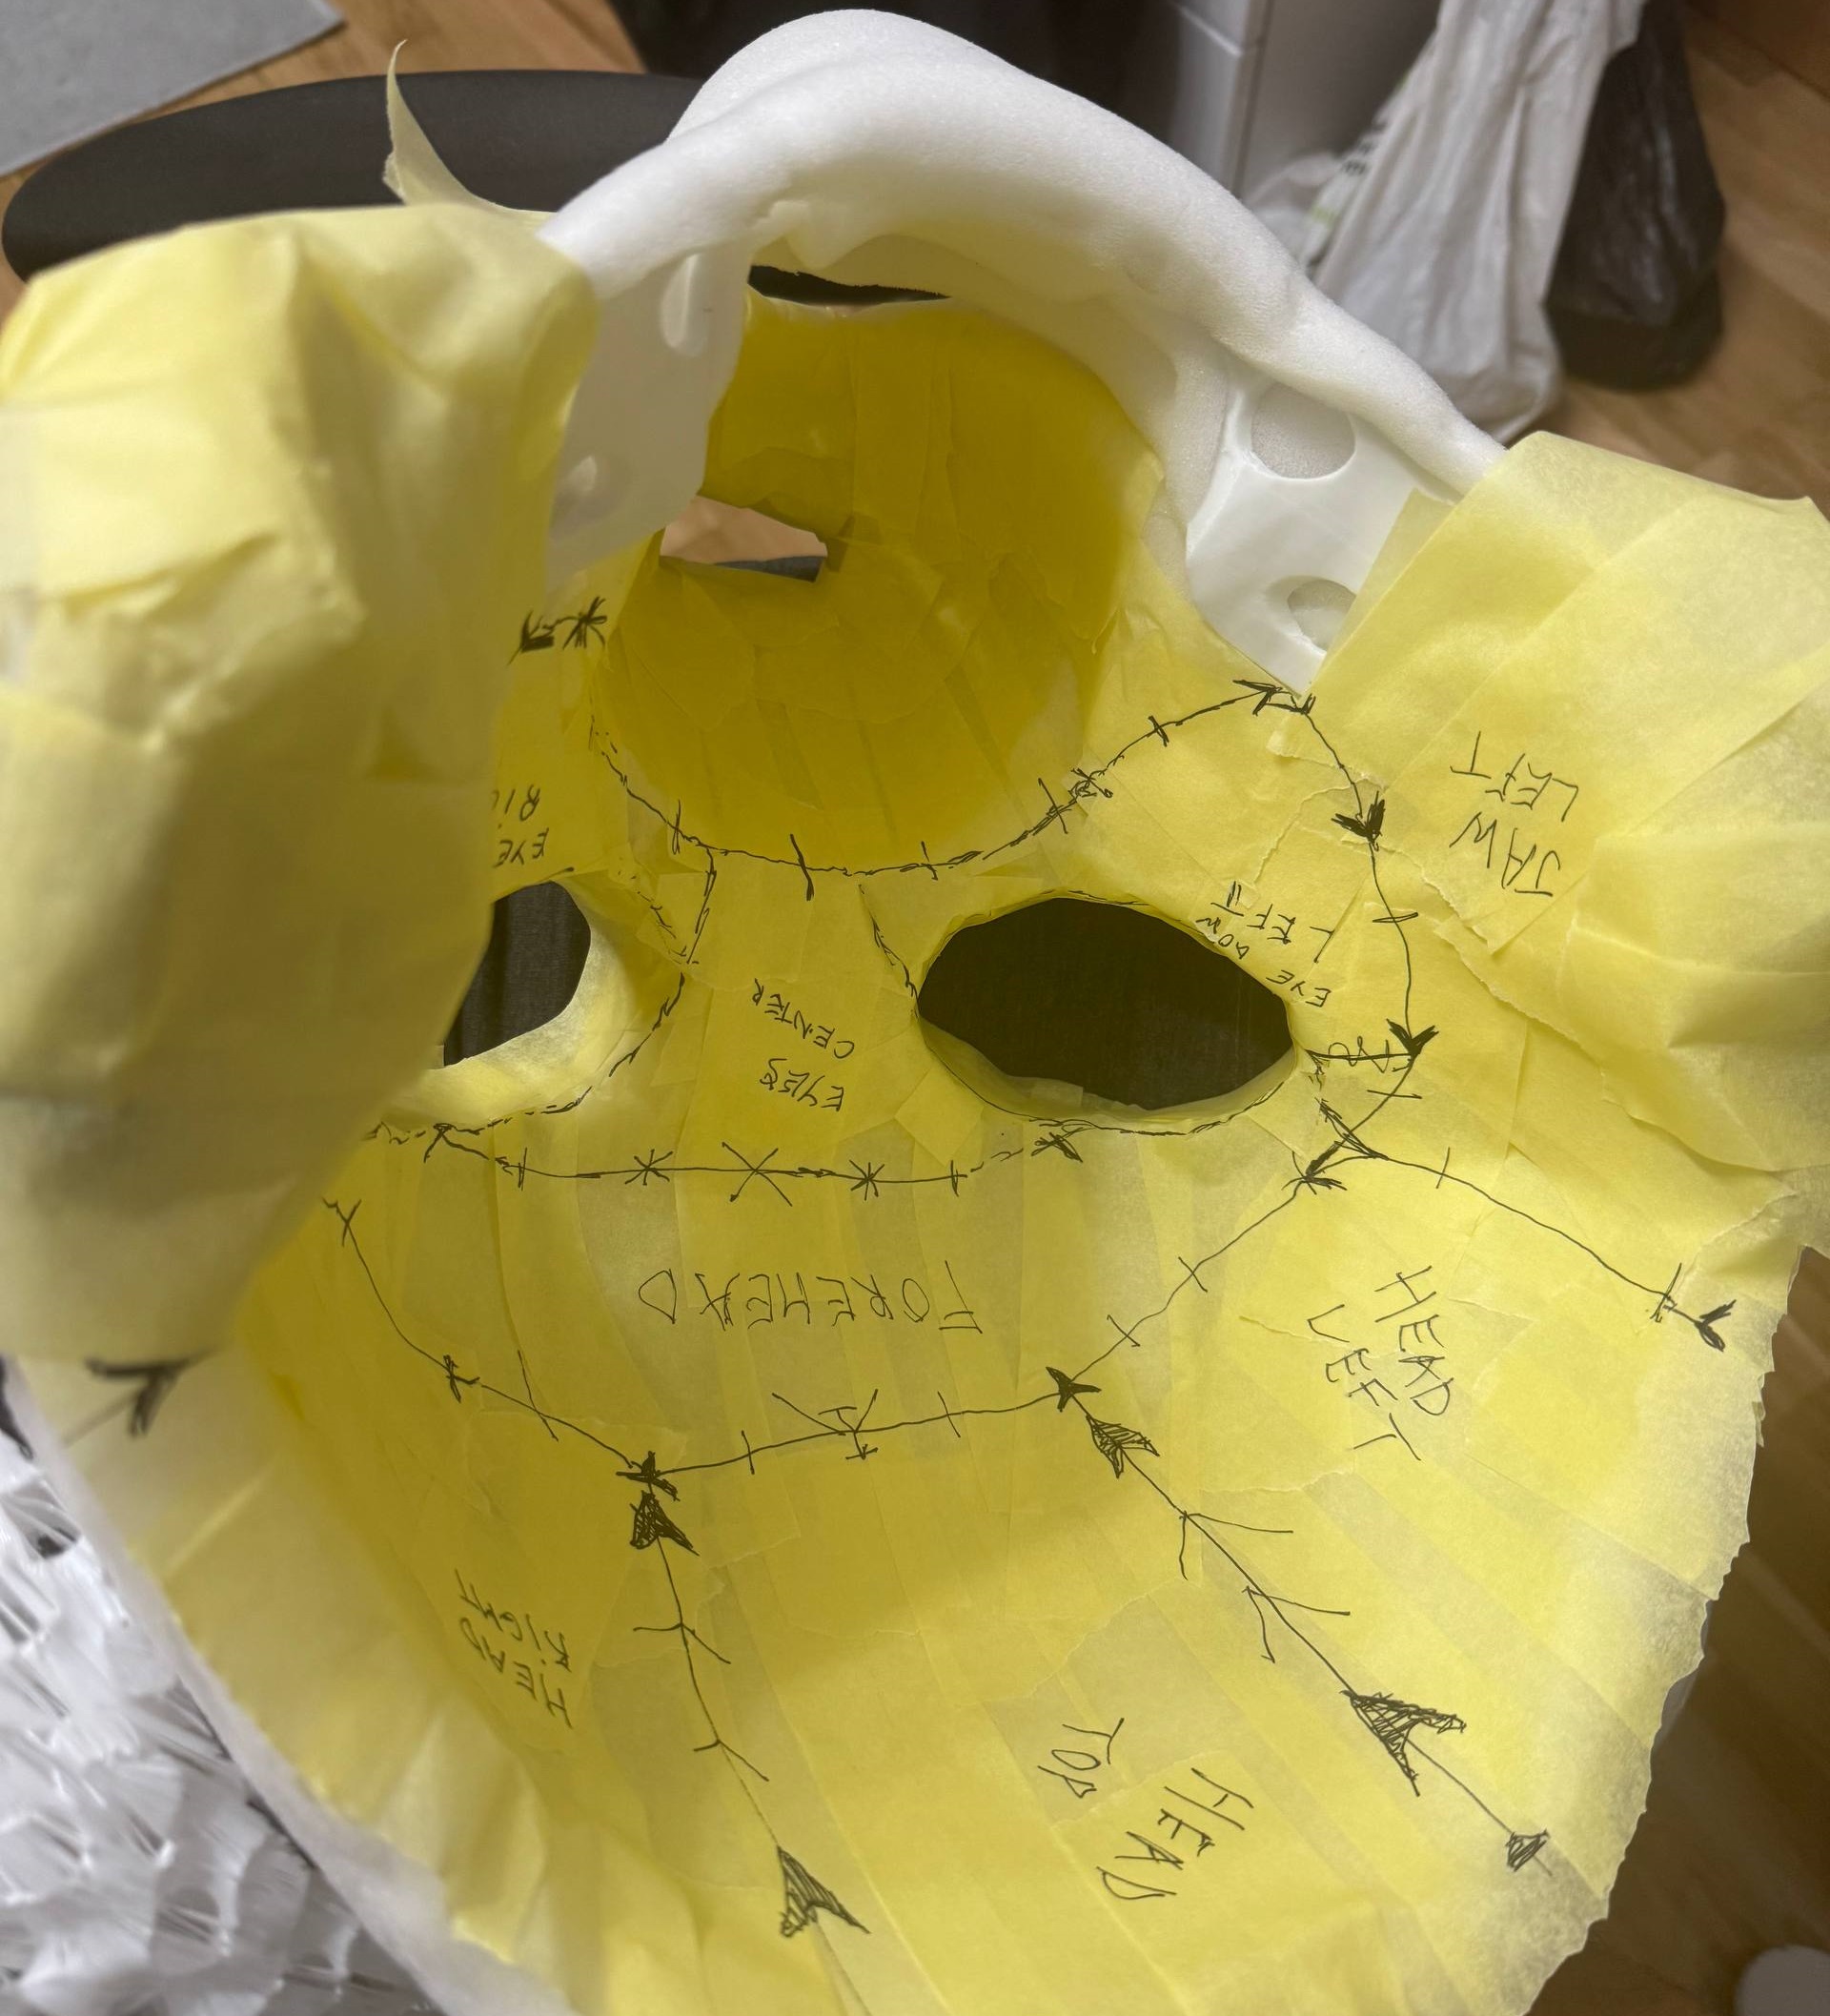
I decided to restart the process and instead used paper tape, and it became better - it stuck to the model more and tape itself is thinner, also it is easier to cut it or just to tear.

There you can see how (terribly) head looks when it is covered with foam.
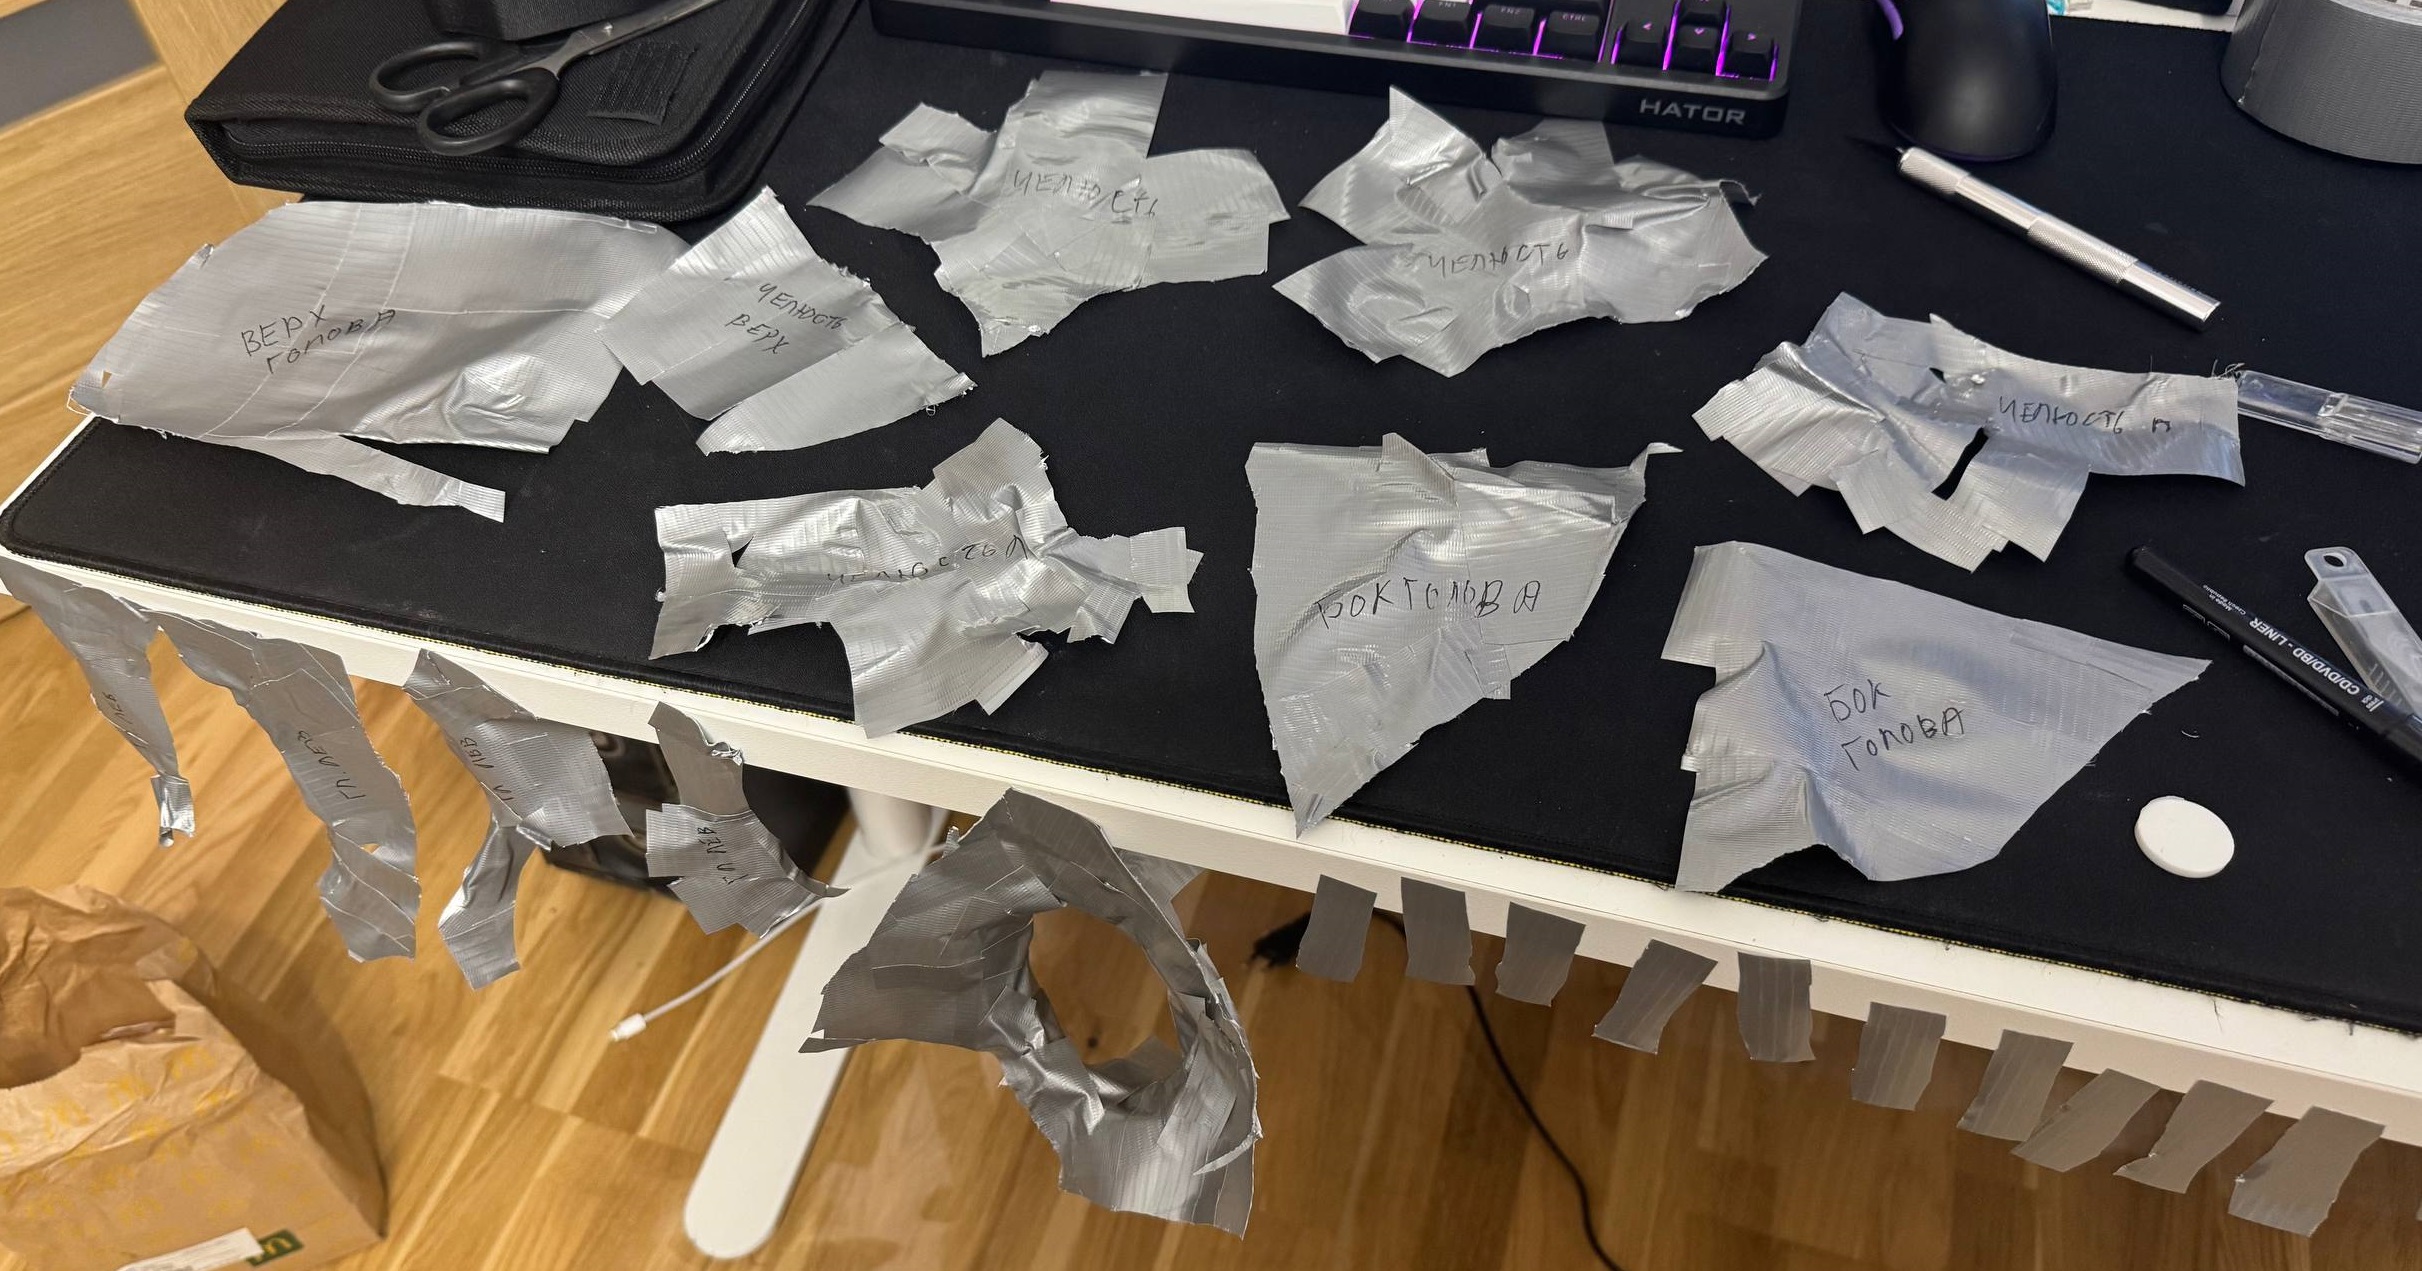
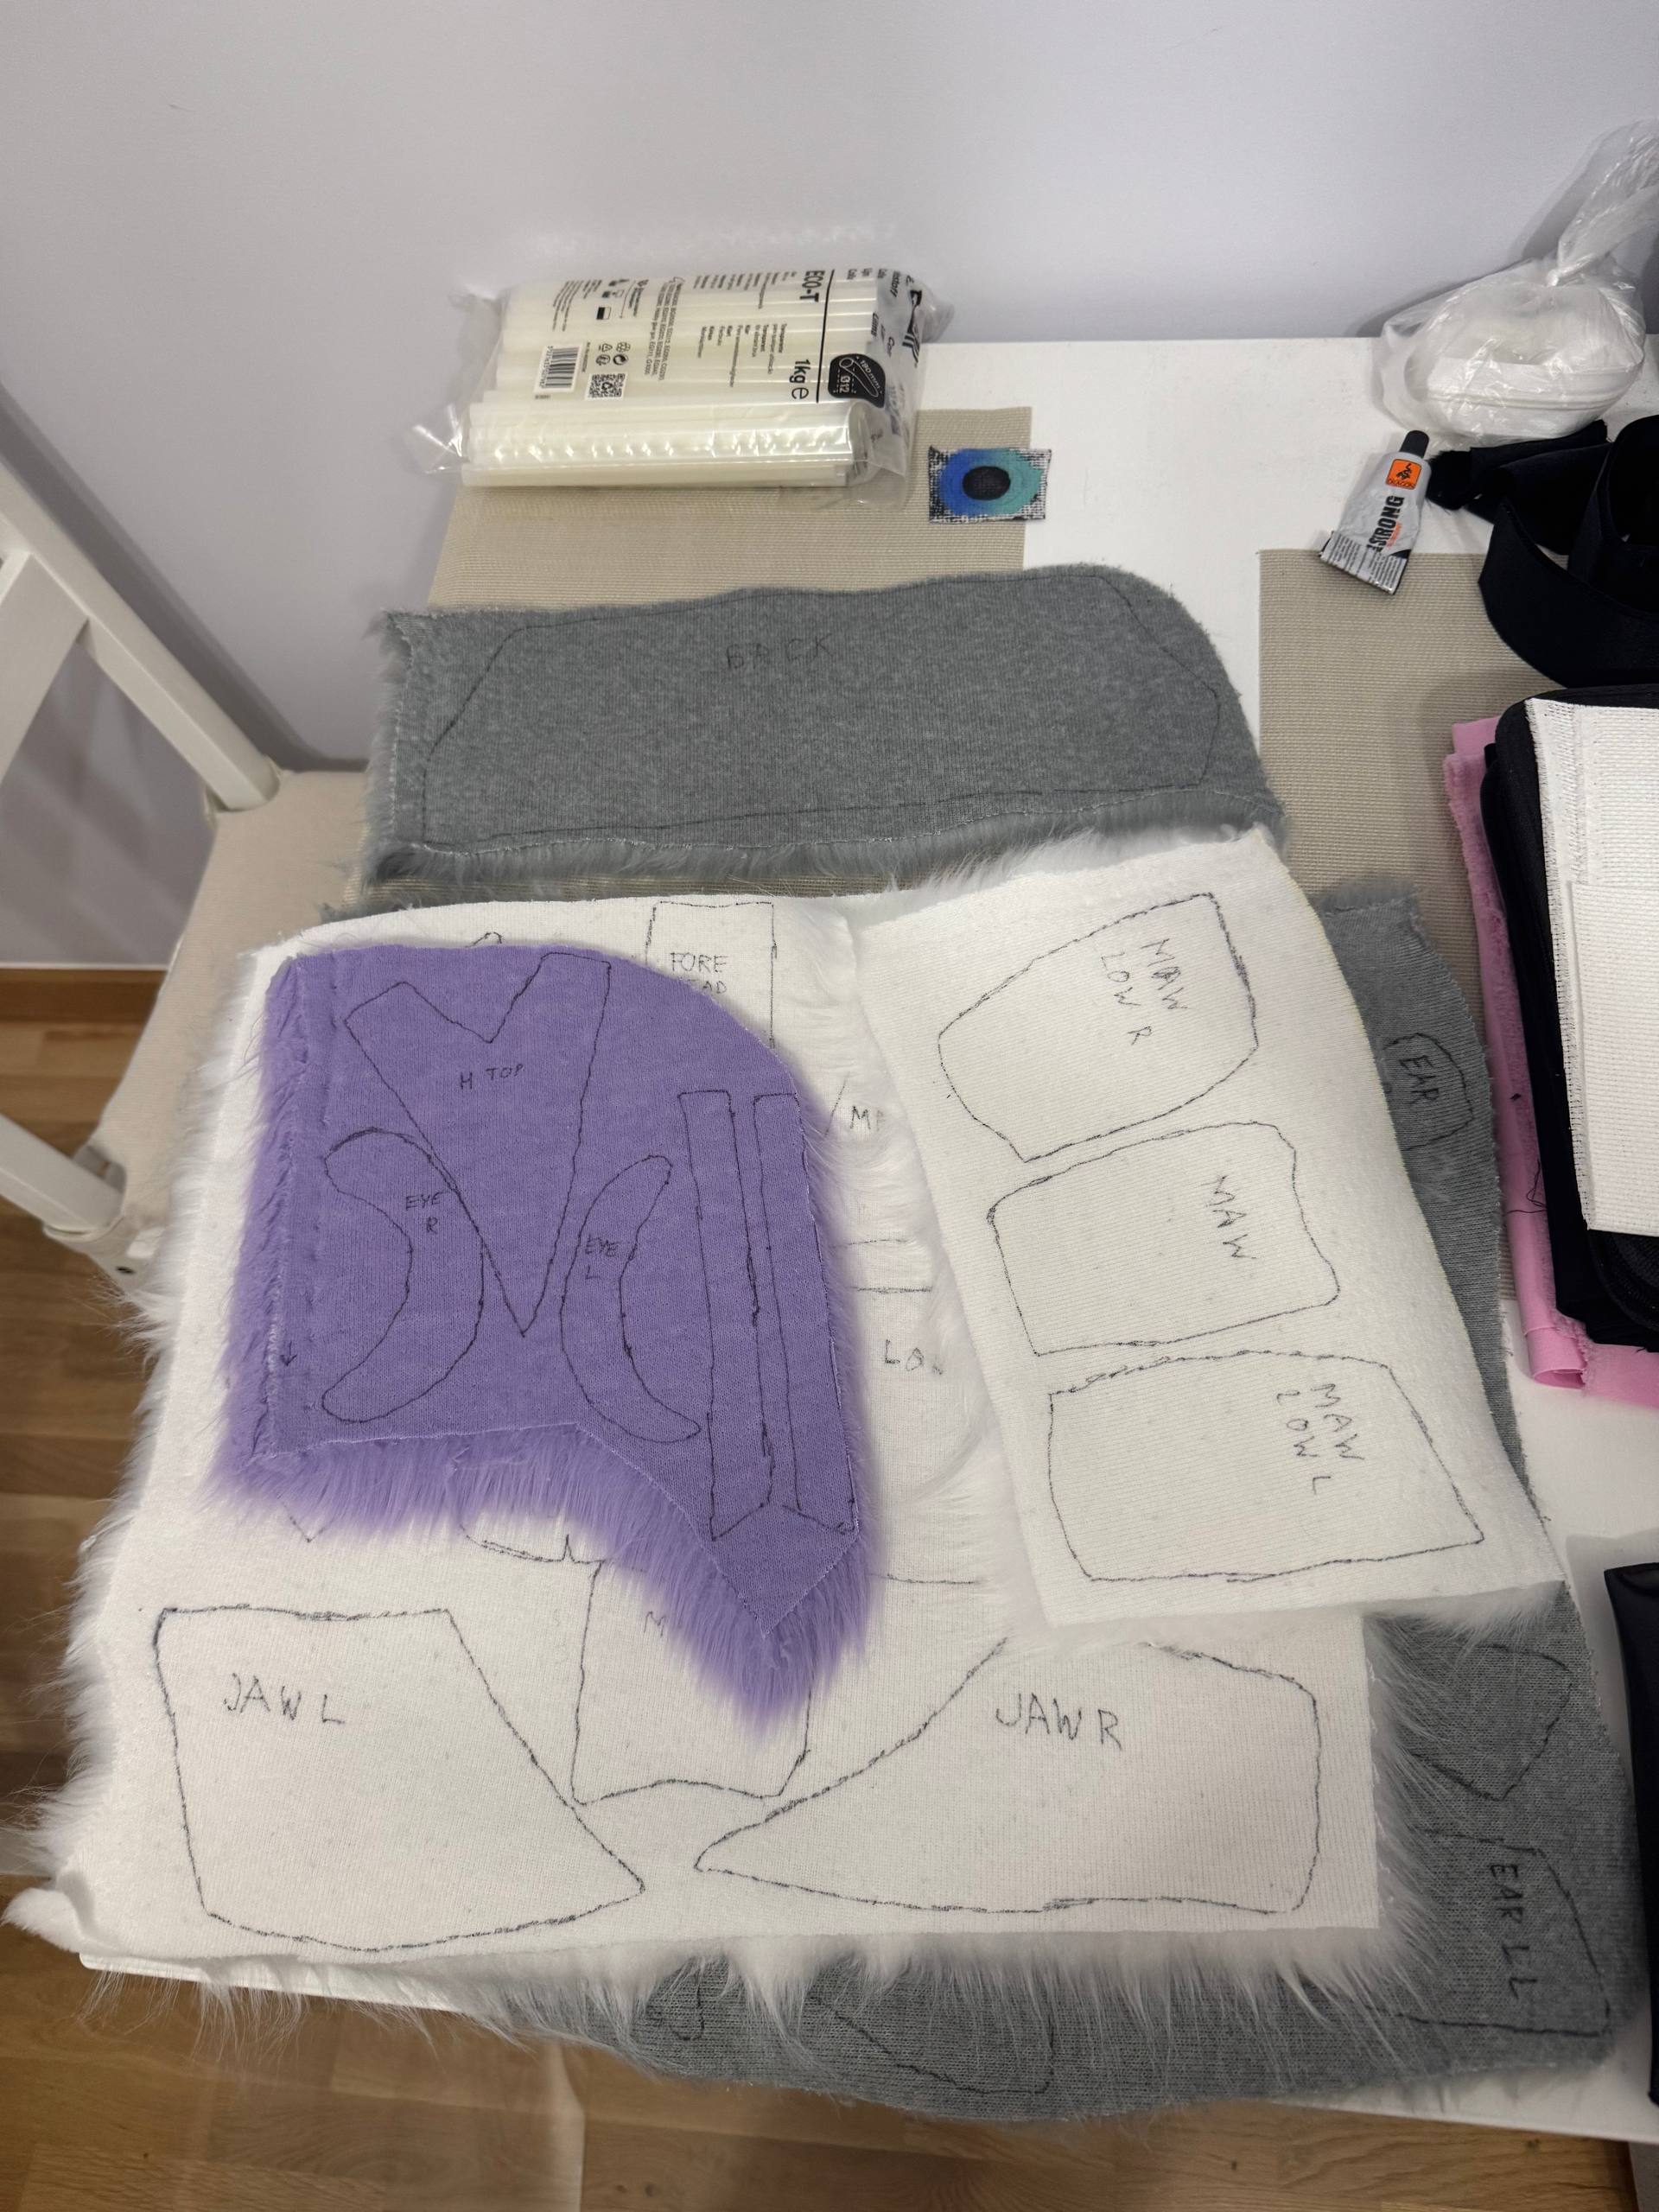
After that I cut it in parts using scalpel and put these pieces onto lycra fabric (it is usually used for swimsuits). I used small piece of soap to mark edges, also I marked each part.
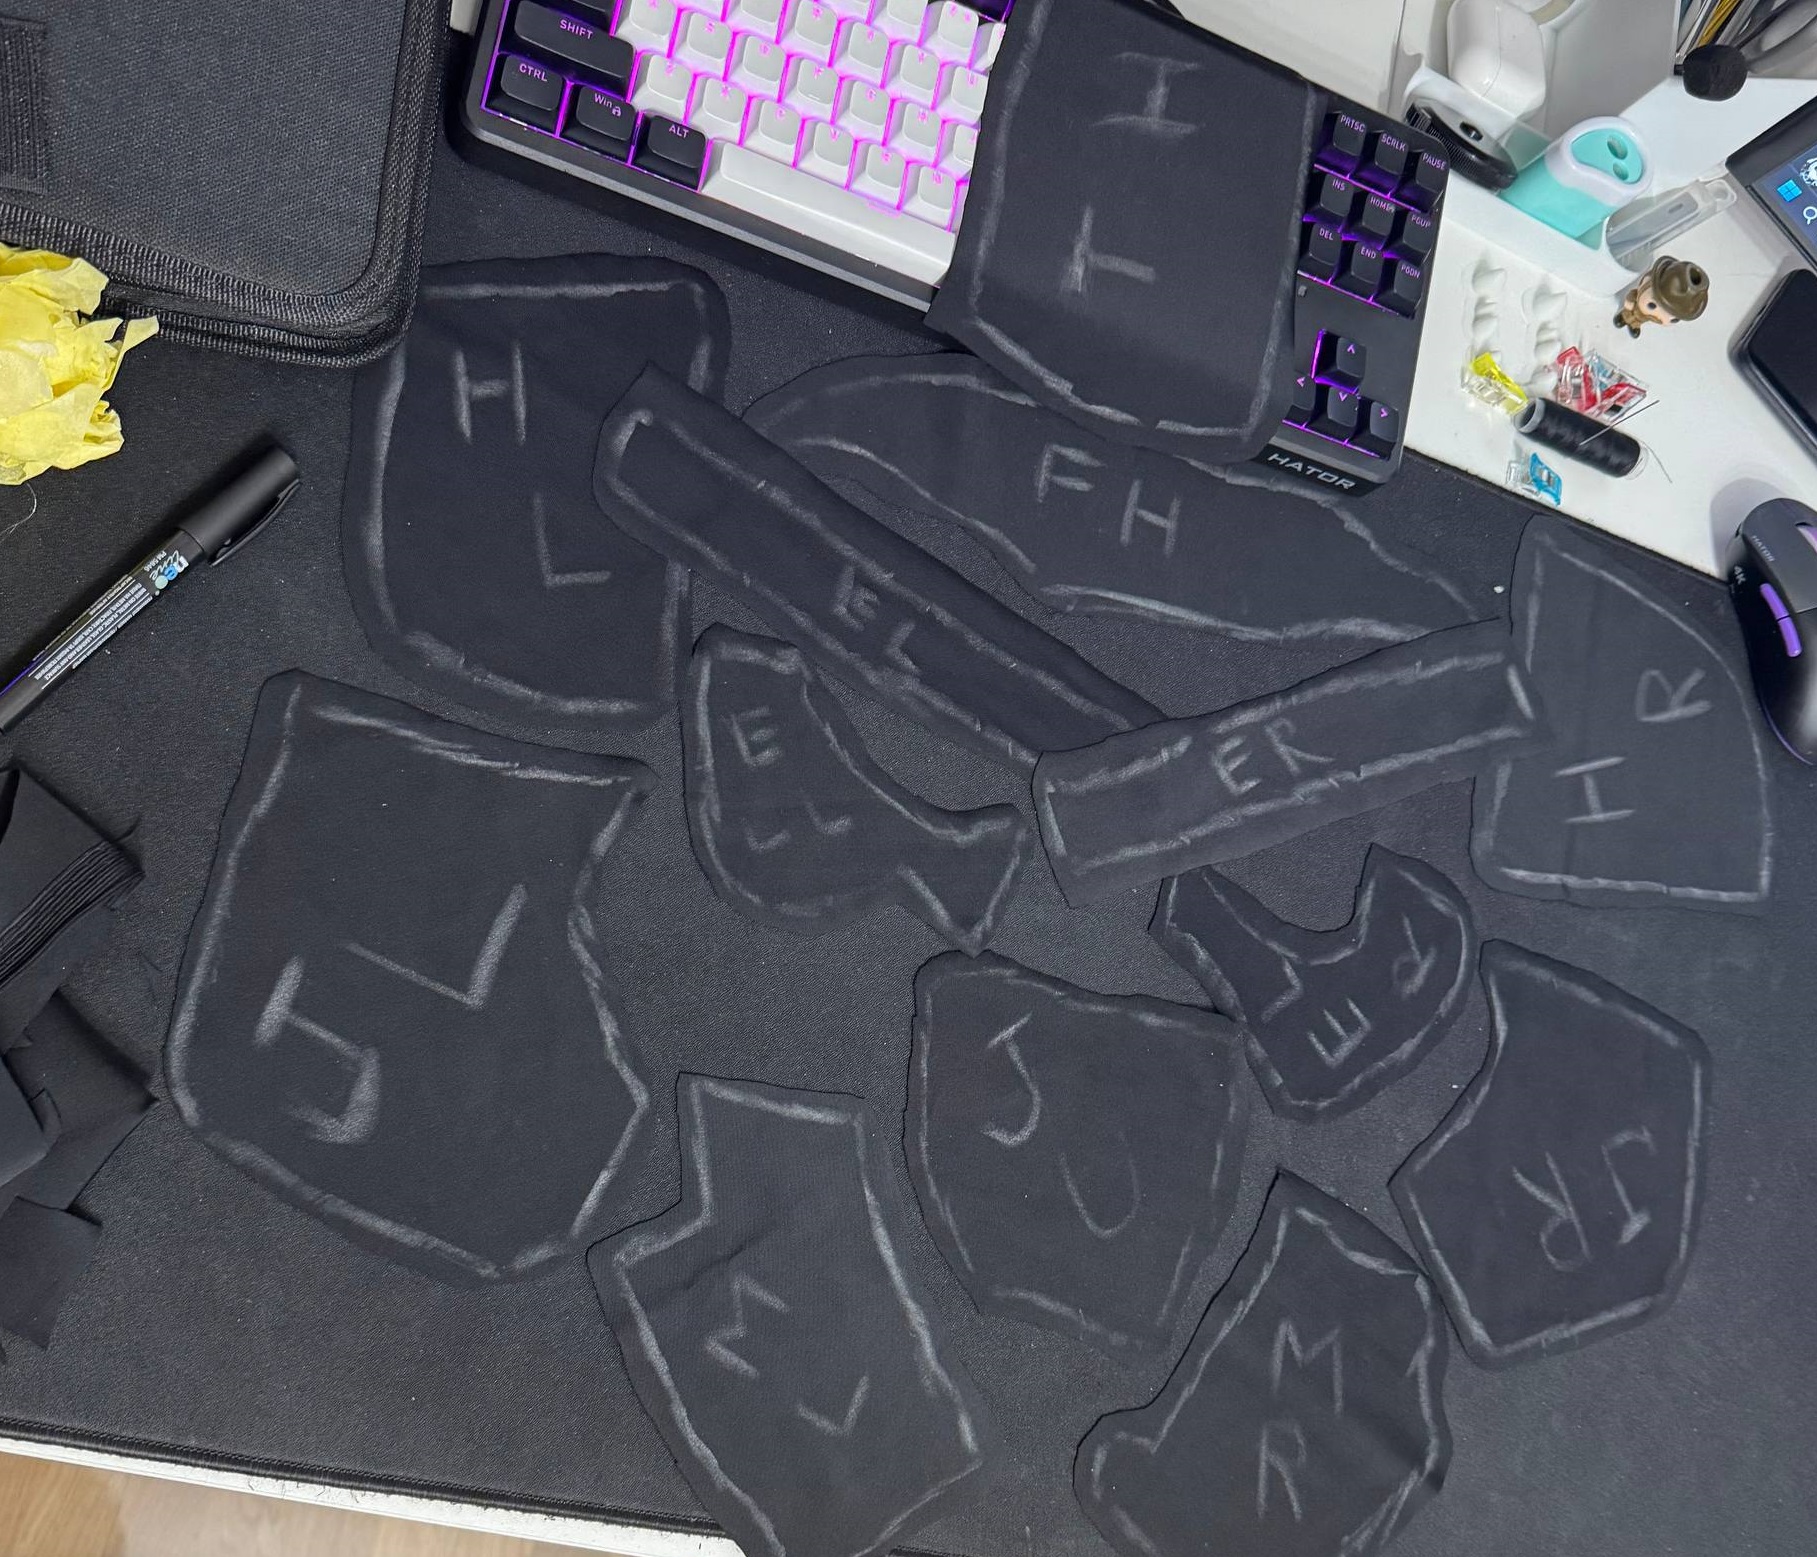
After cutting them all I sewed all of them together using blanket stitch.
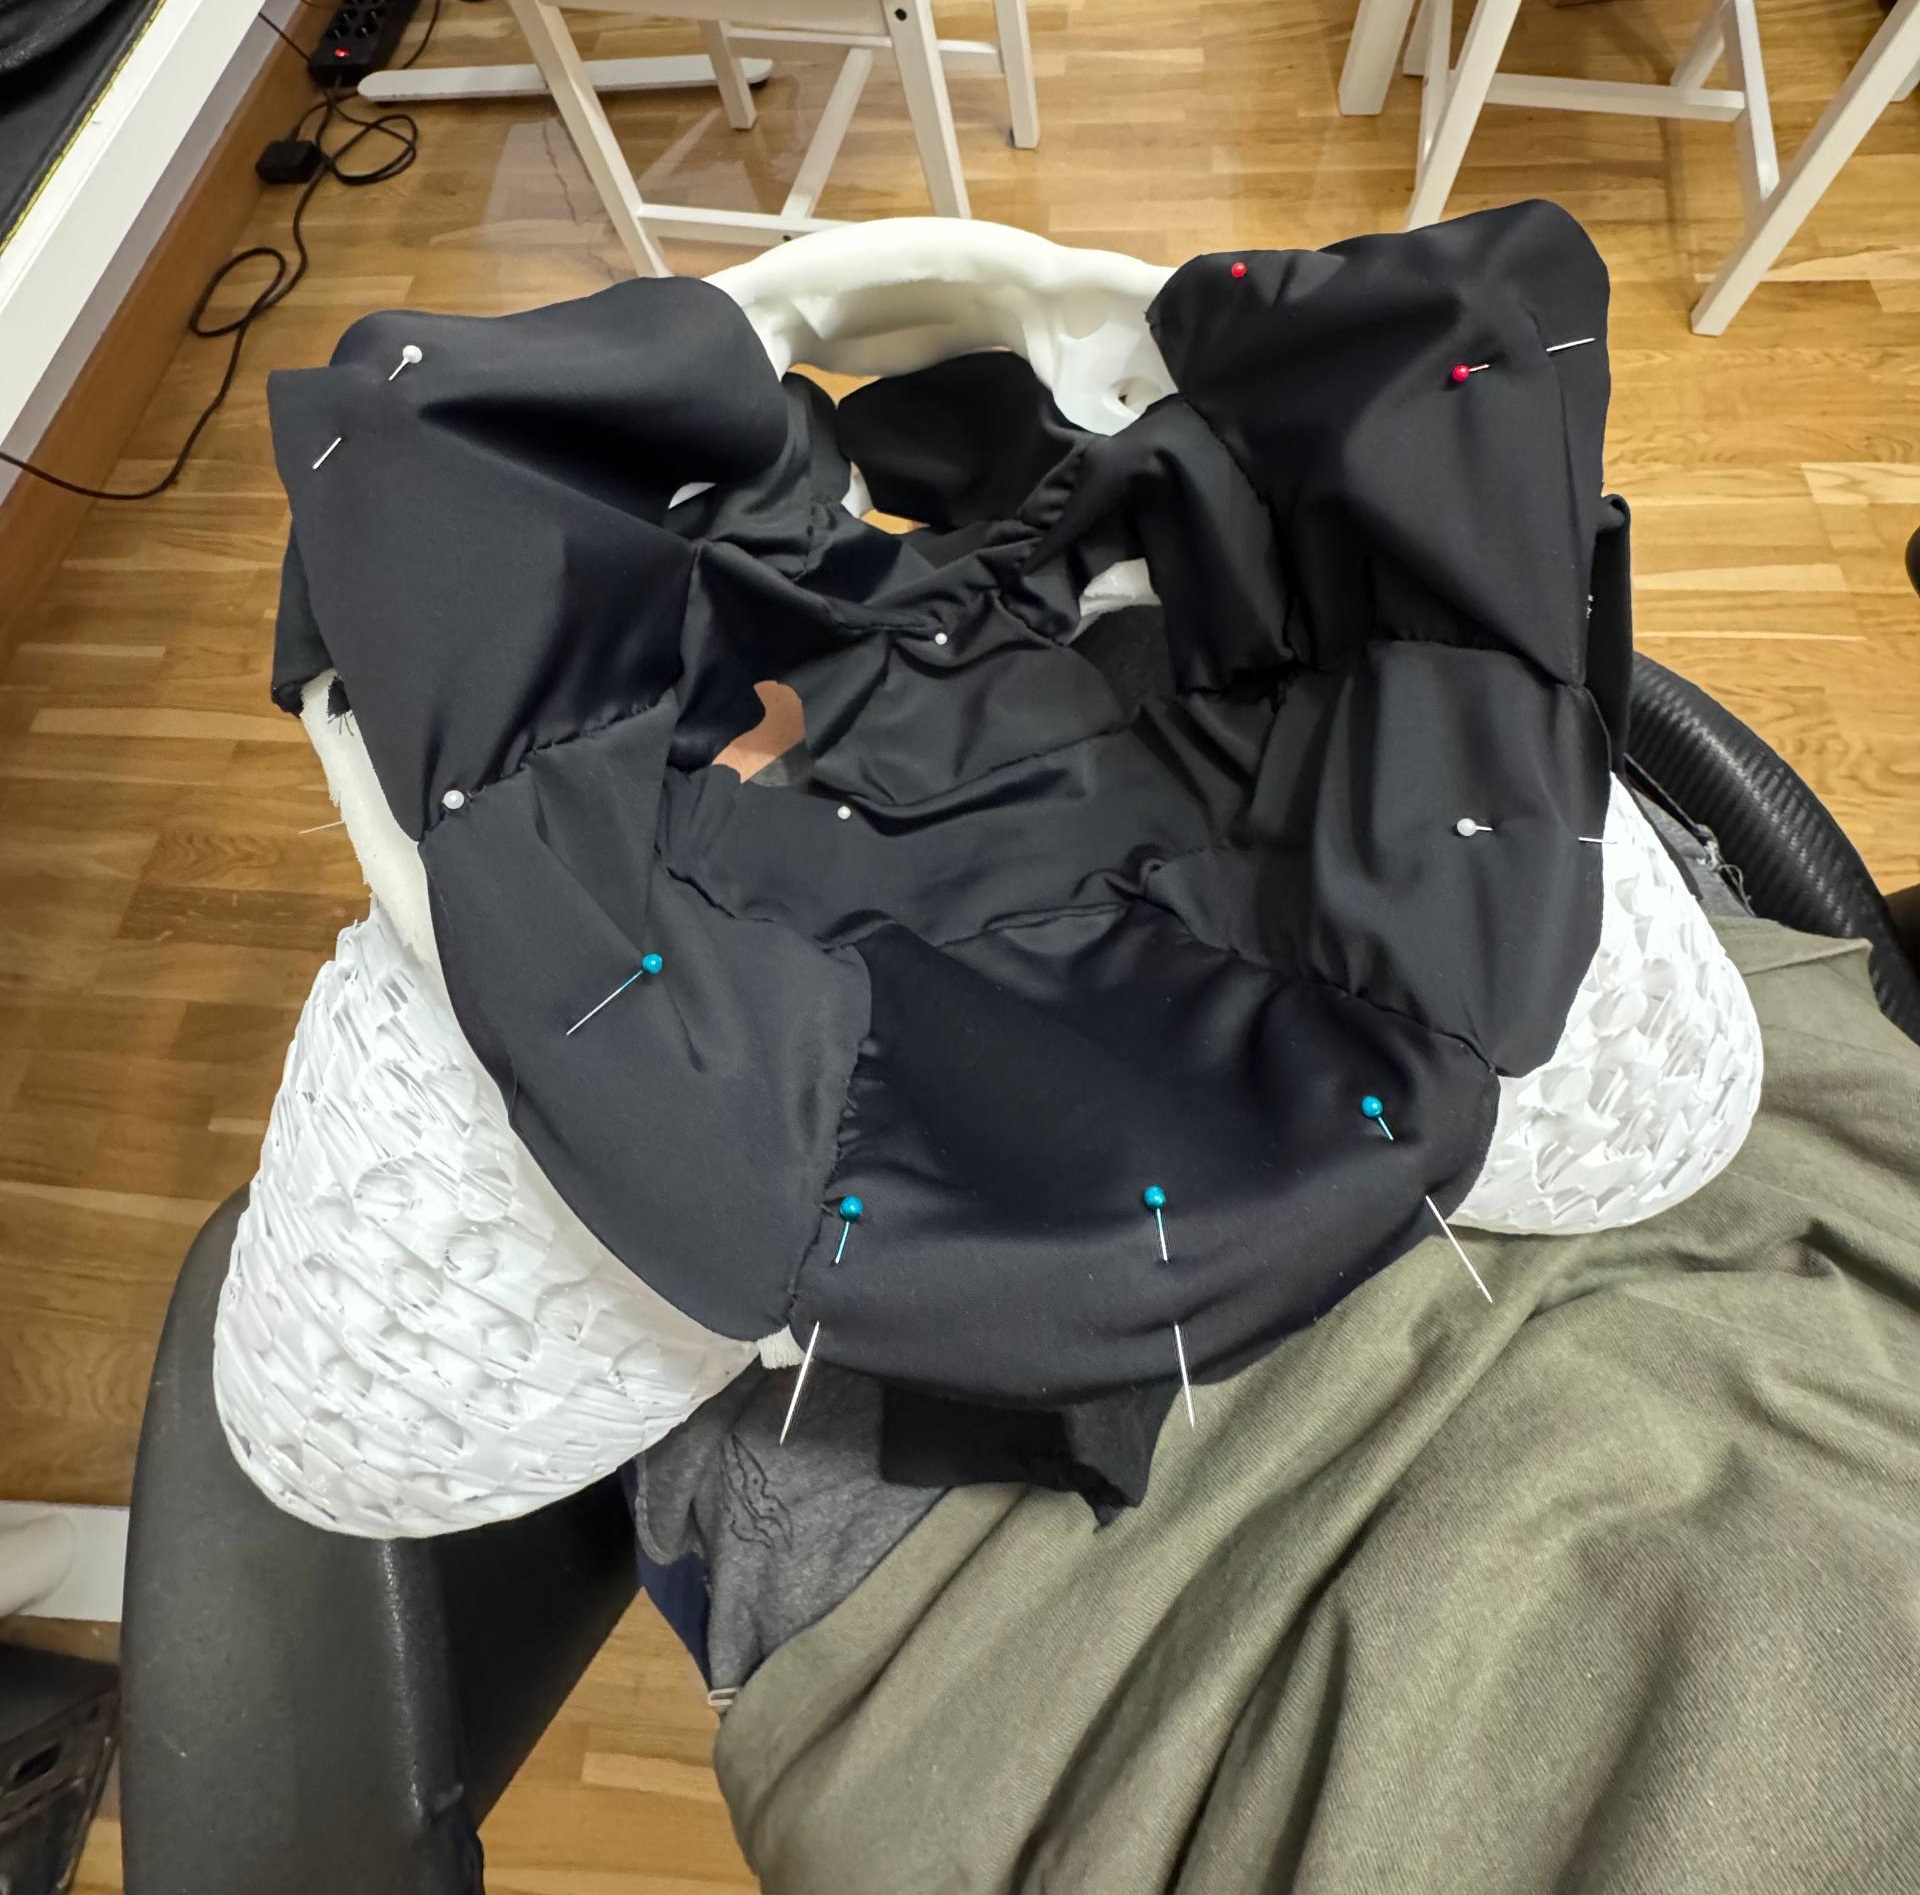
When I was close to the finish - I decided to check how it looks on the head and realised that I missed sizes completely, but I was too lazy to start over, so I decided just to compress or stretch it in some places while I was gluing.

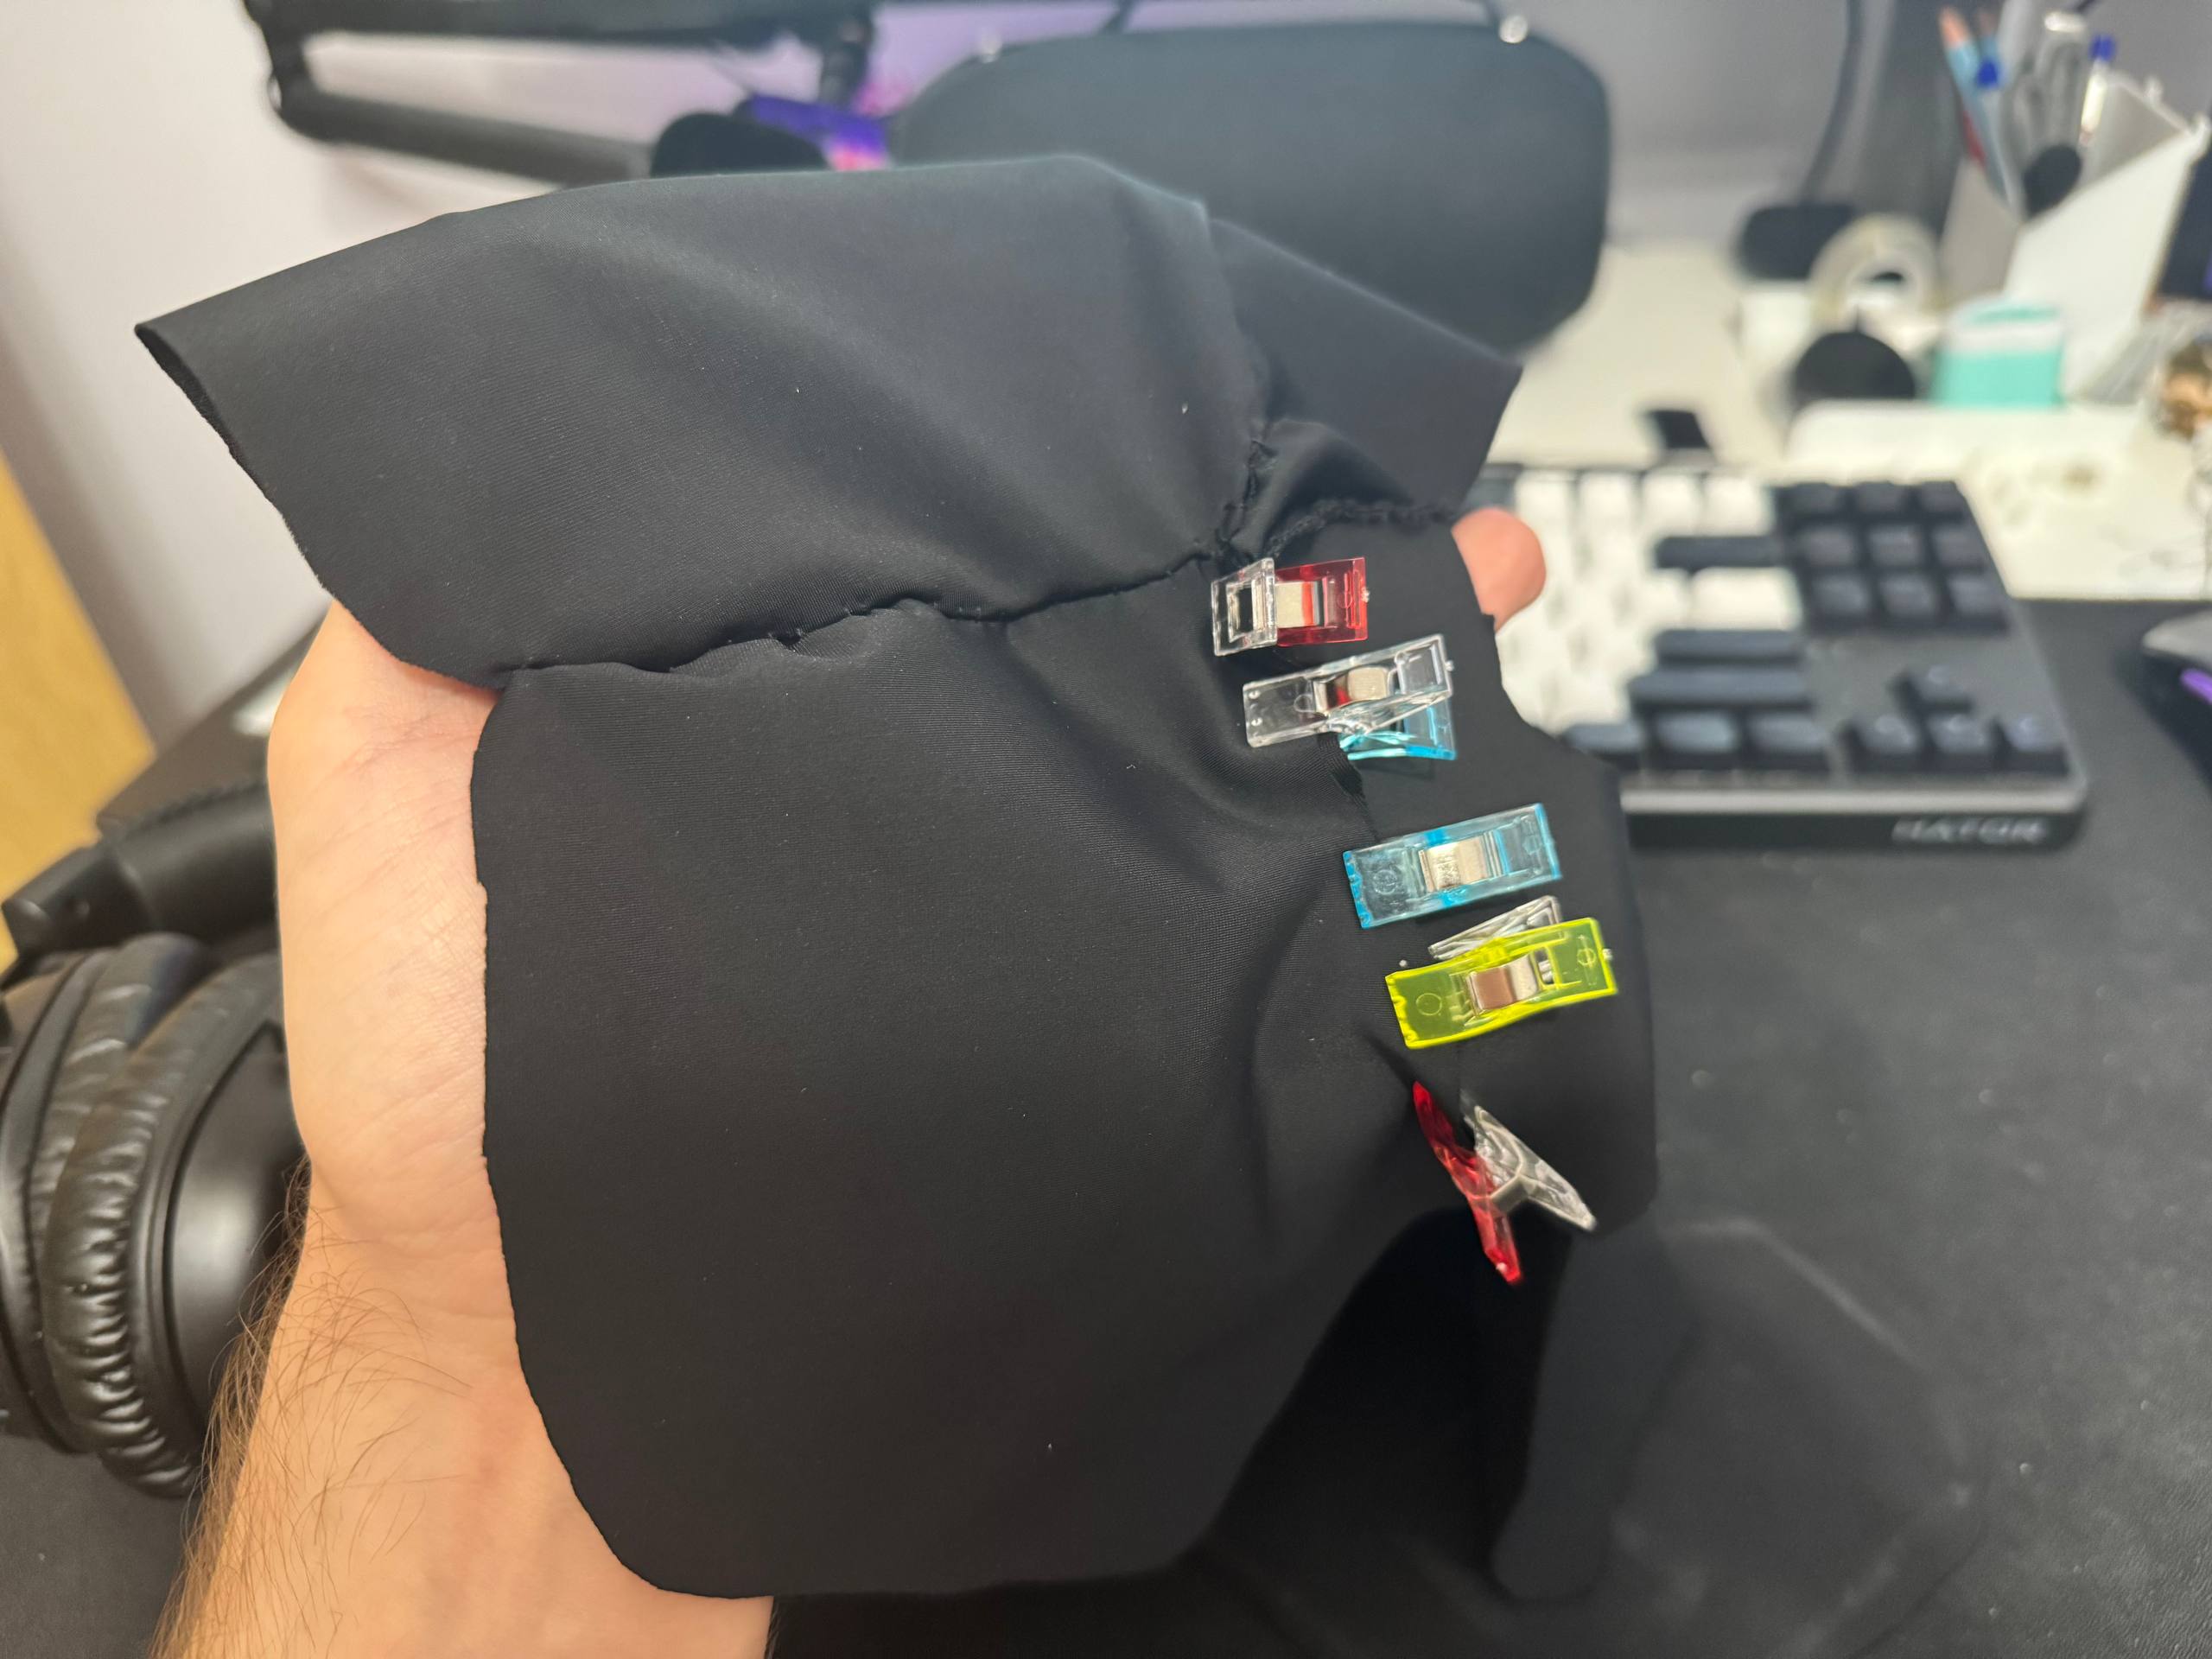
When you glue lycra fabric - make sure only to put glue on seams, because if you will apply it on the fabric directly - it will be easily sensible with the touch that glue is placed there, and also it may make it look worse.
After that I made small pillows covered with lycra and attached to the base with the velcro pieces.
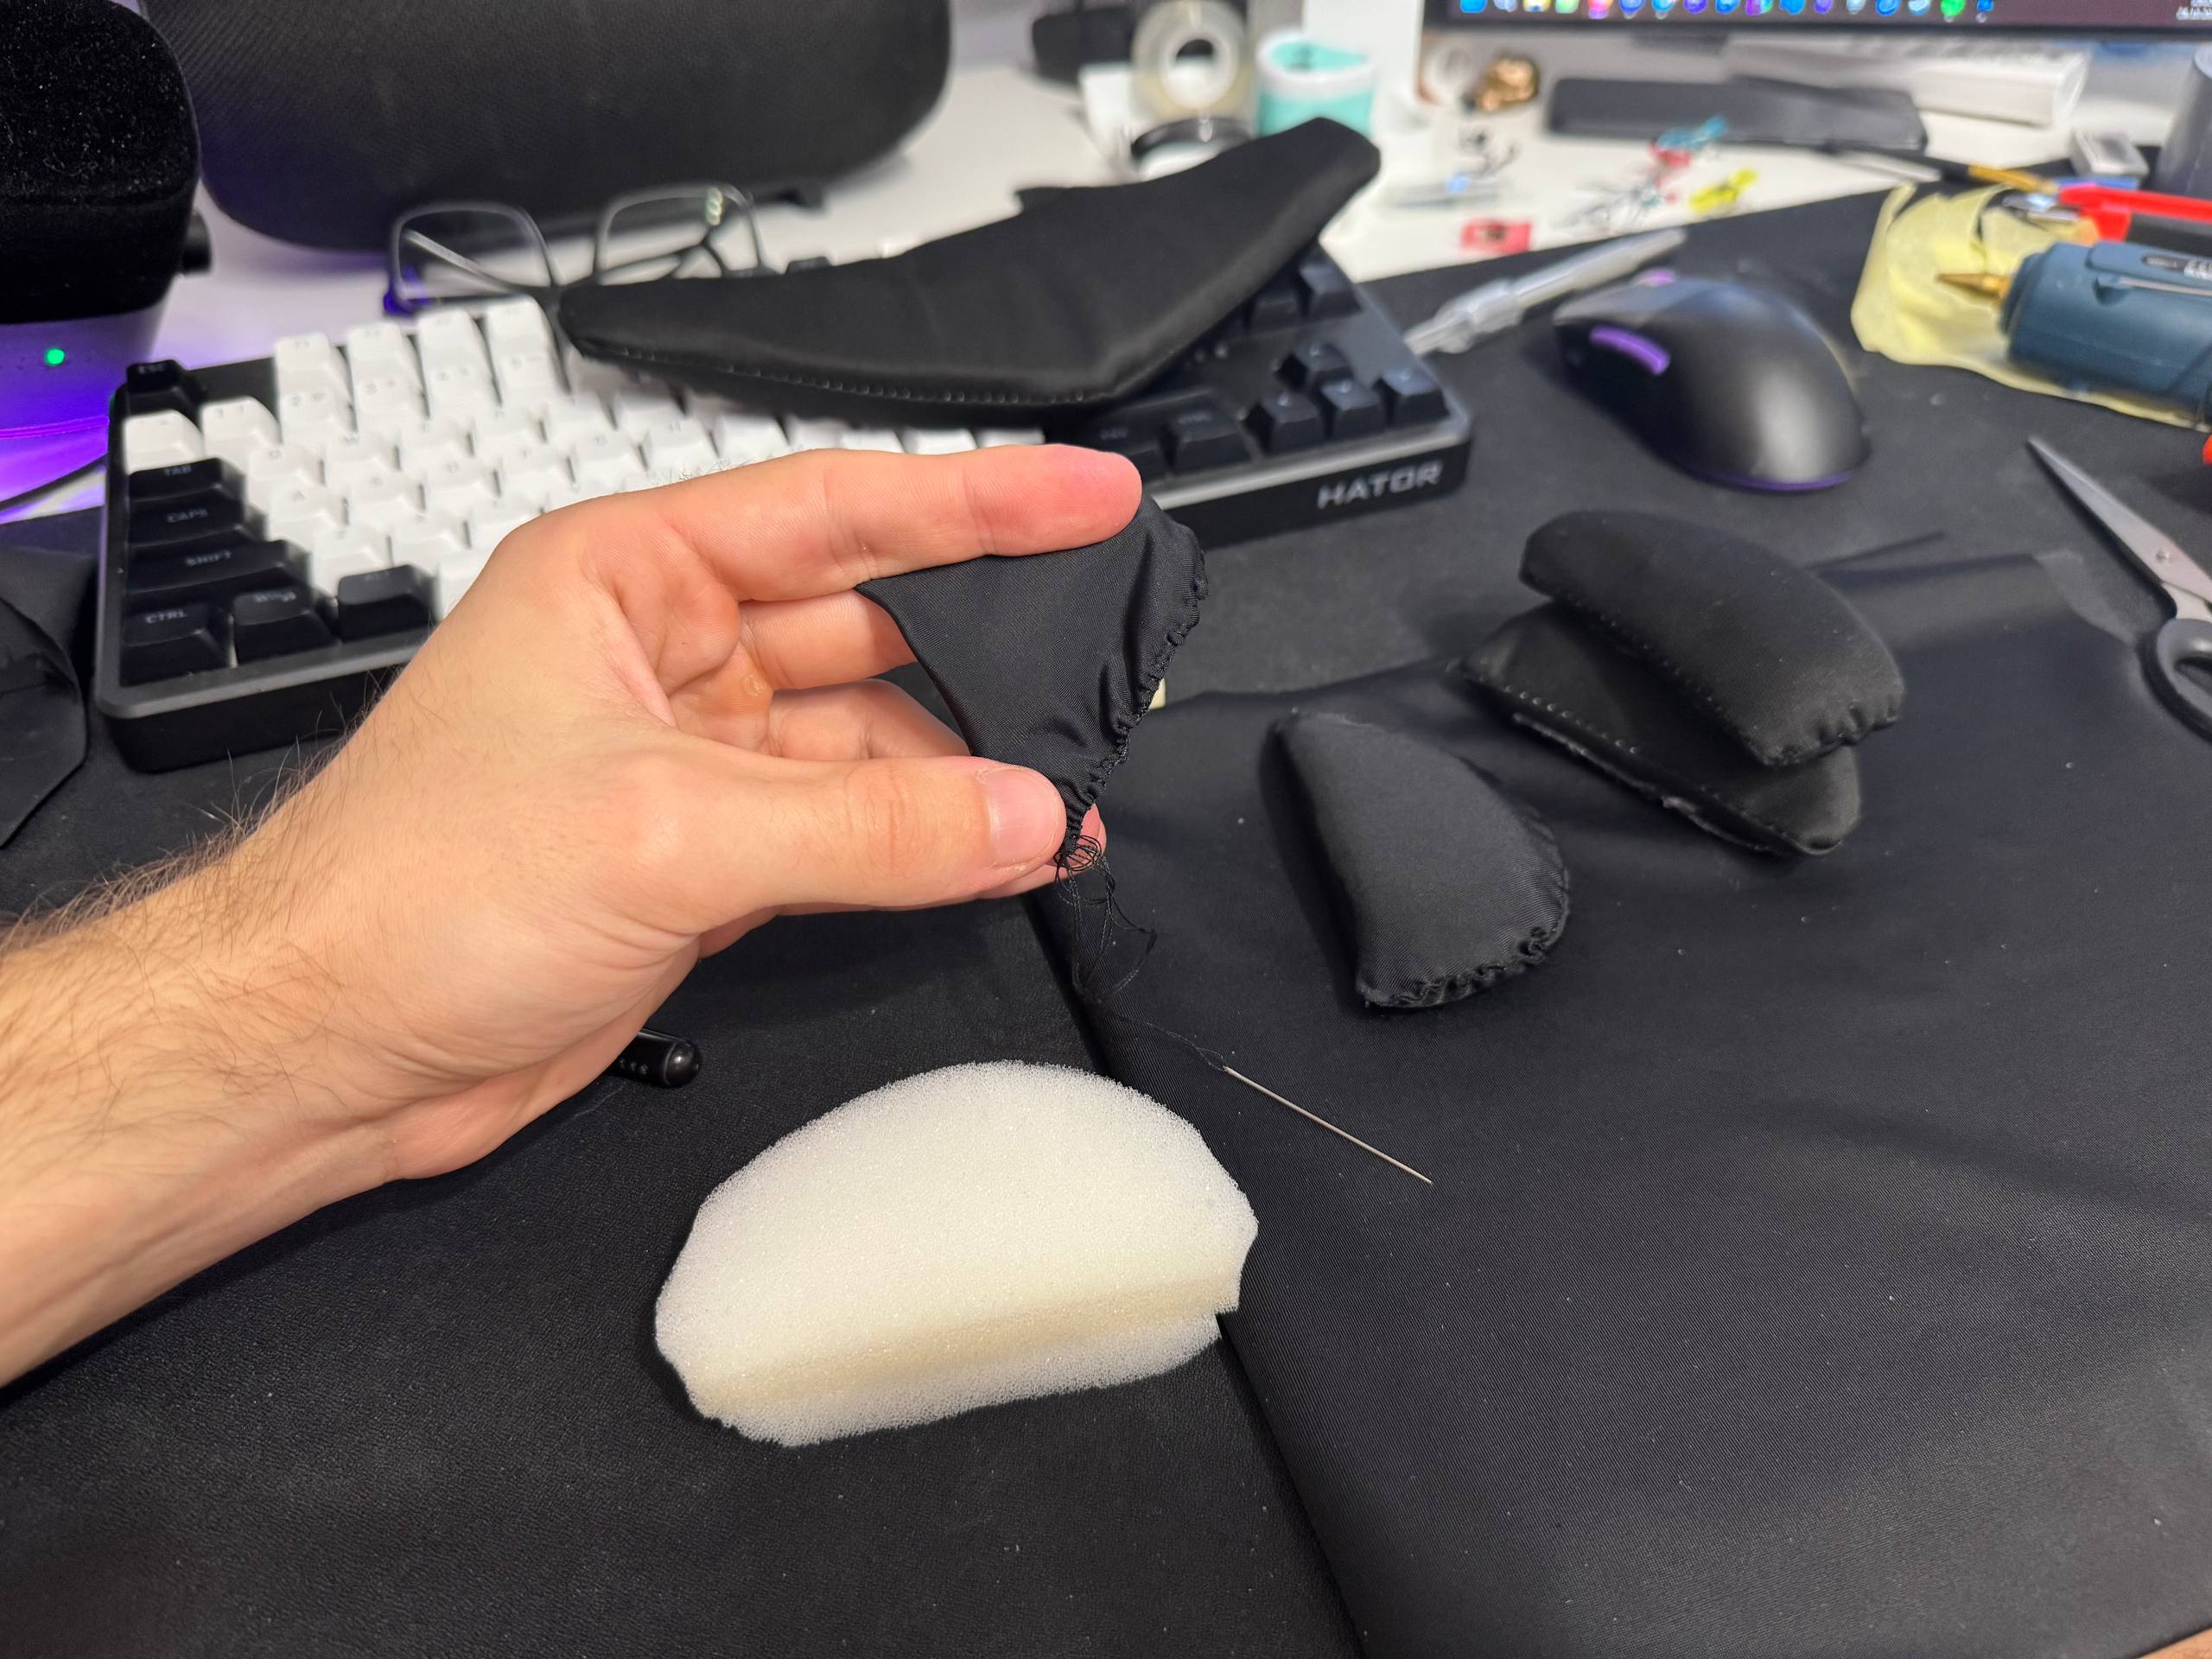
I attached them with hot glue on inner side of the head.
I was not sure what material to use for eyes, at first I bought fabric as you can see on image, as I understood it is used for cross-stitch embroidery. I tried to paint it with acrylic, but it covered all holes and mixed up colors cause it soaked in the paint, so result was not looking good enough.
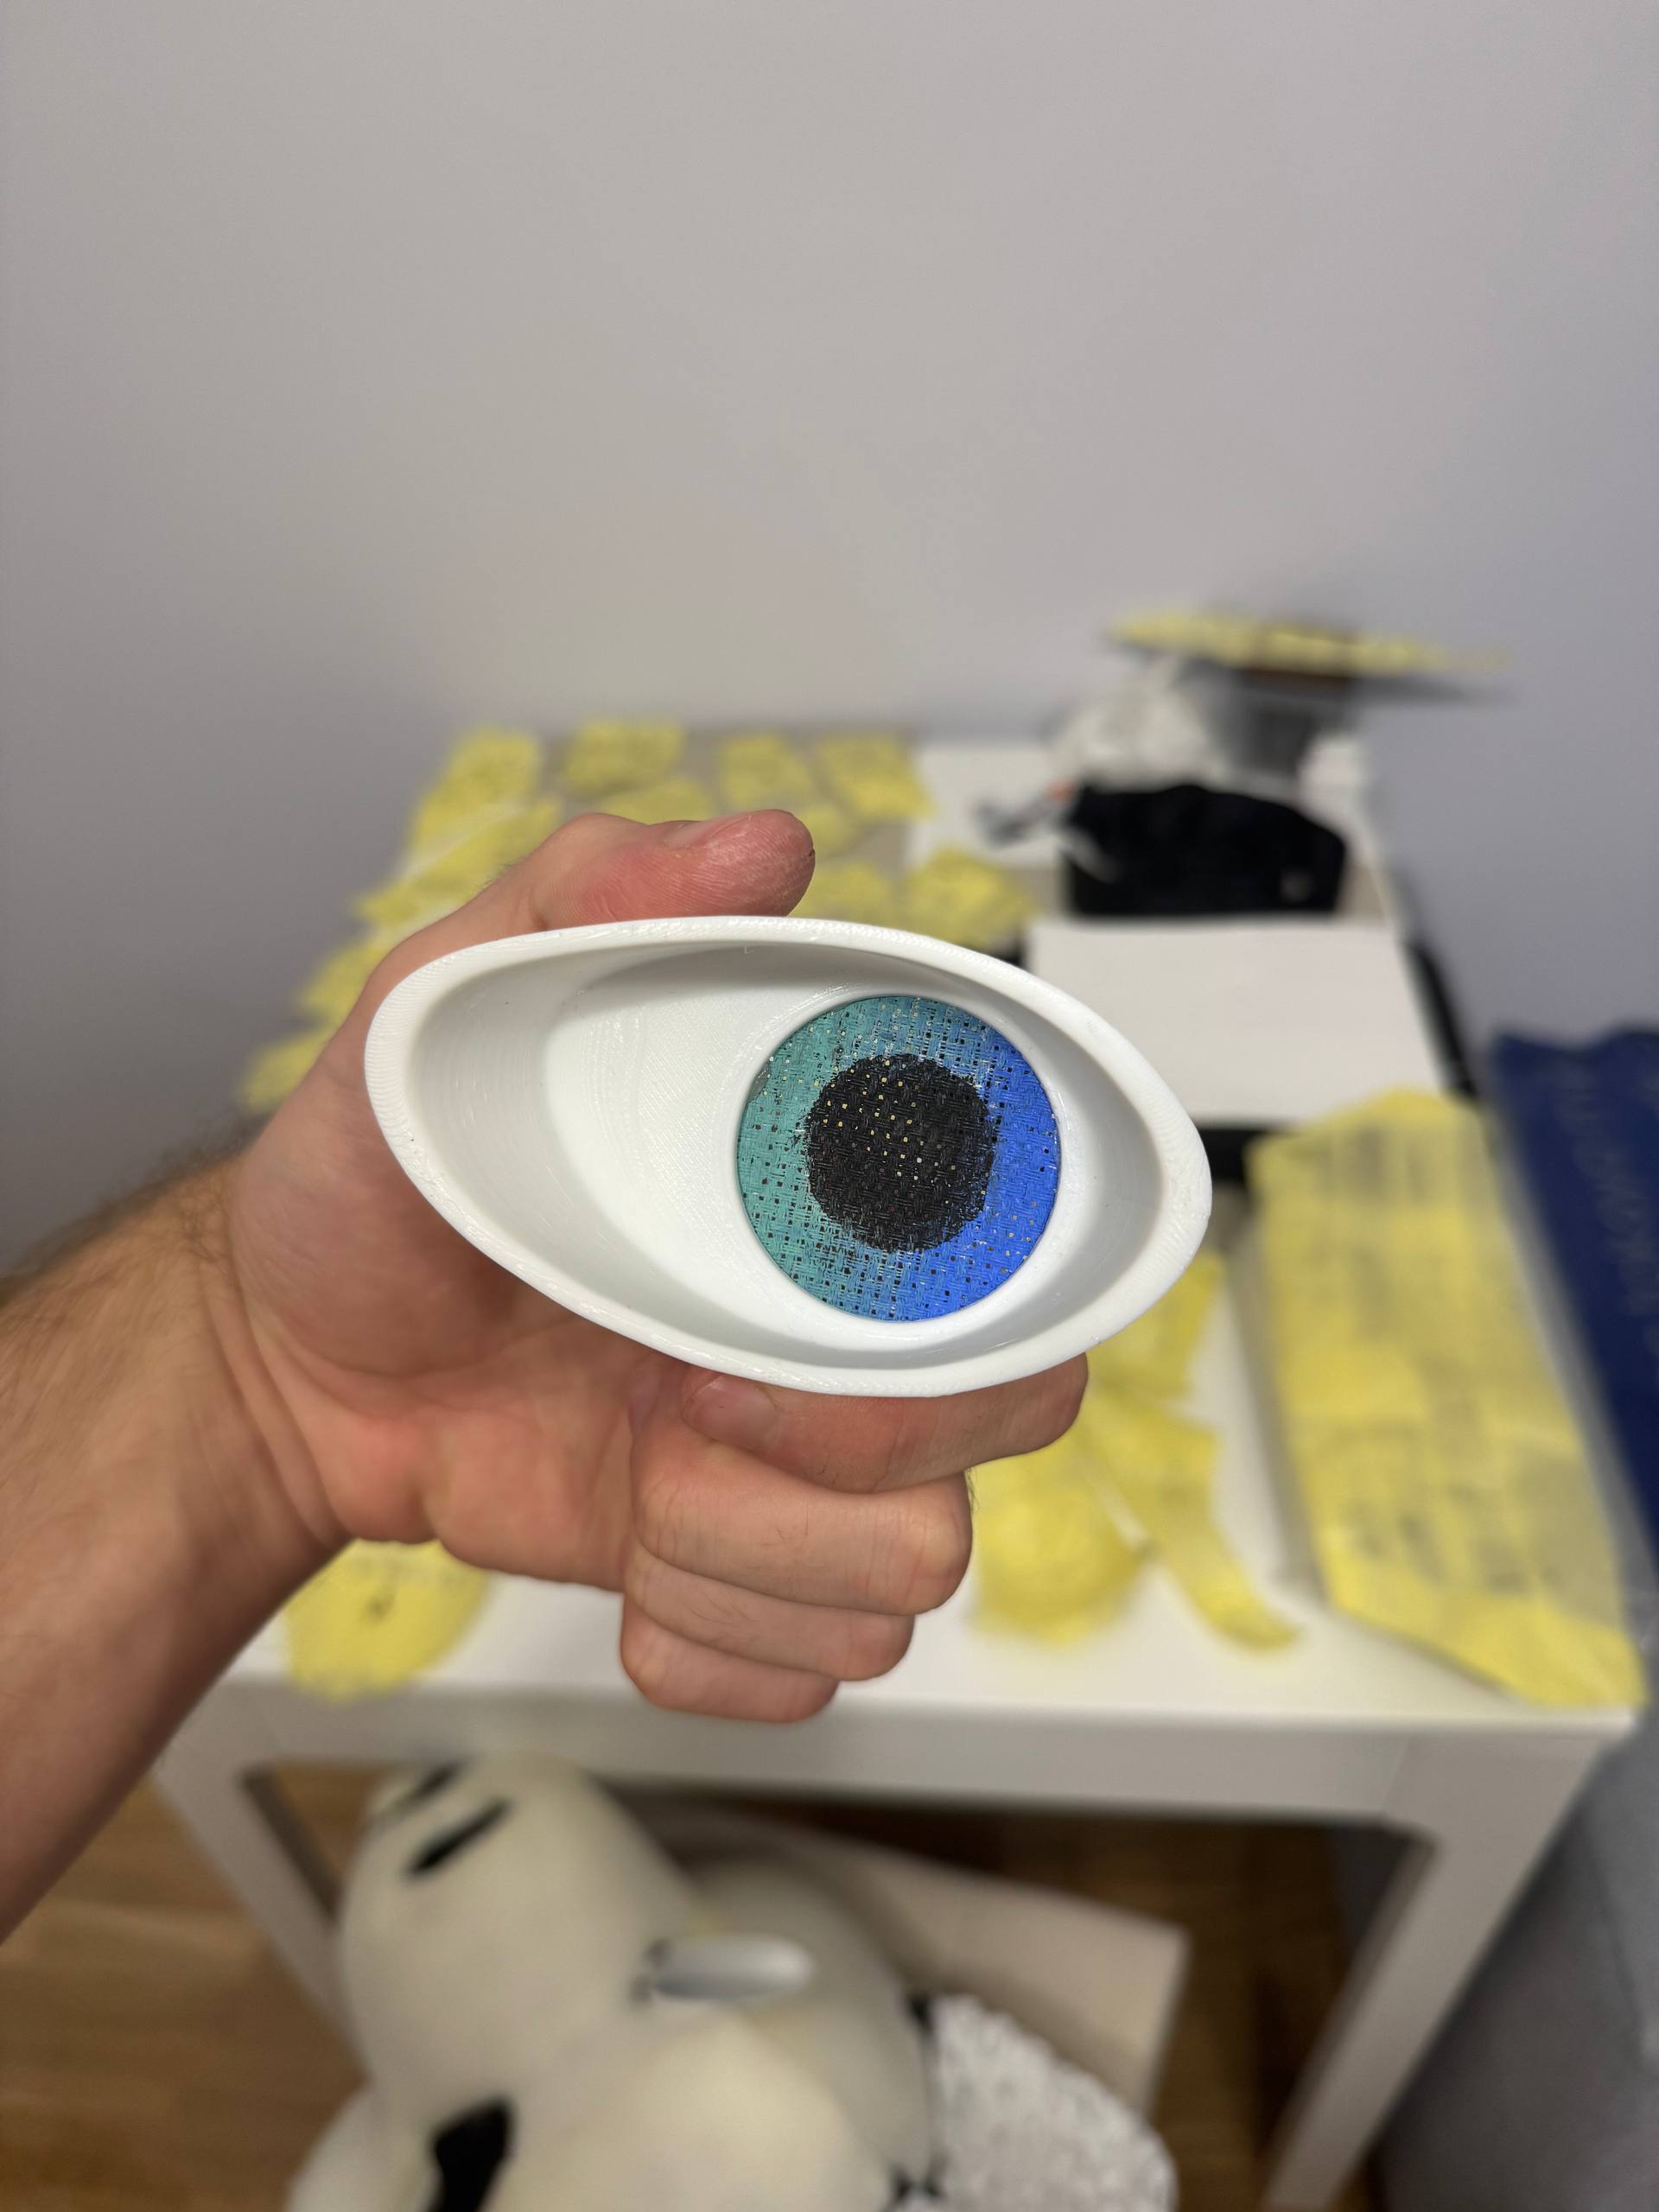
After some time of thinking and googling my friends gave me a contact of a fur who makes eye printings on PVC mesh using sublimation. Cost was only 30PLN (8USD), so it was ideal for me.
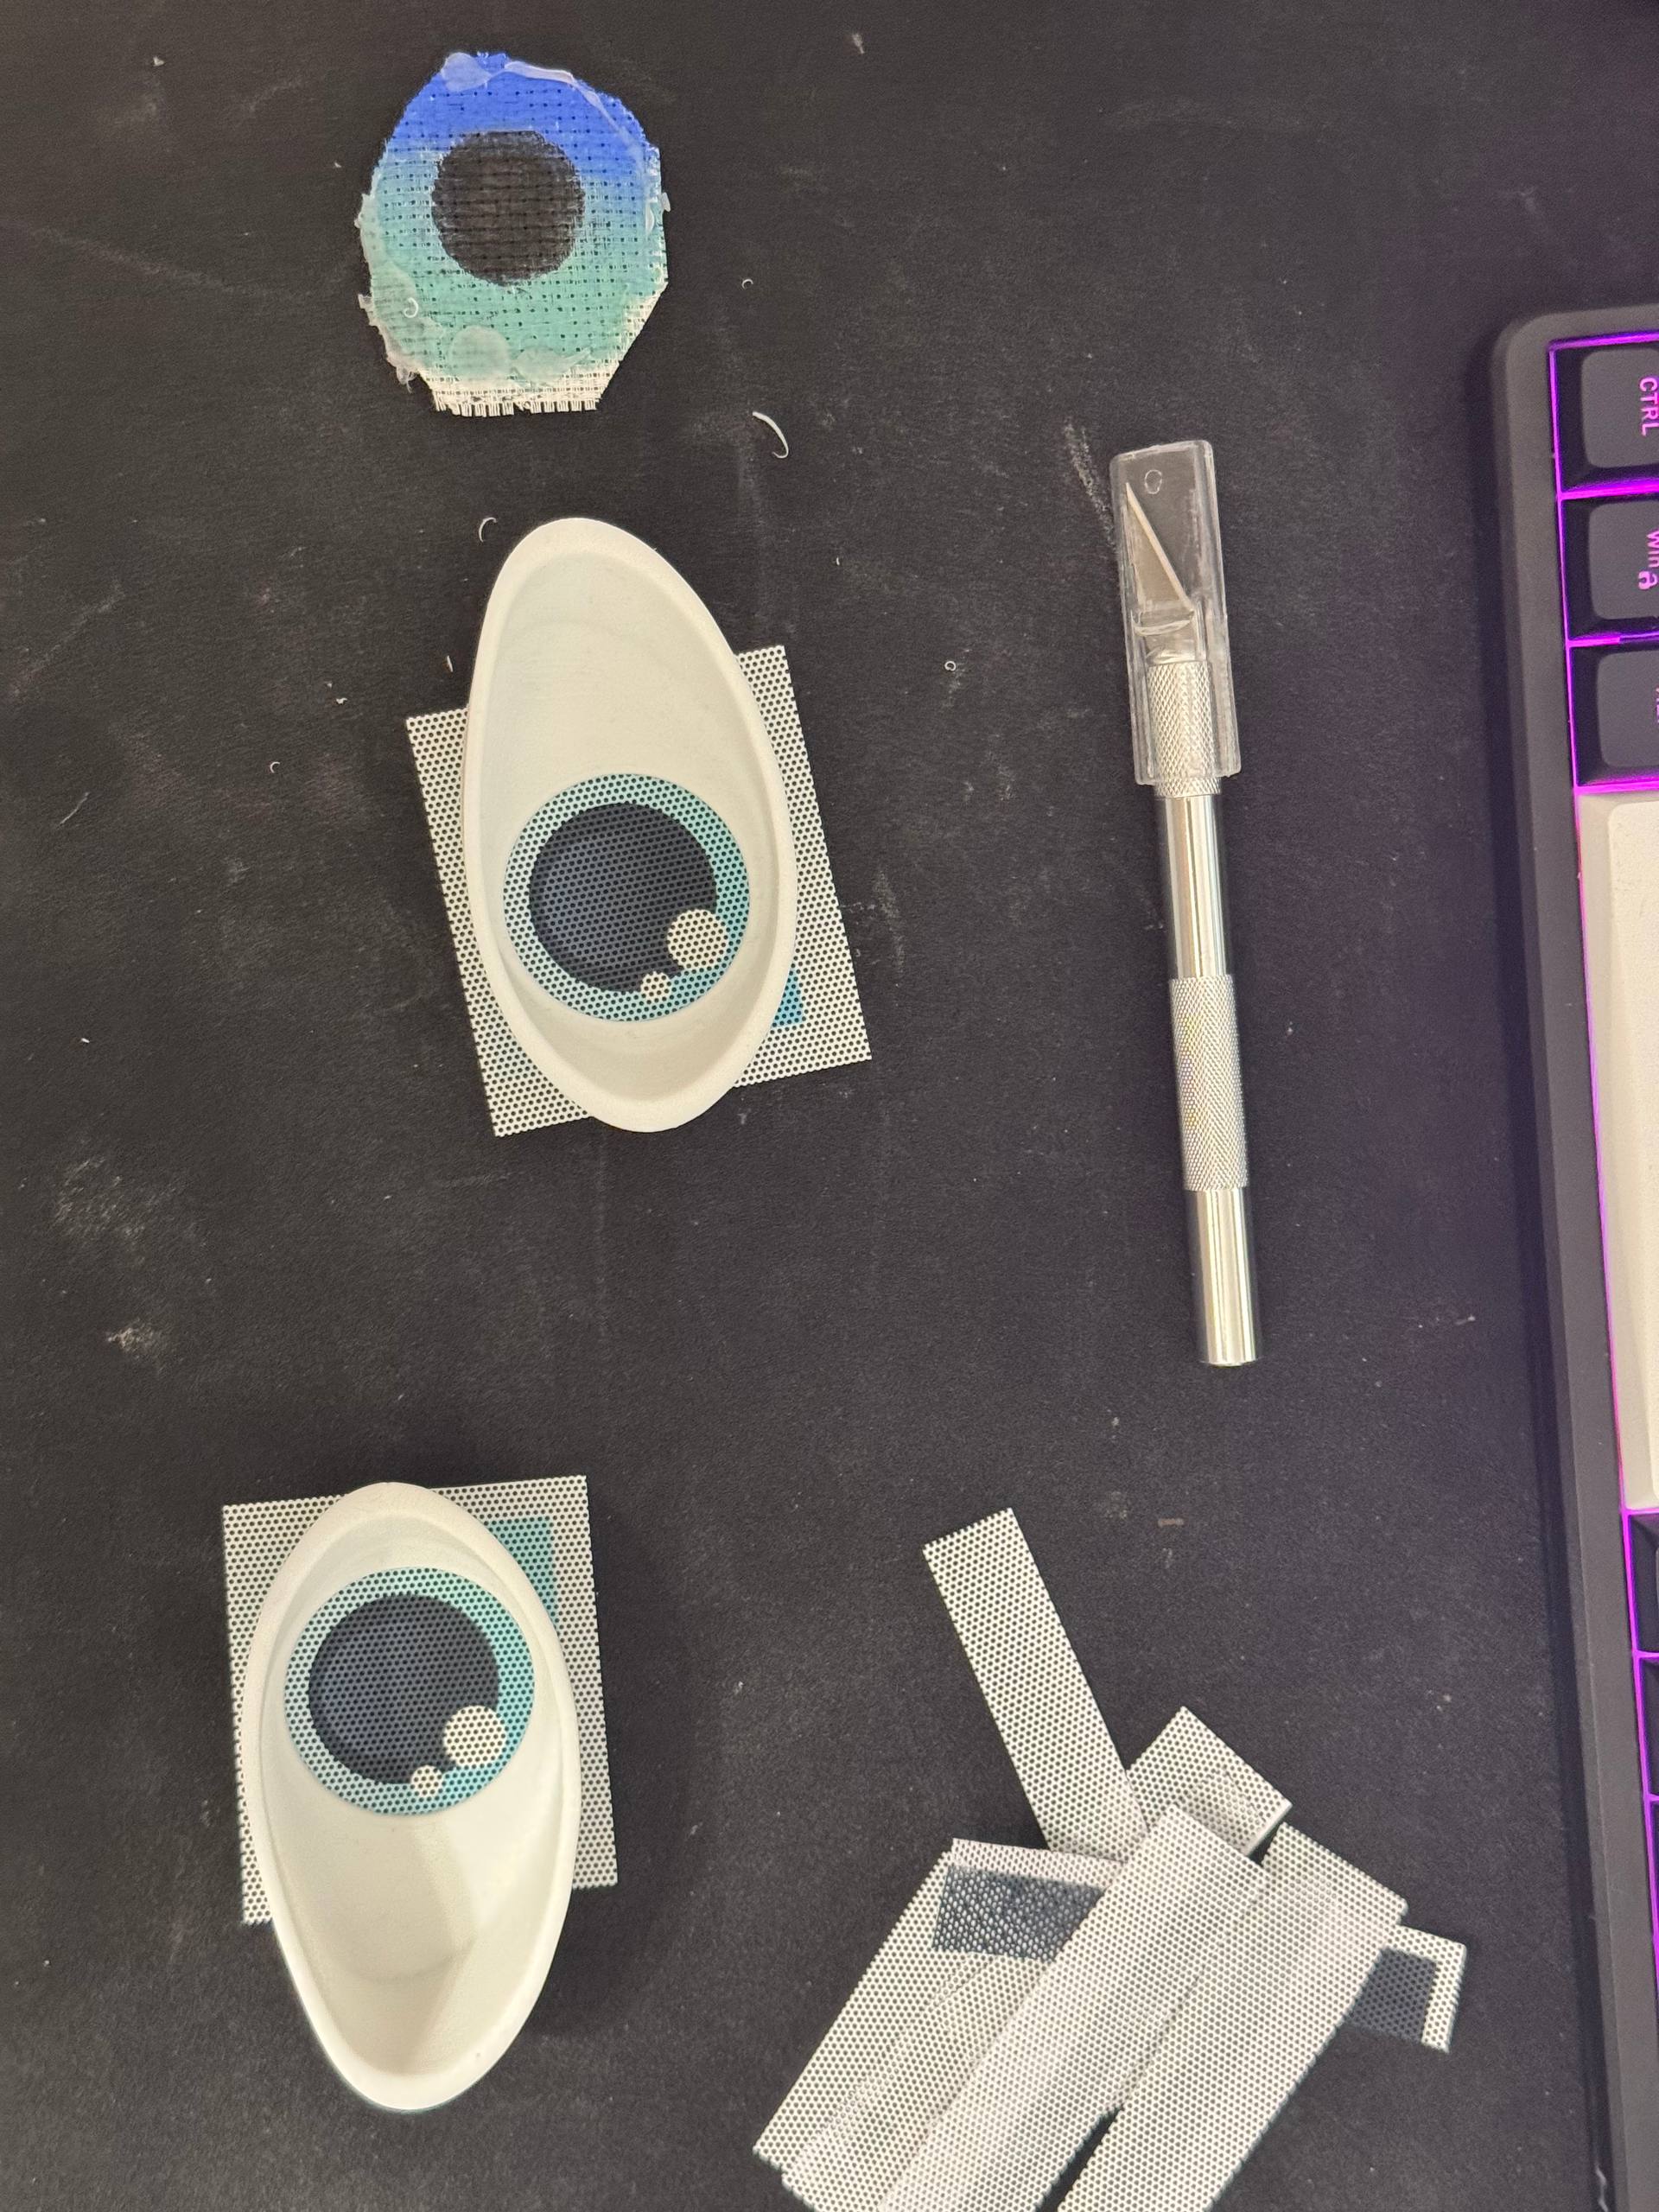
Printed eyes looked much better than ones I tried creating myself.
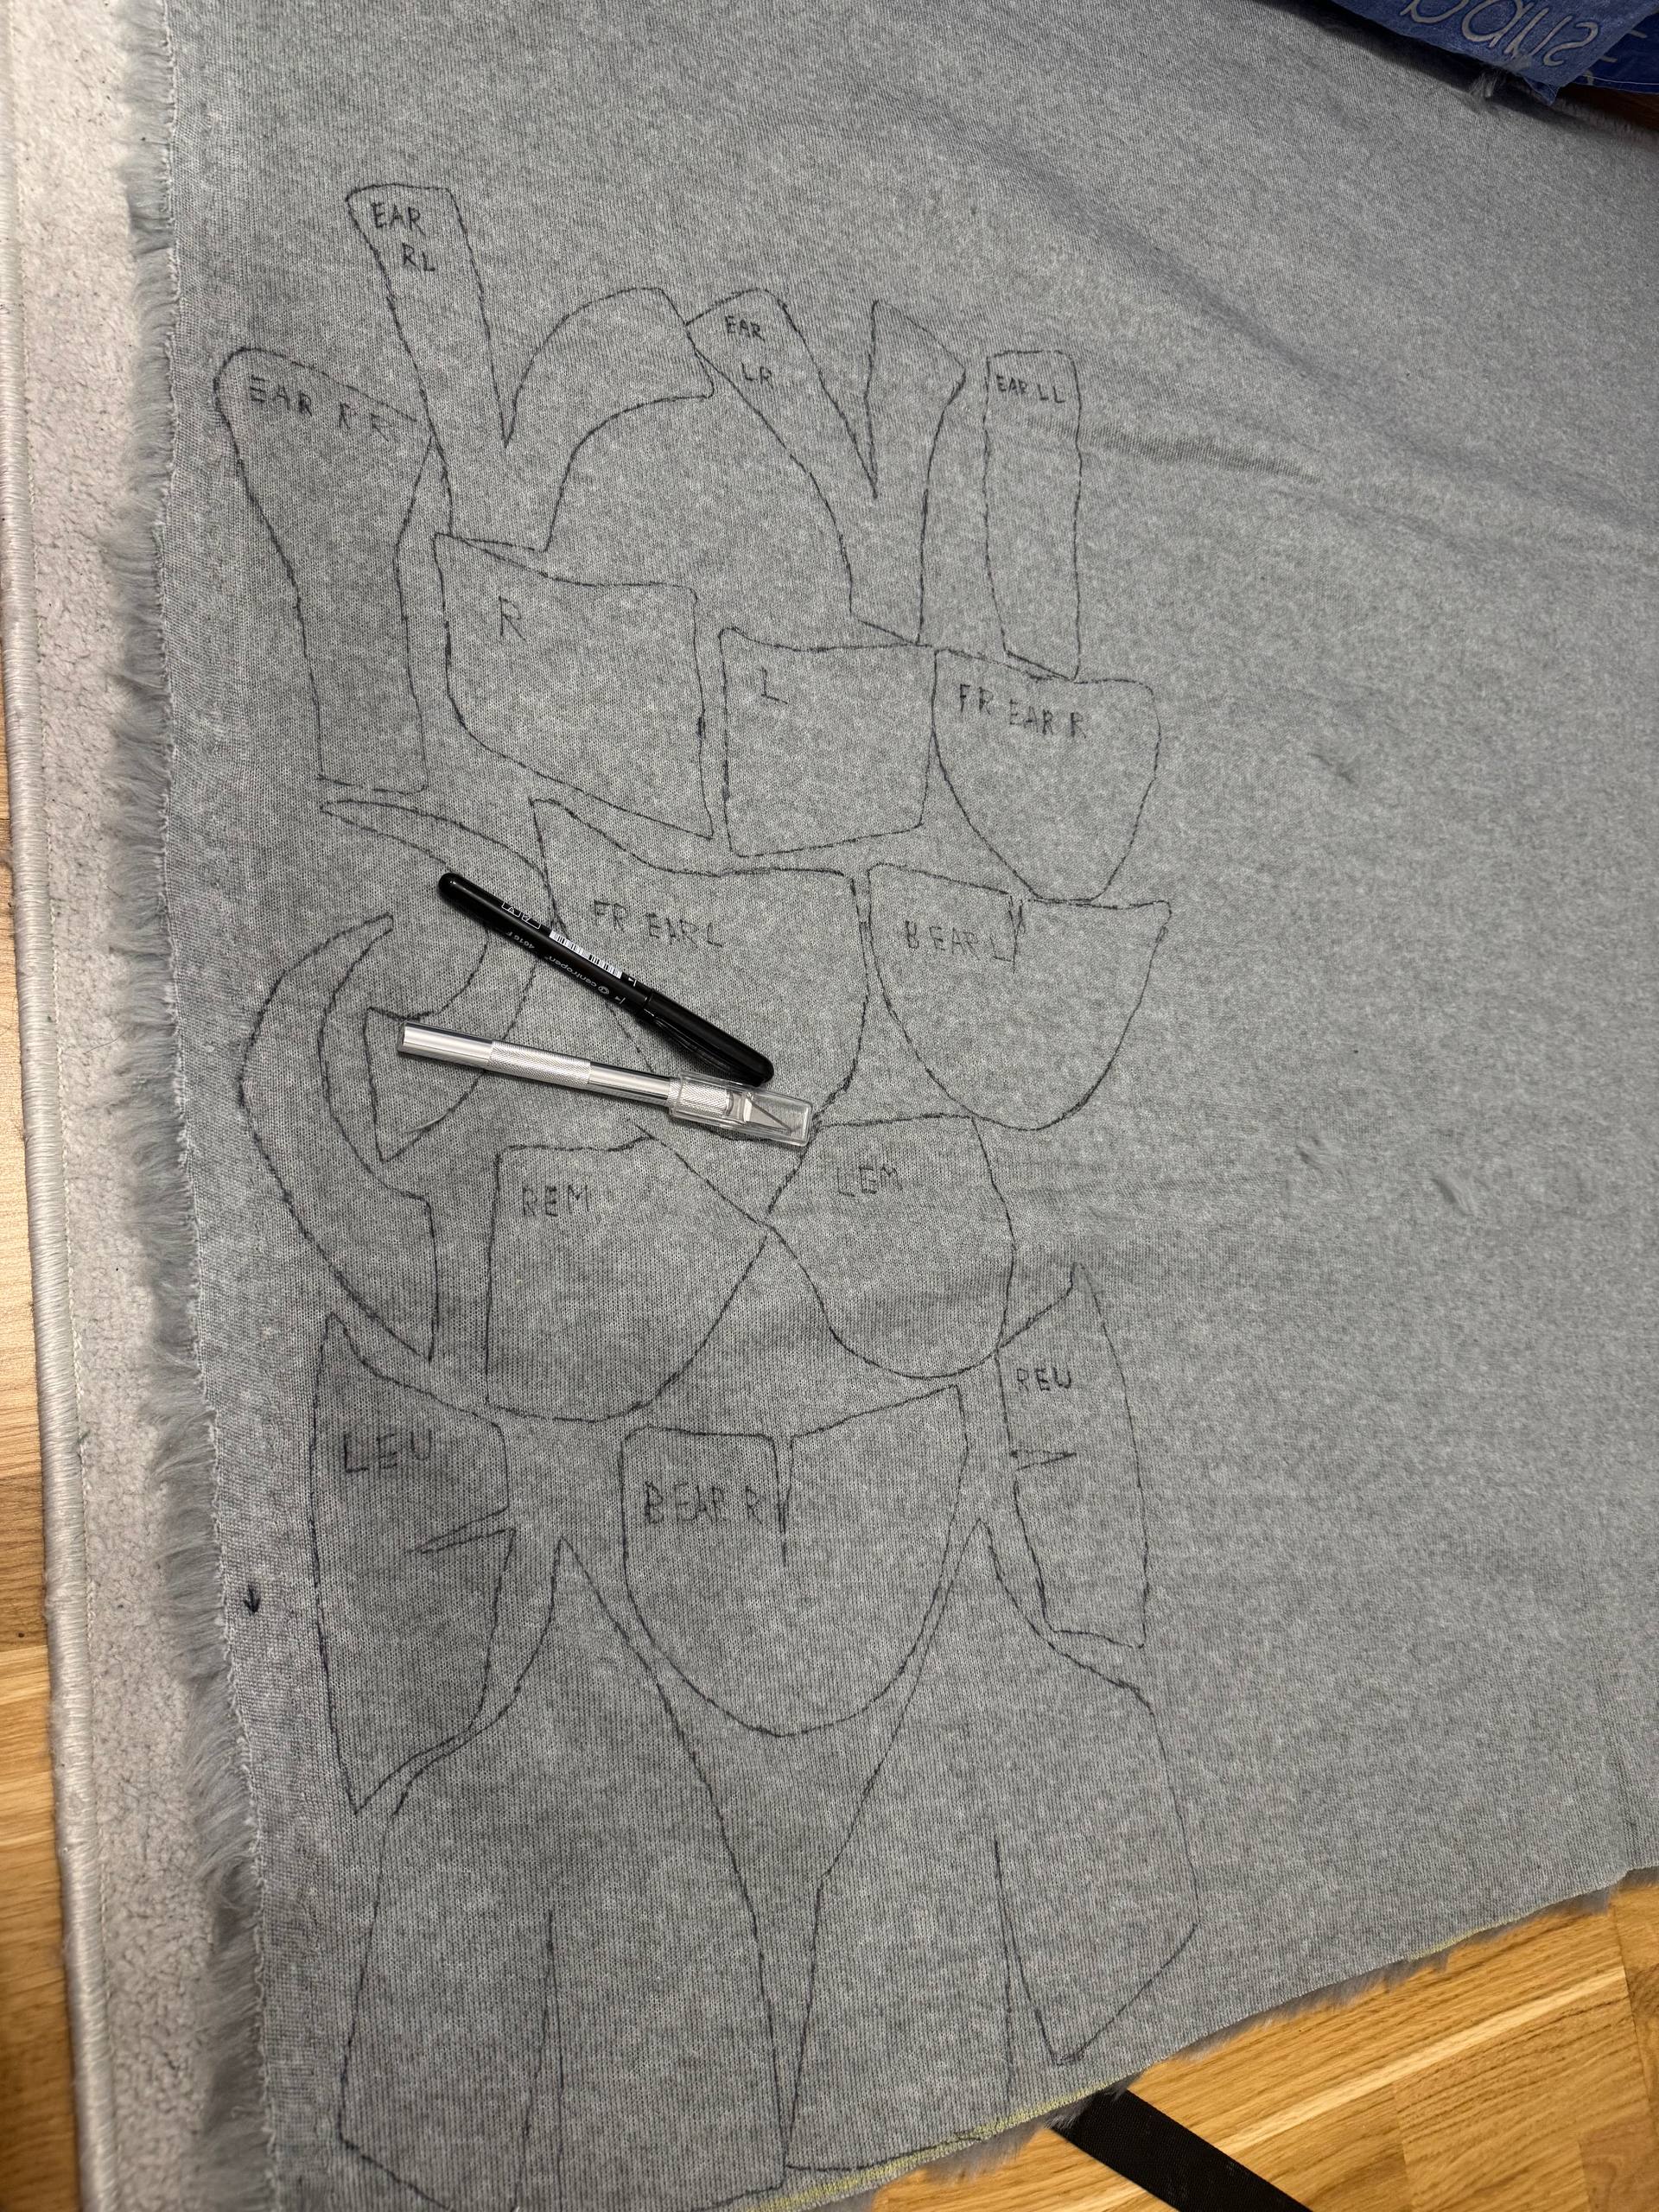
I covered outer layer of the head with paper tape, painted where fur parts differ (according to my fursona) and split it in parts where head curve change too much. (Here I made another mistake by dividing it into too much pieces)
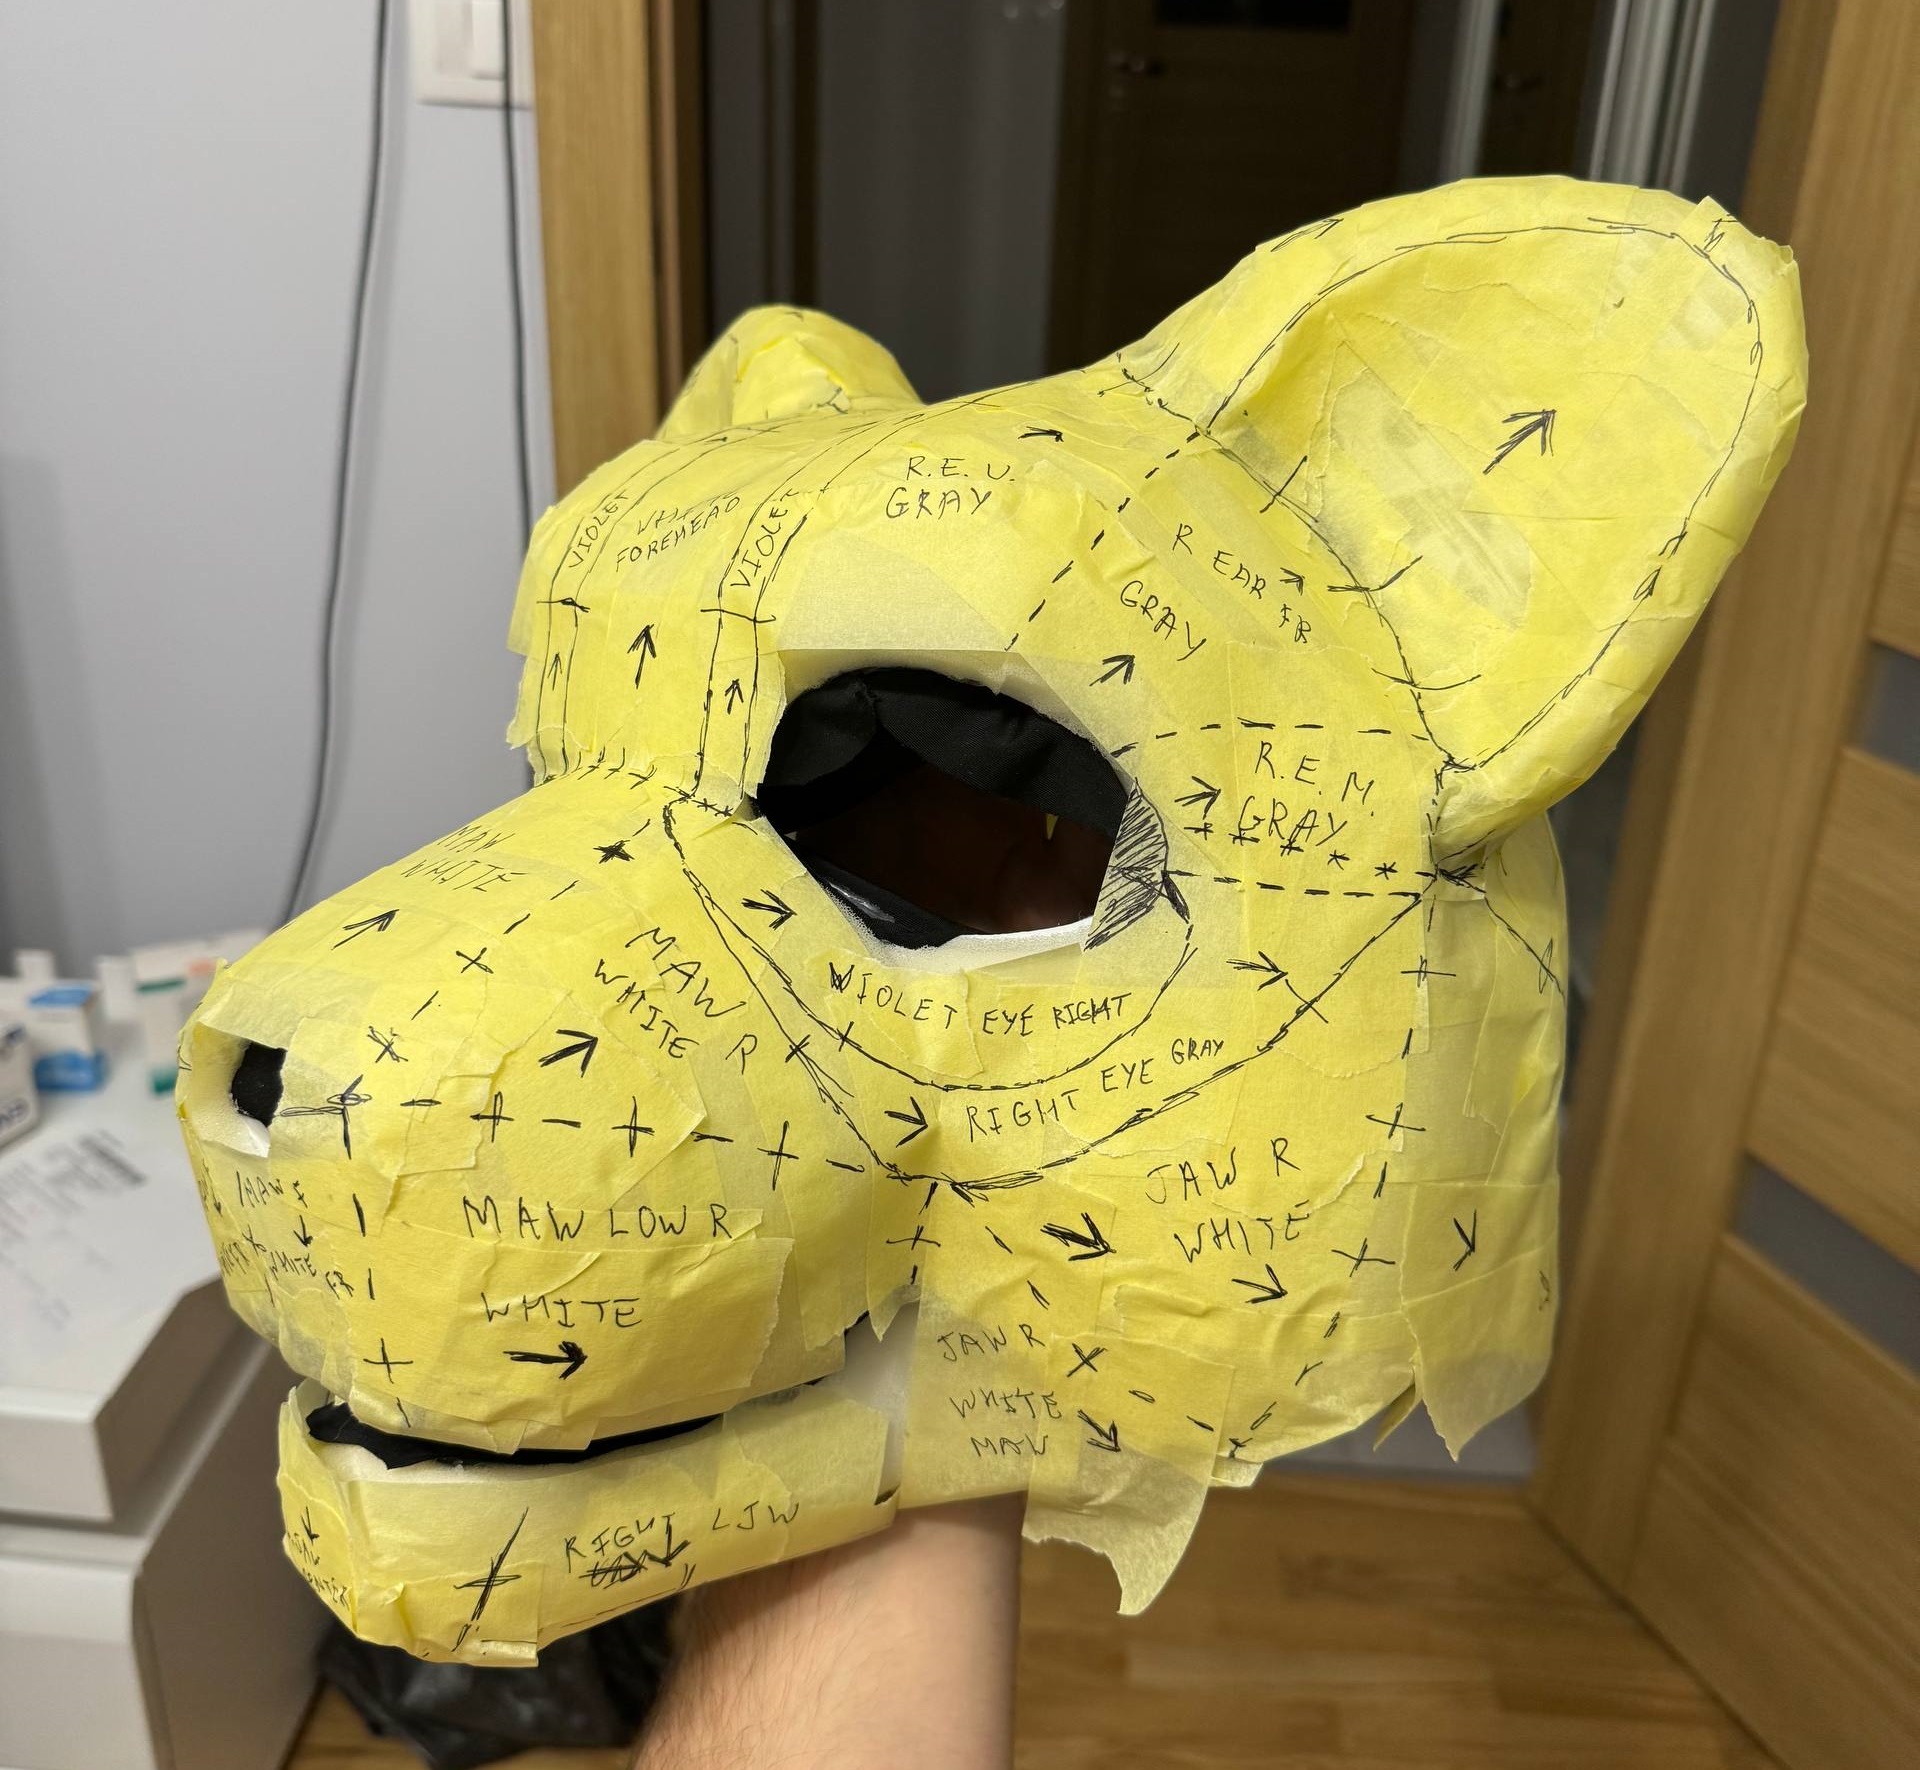
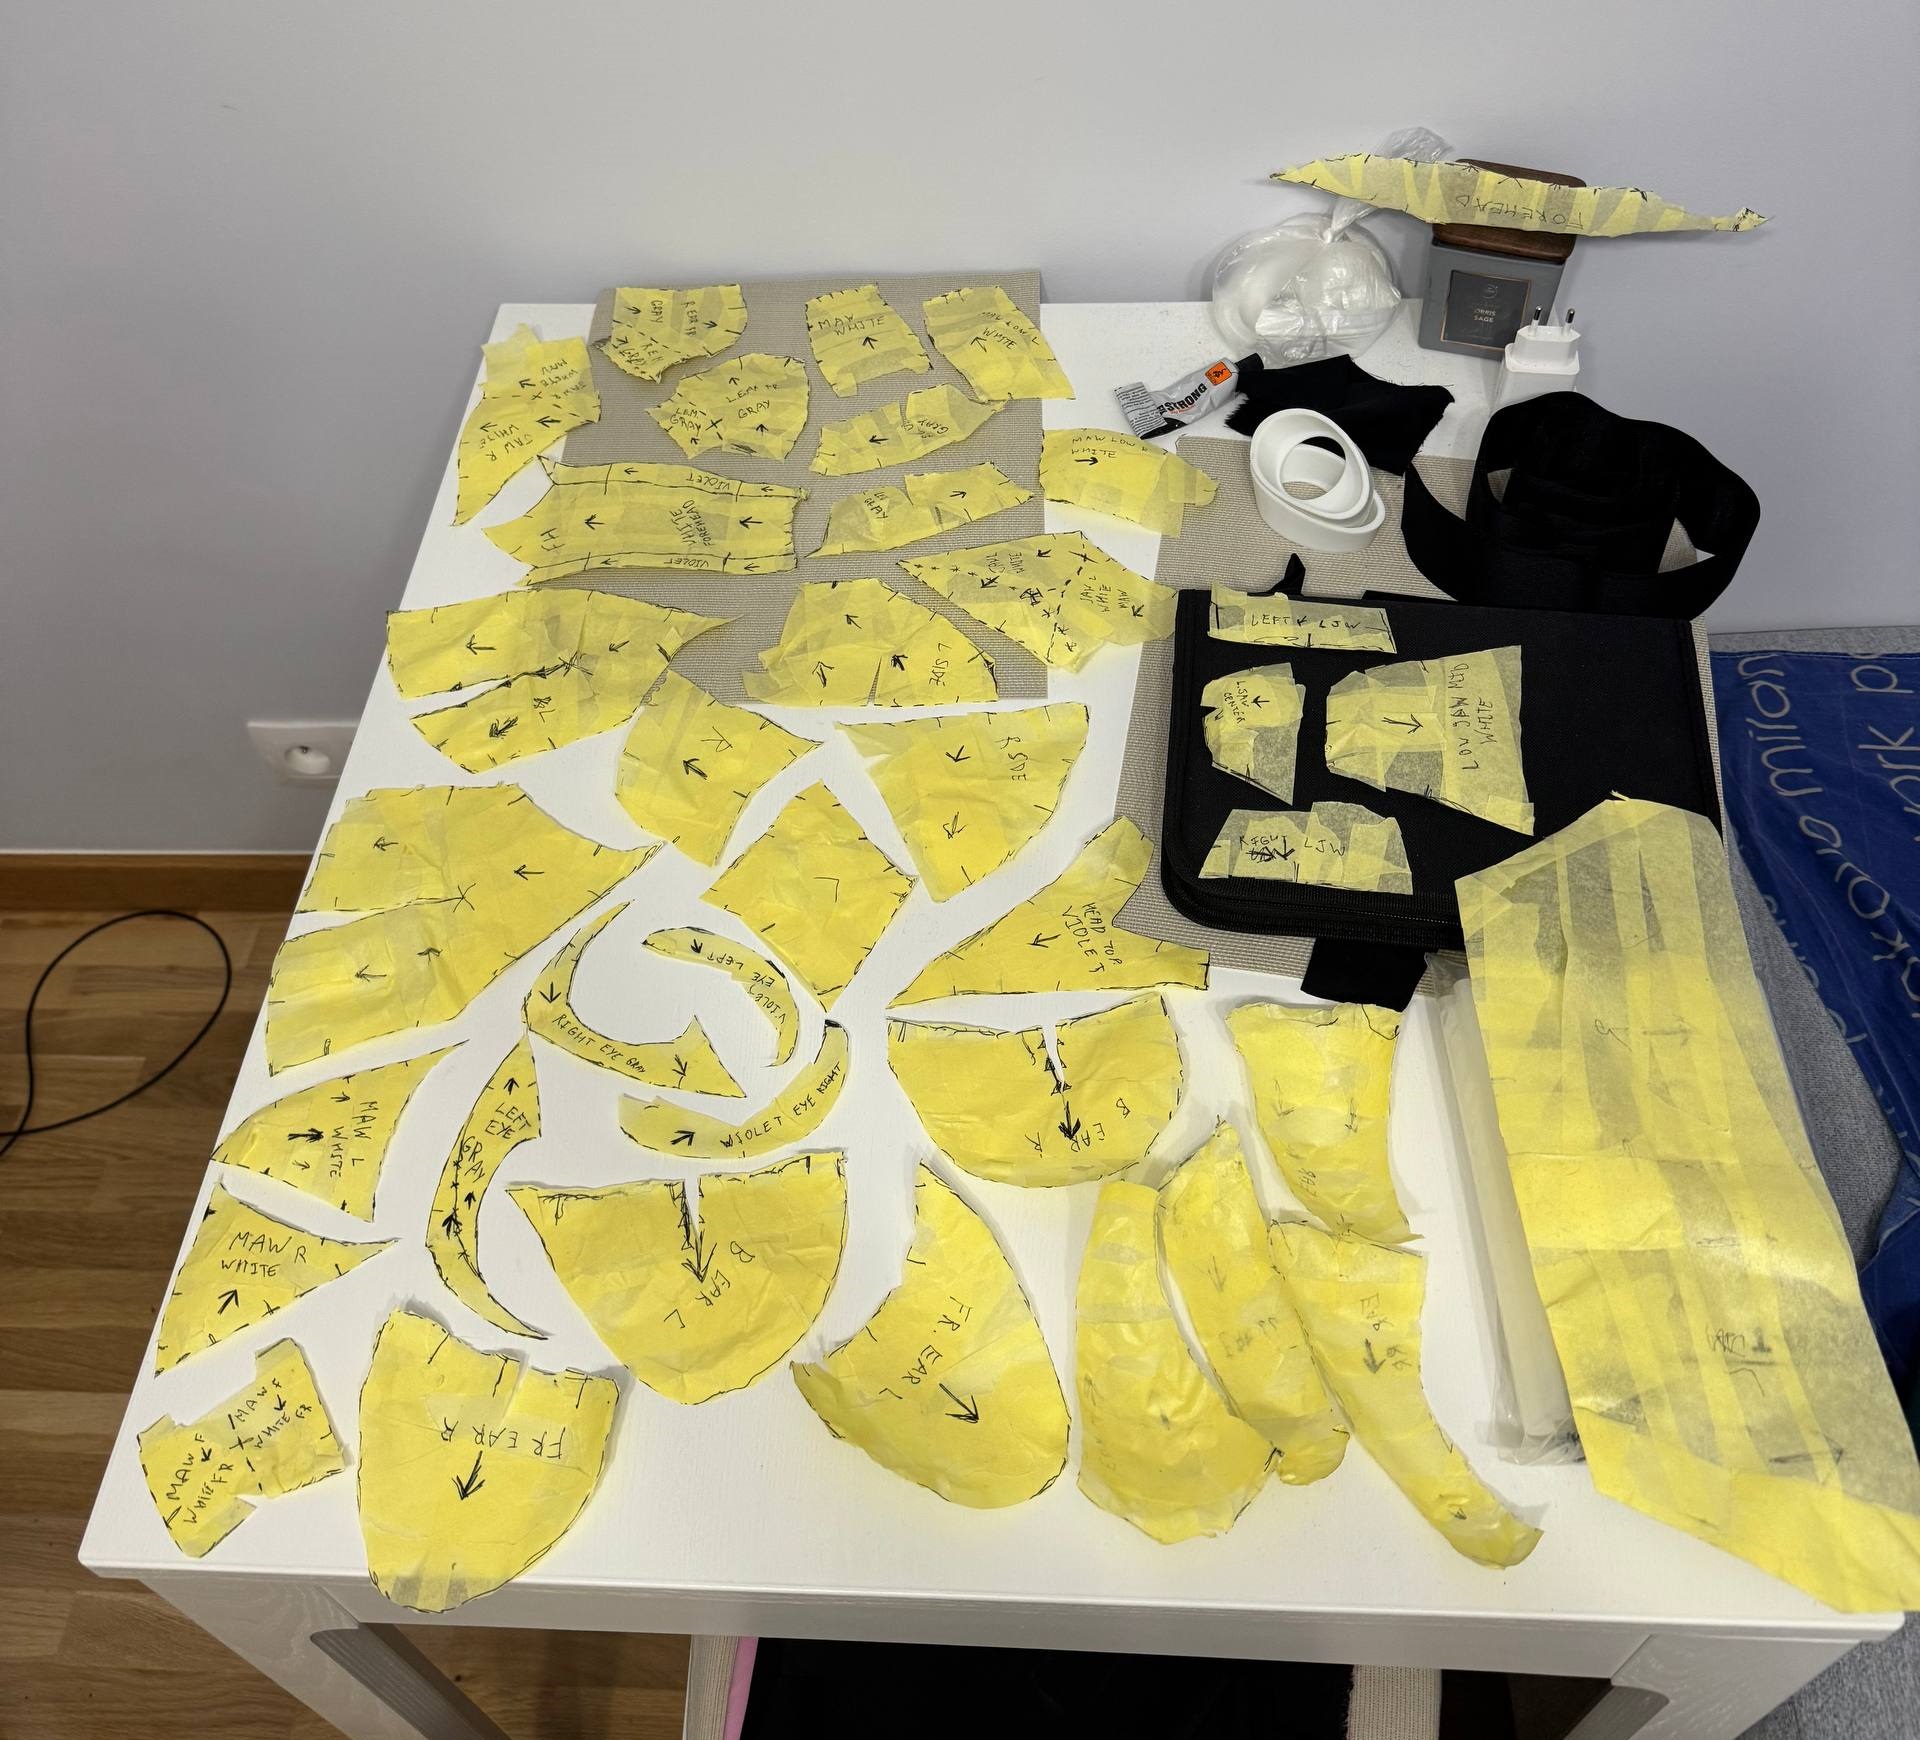
I placed each part on the fabric with sticky side facing up, marked edges with black marker with adding few mm seam allowance.
Then I cut big parts from the main piece of the fur and trimmed them. Initially I bought some used cheap trimmer, but it was not trimming the fur at all, so I just threw it away. Then I bought Neabot P1 trimmer and it worked brilliantly. It also has vacuum cleaner intake right next to the trimmer which allowed to avoid any mess made by trimming. I bought it for 220PLN (60USD).
Make sure to cut everything on a special surface for cutting, otherwise you may destroy something (I killed my mouse pad).
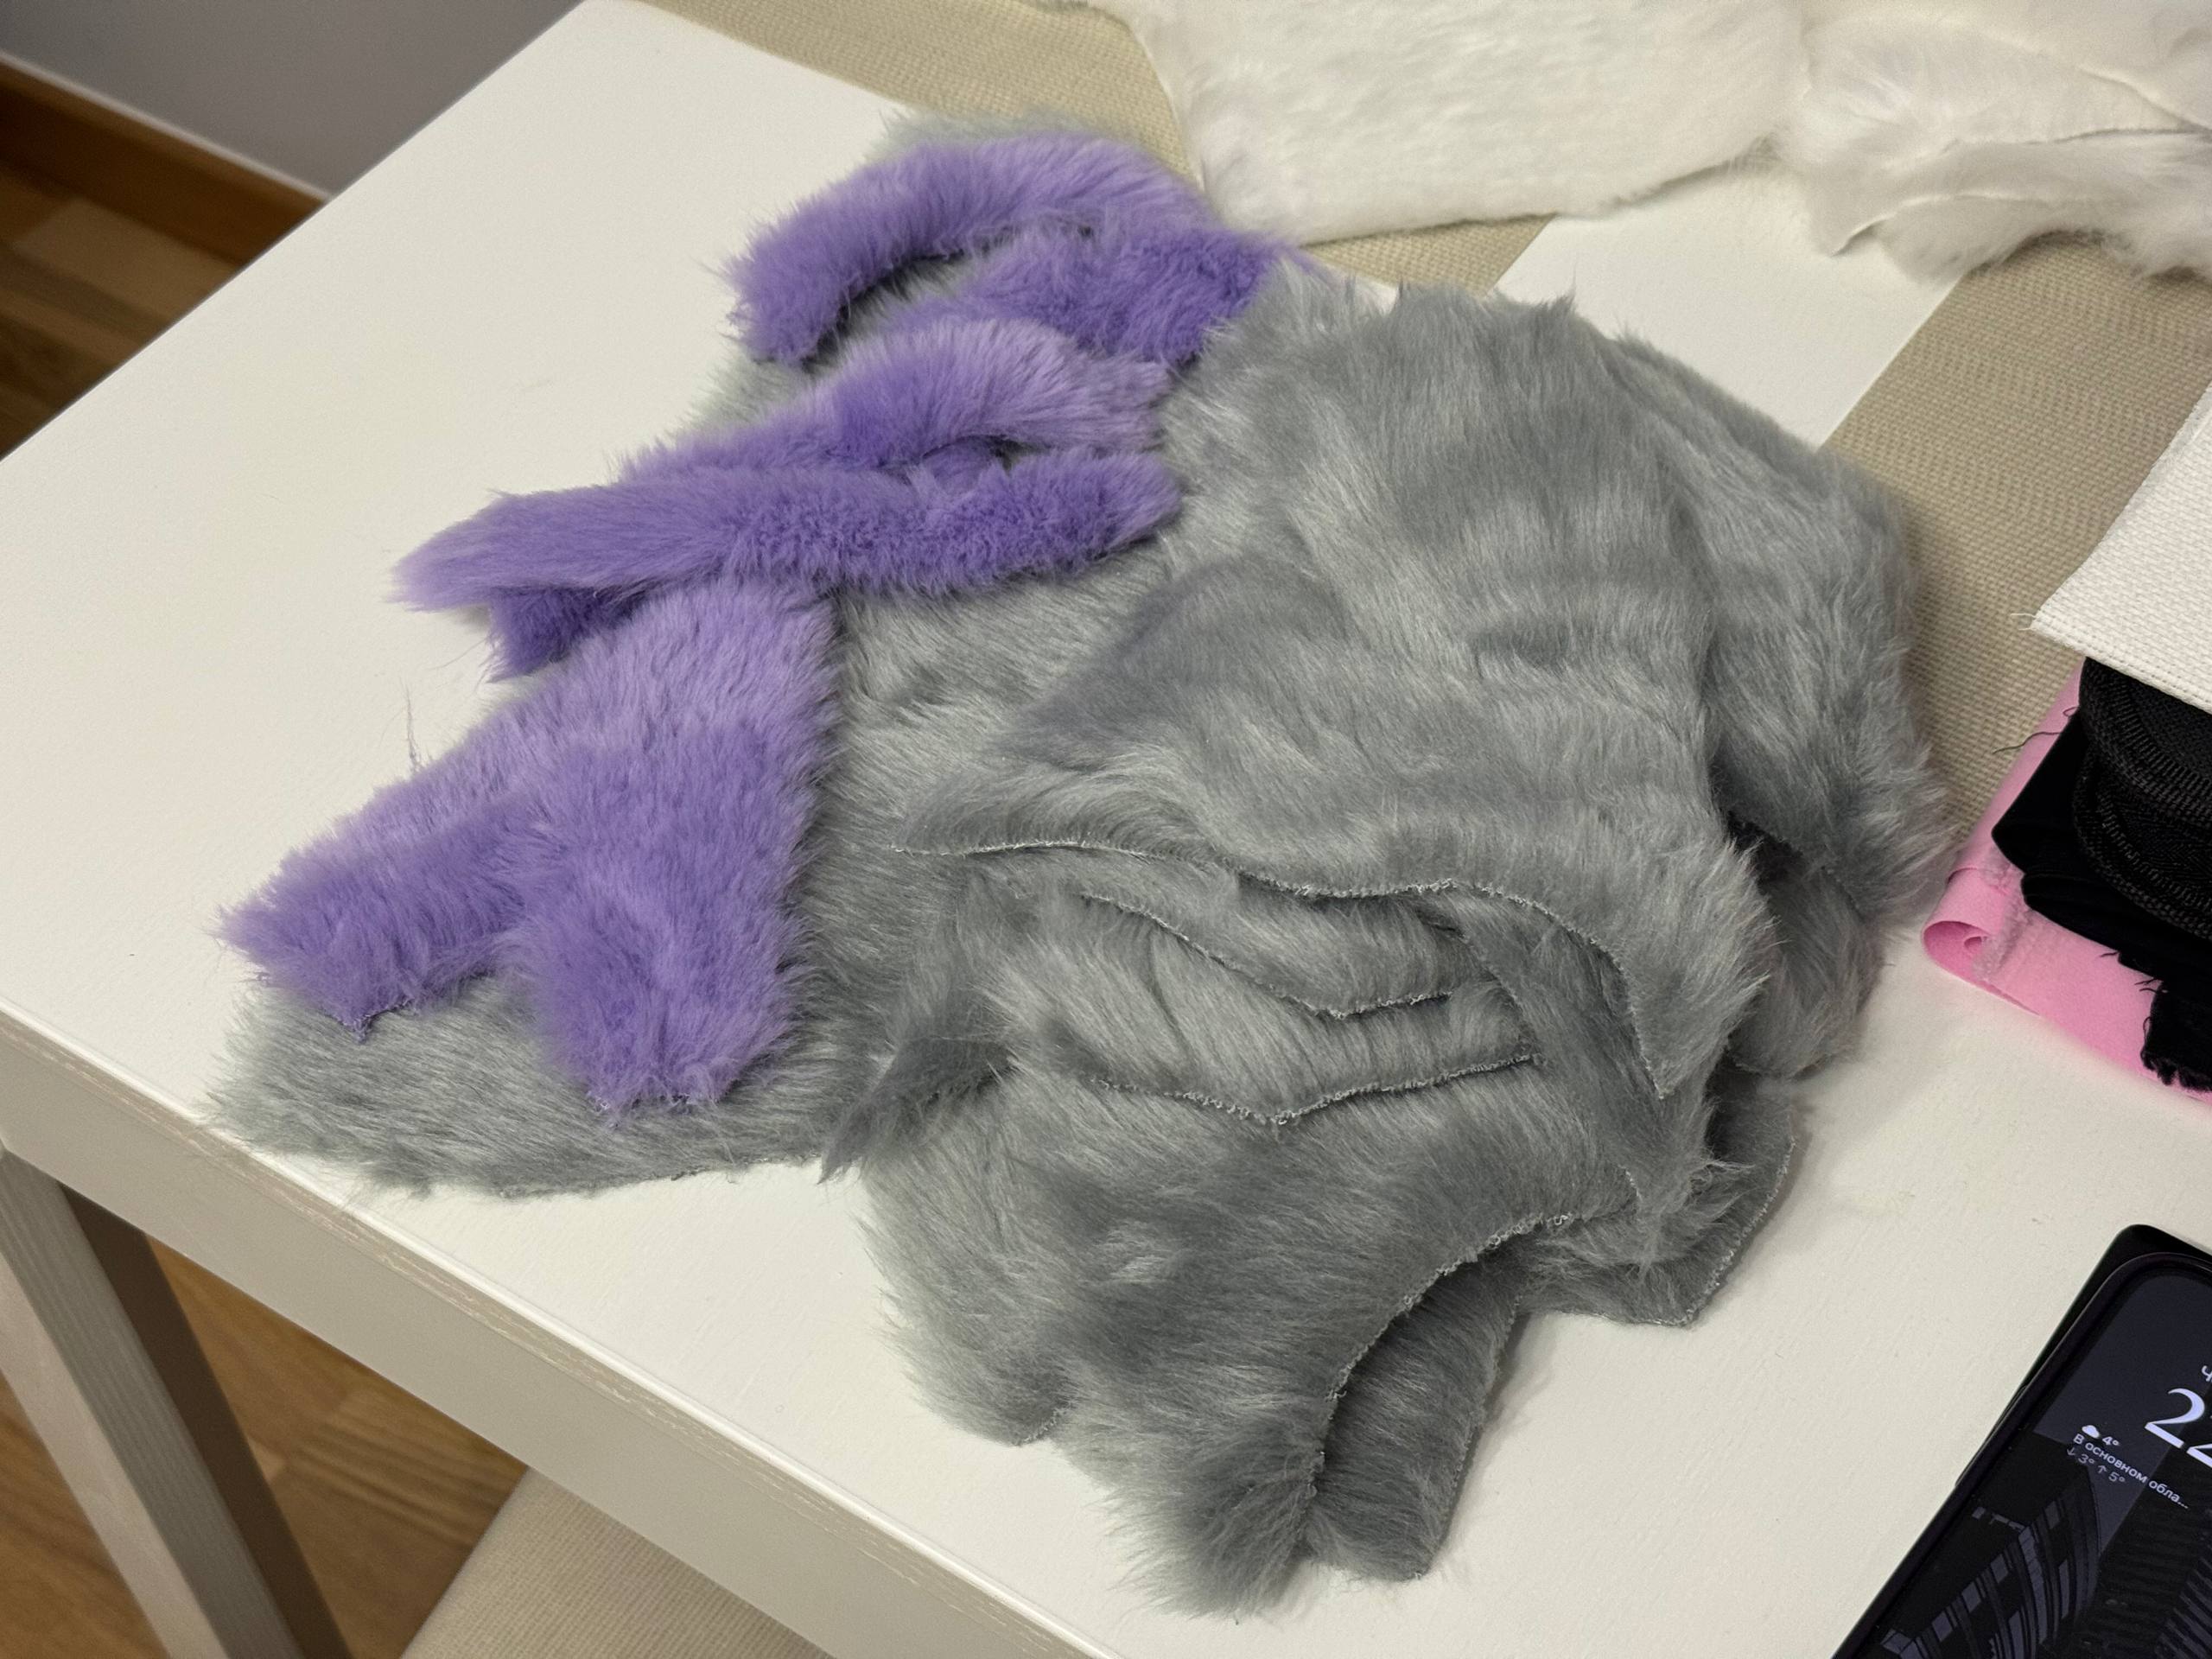
Slowly step by step I sewed parts together, and as I remember I sewed 2 purple pieces near eyes incorrectly, so please - put marking on your patterns and trace them to the fur, so you will understand how to connect the parts. Also, another good idea is to make 3d scan of your head using any app on your phone - I exported model to Blender and was able to rotate it and check everything.
After everything was sewed, I took glue gun and slowly put fur over the base adding glue under it. This process it extremely important and any errors are hard to fix there, so proceed slowly step-by-step. I made an error there by gluing wrong part, as a result I had to use hair dryer to melt the glue and slowly moving the fur to the correct side.
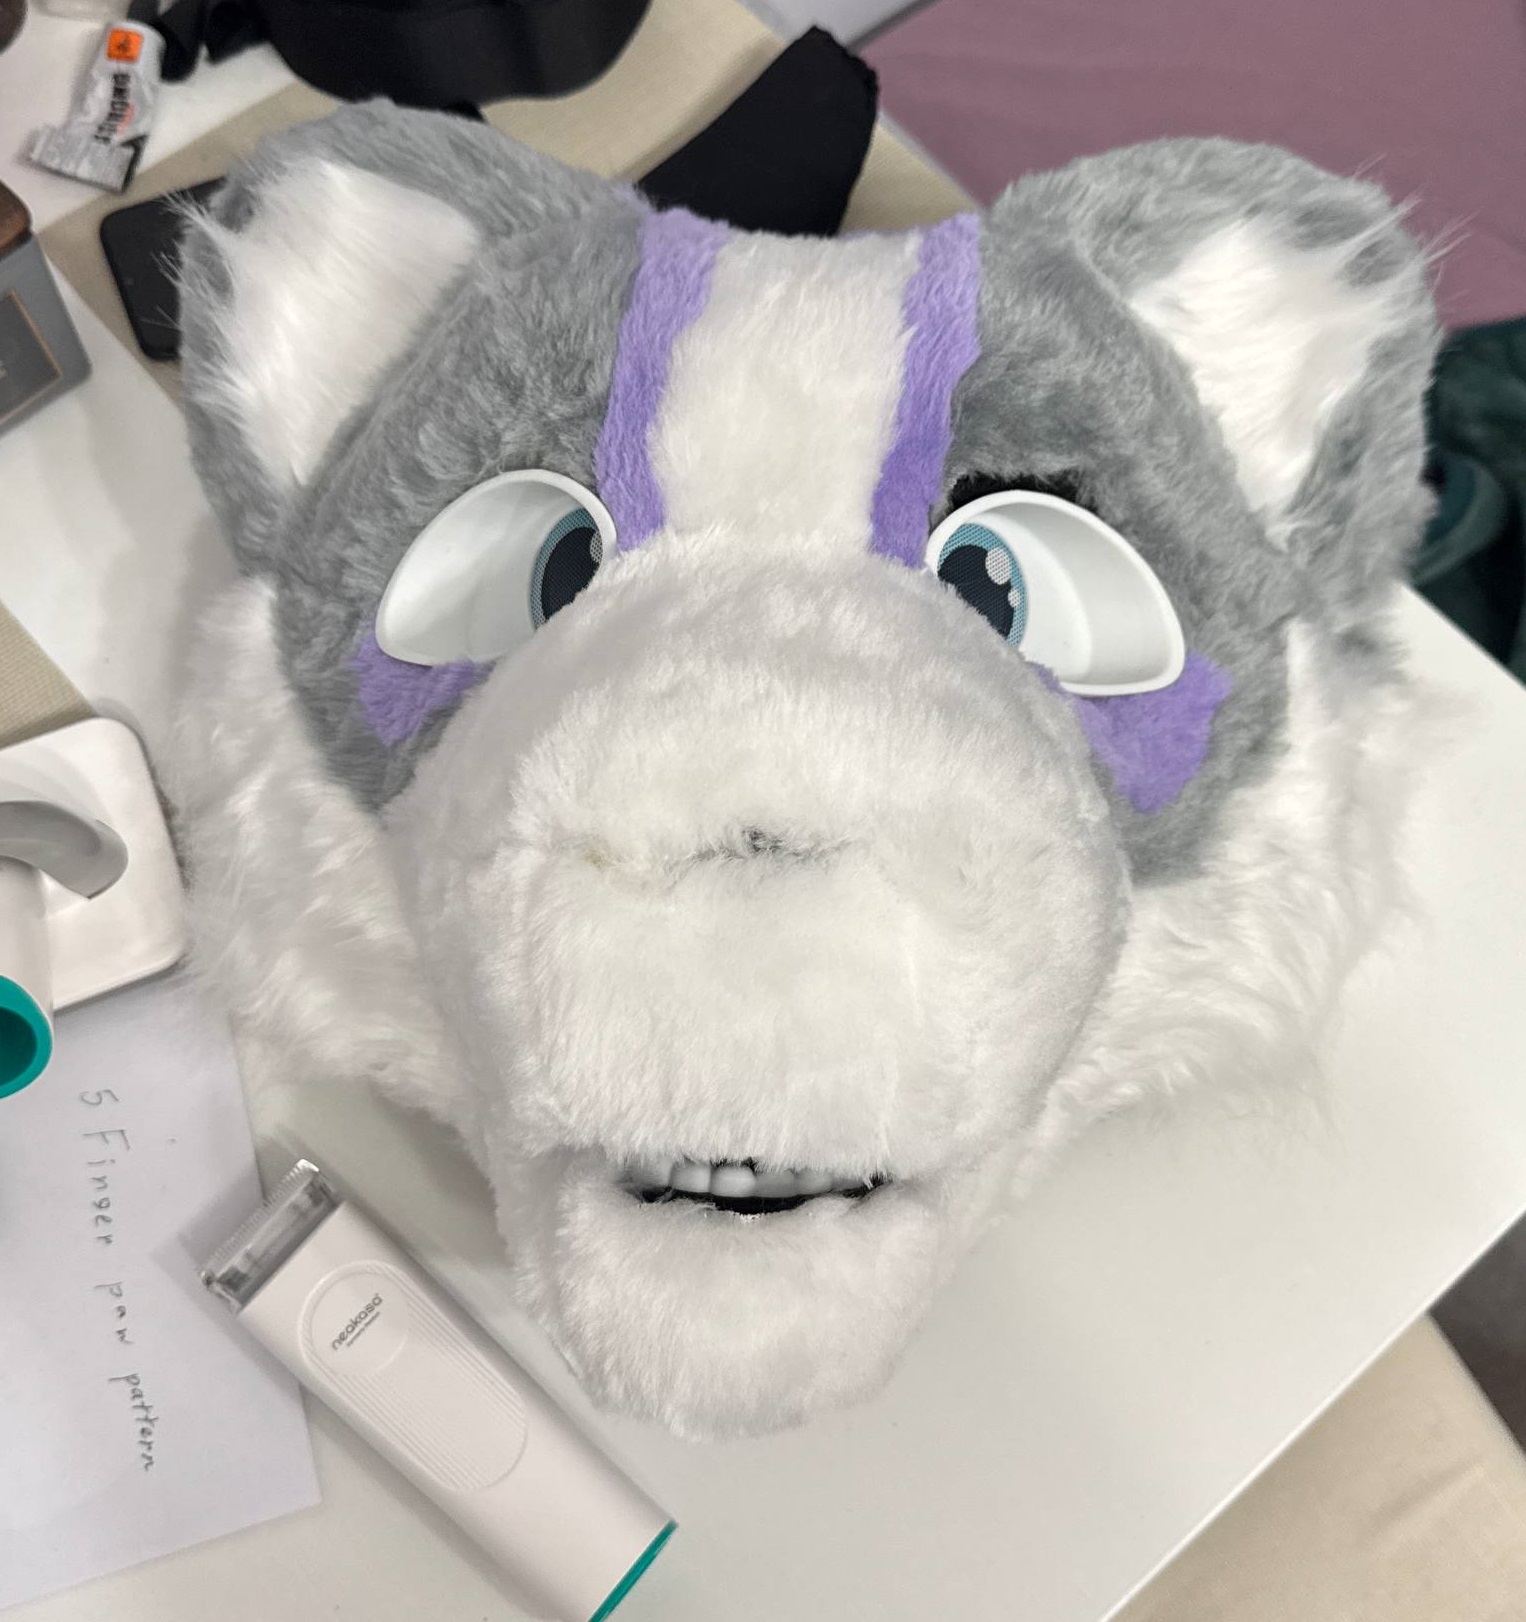
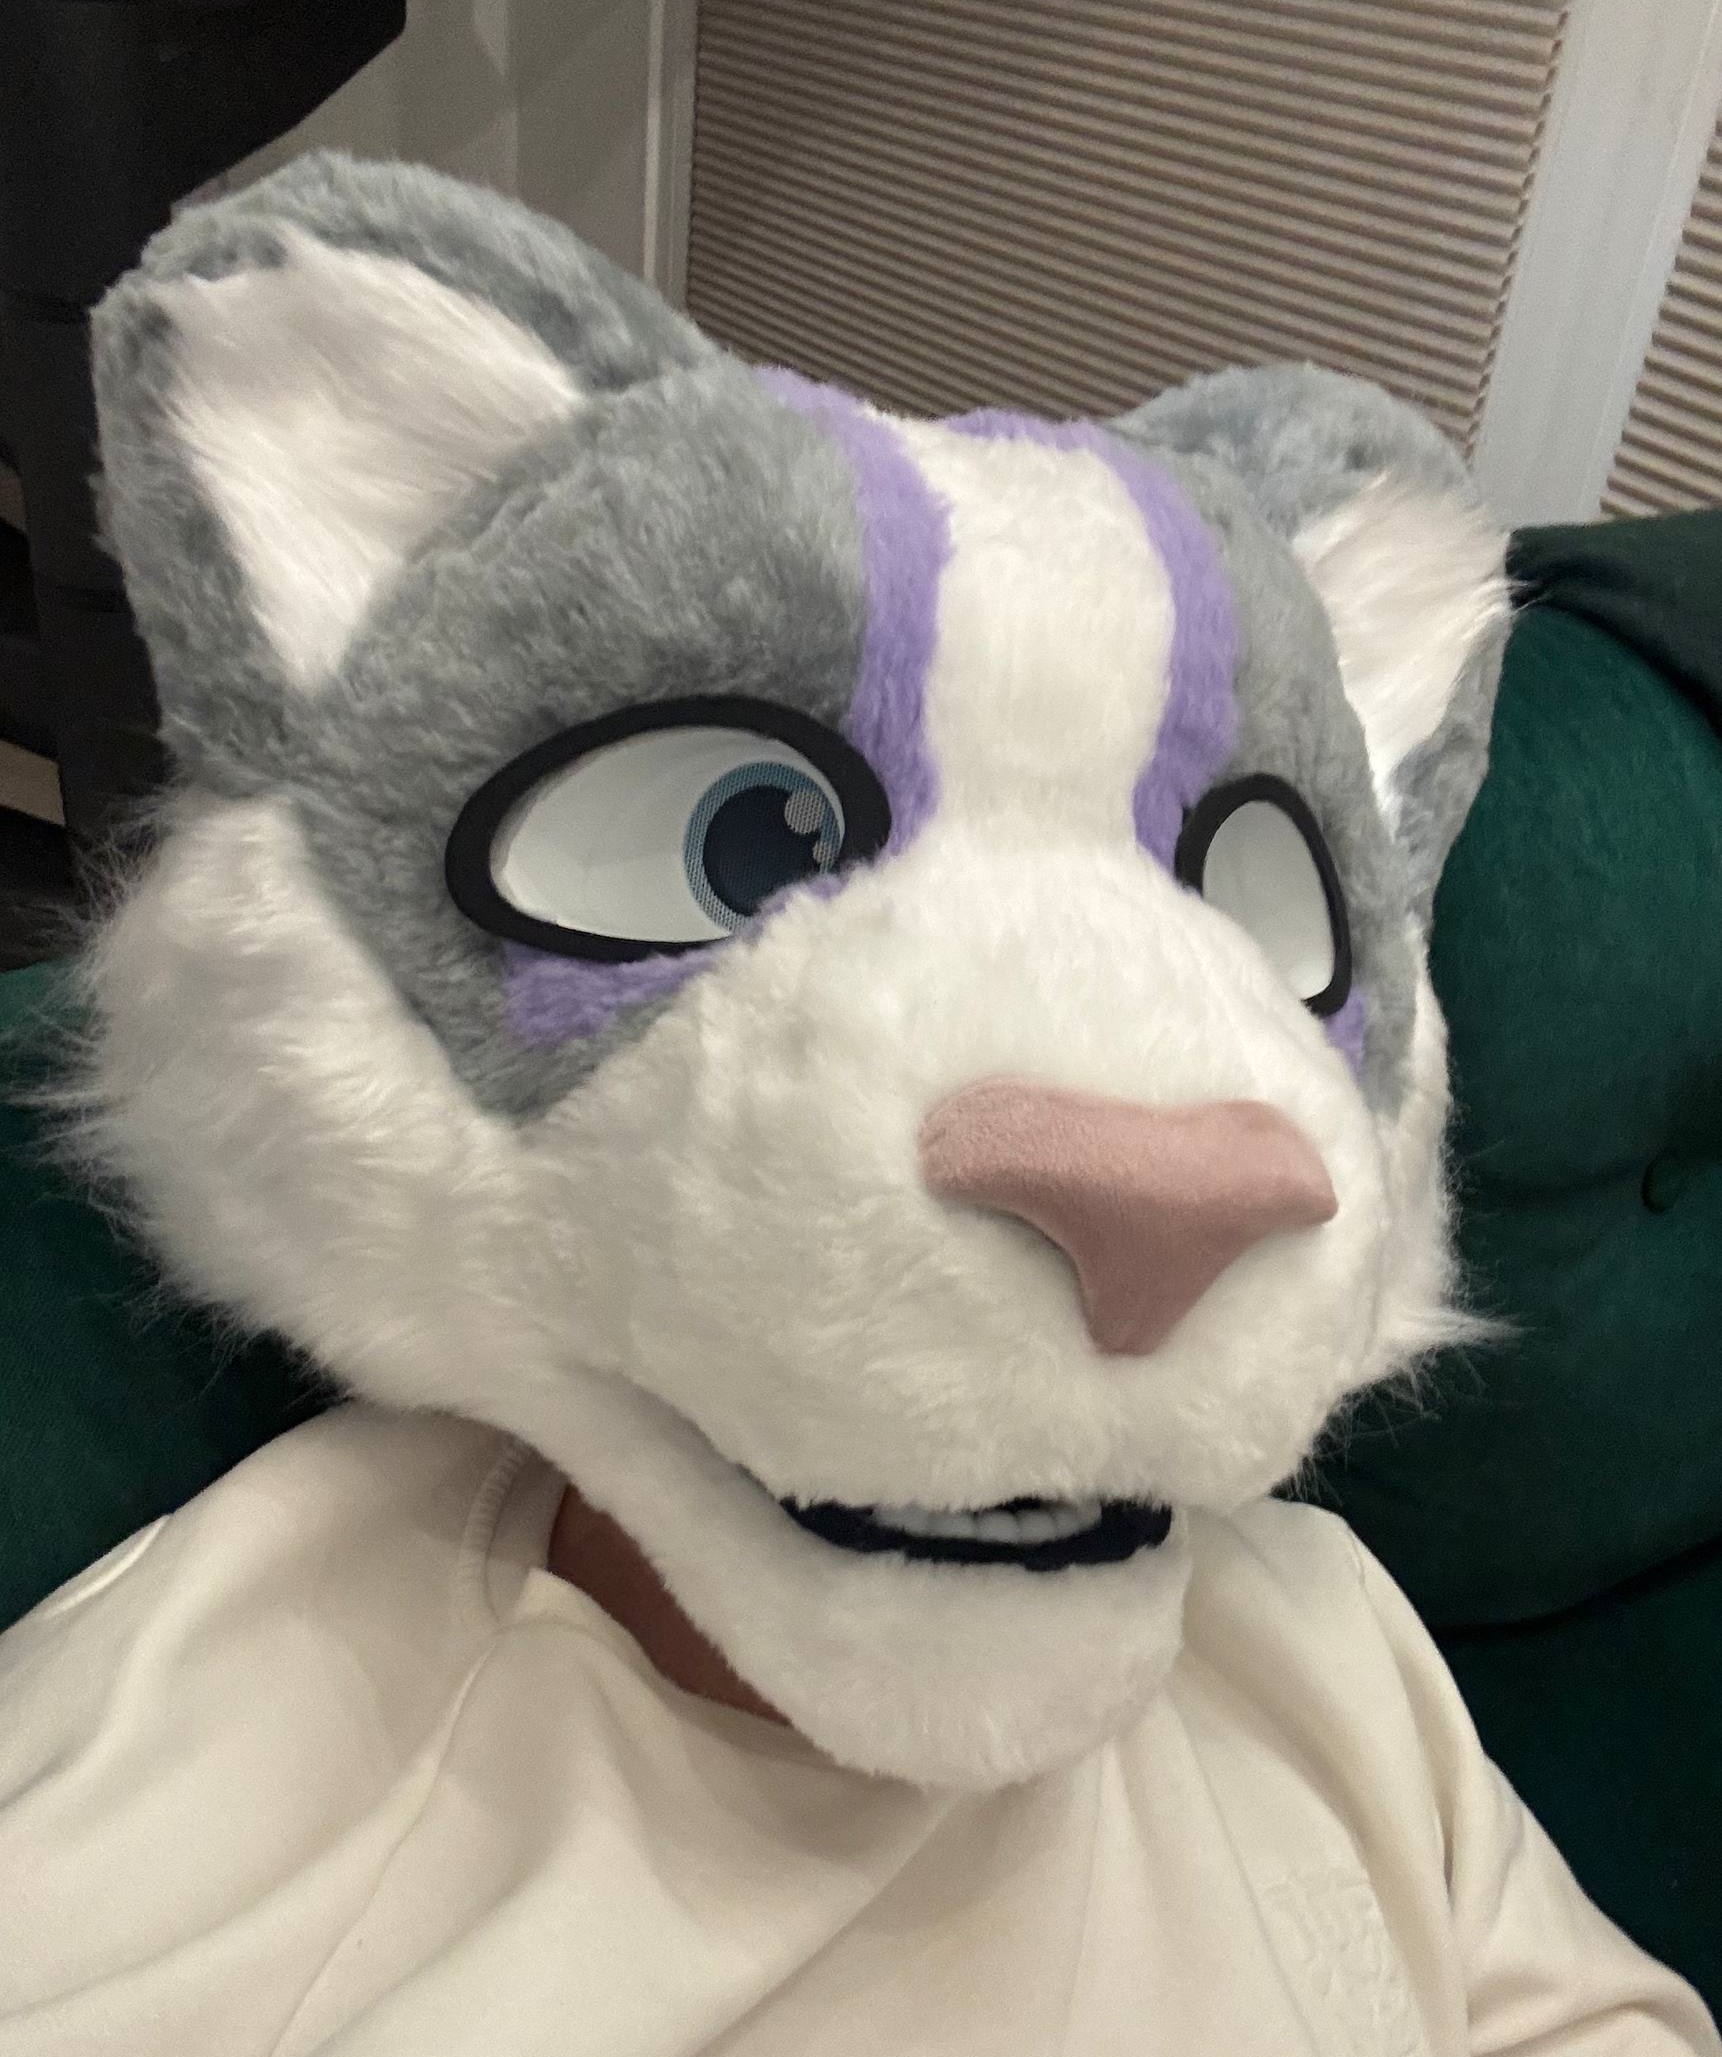
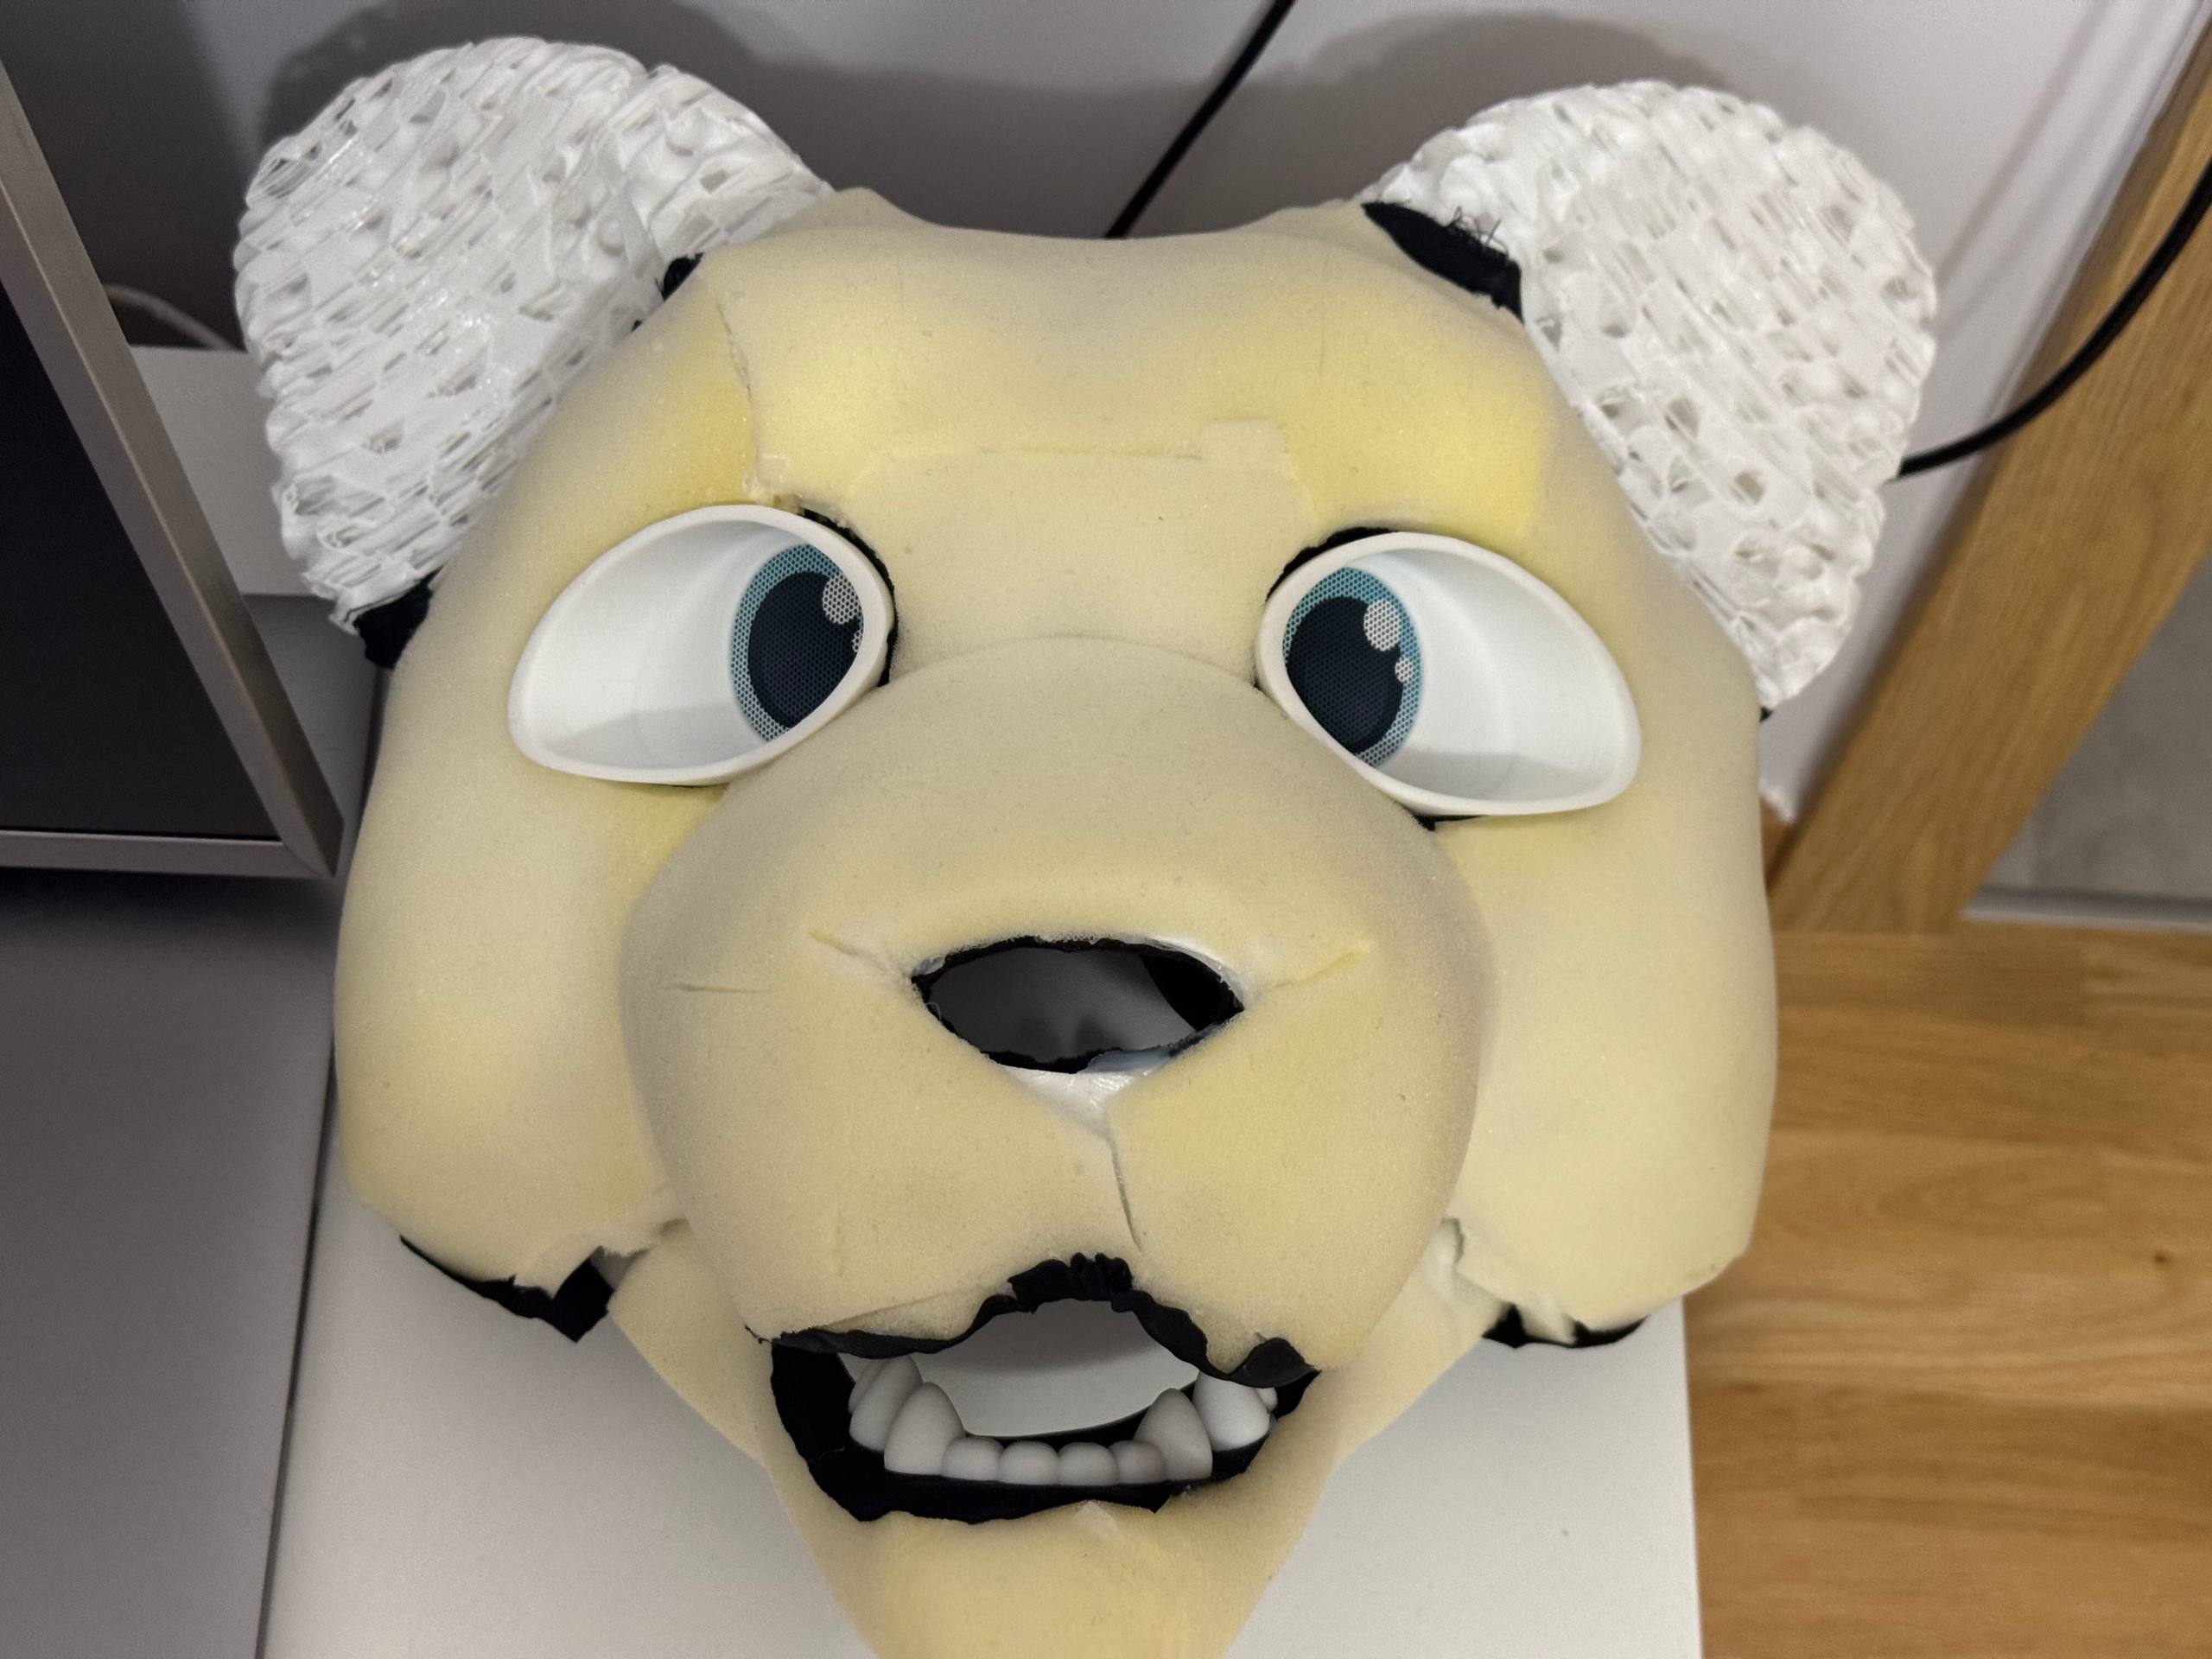
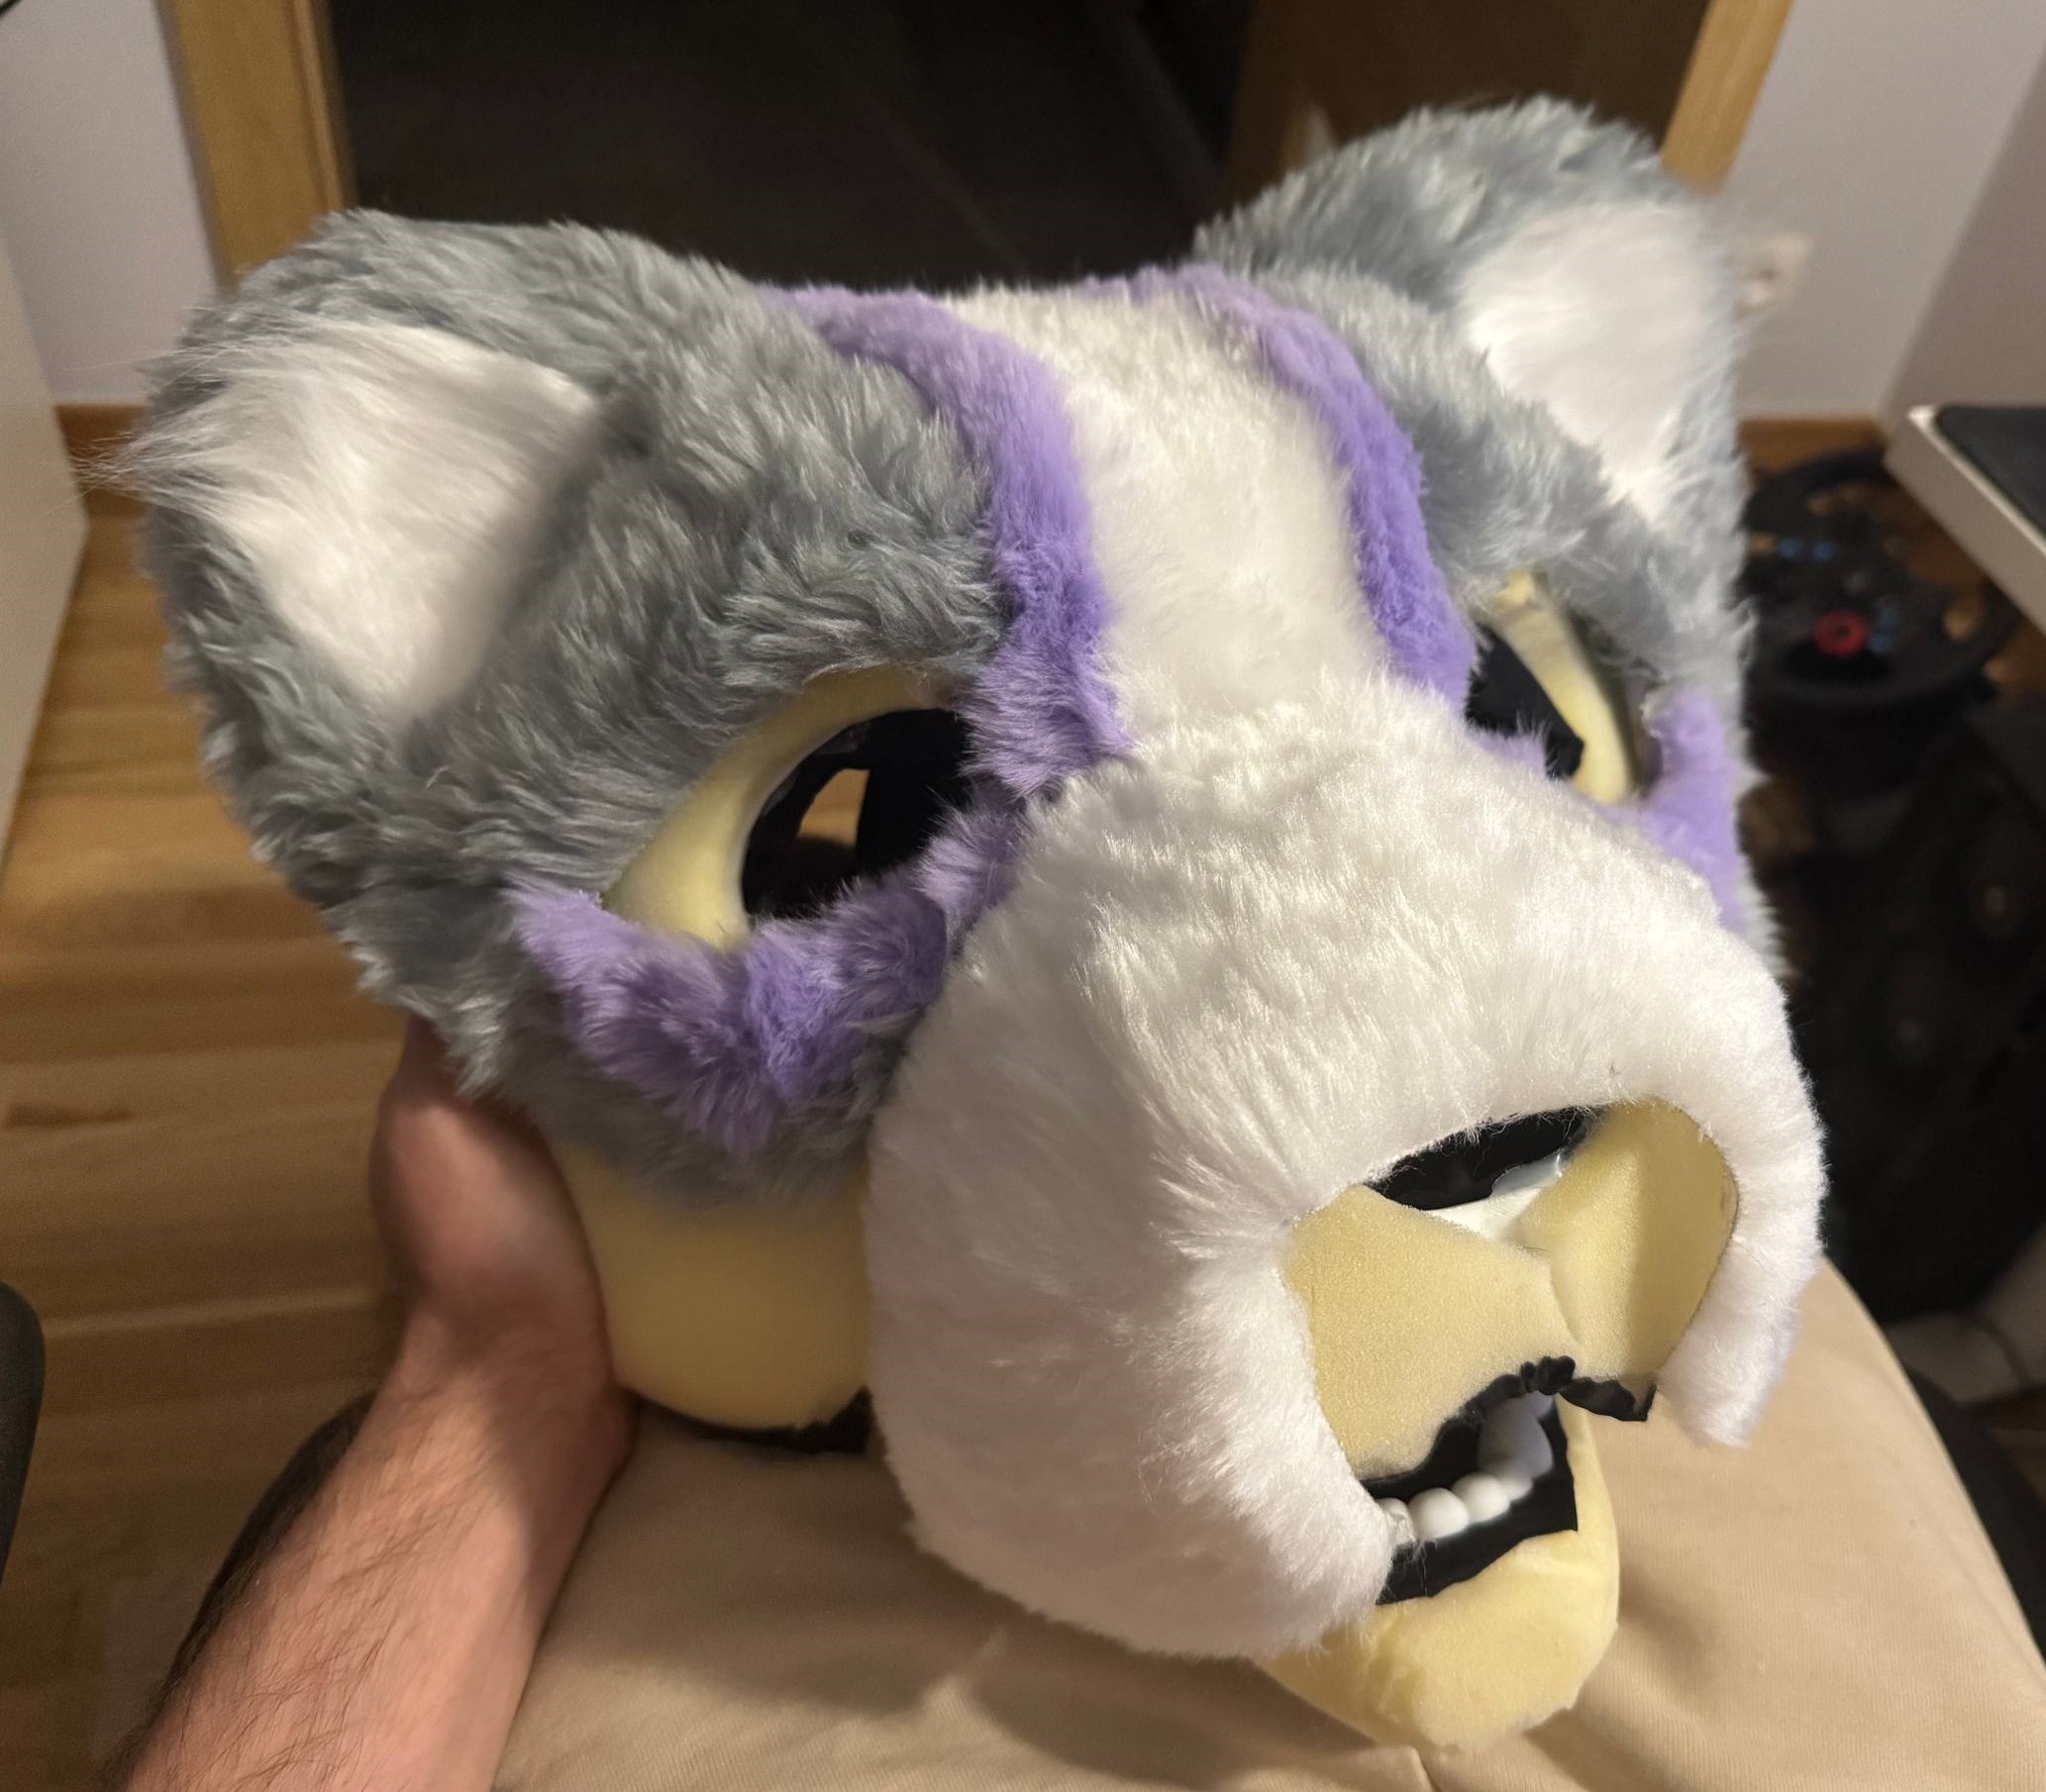
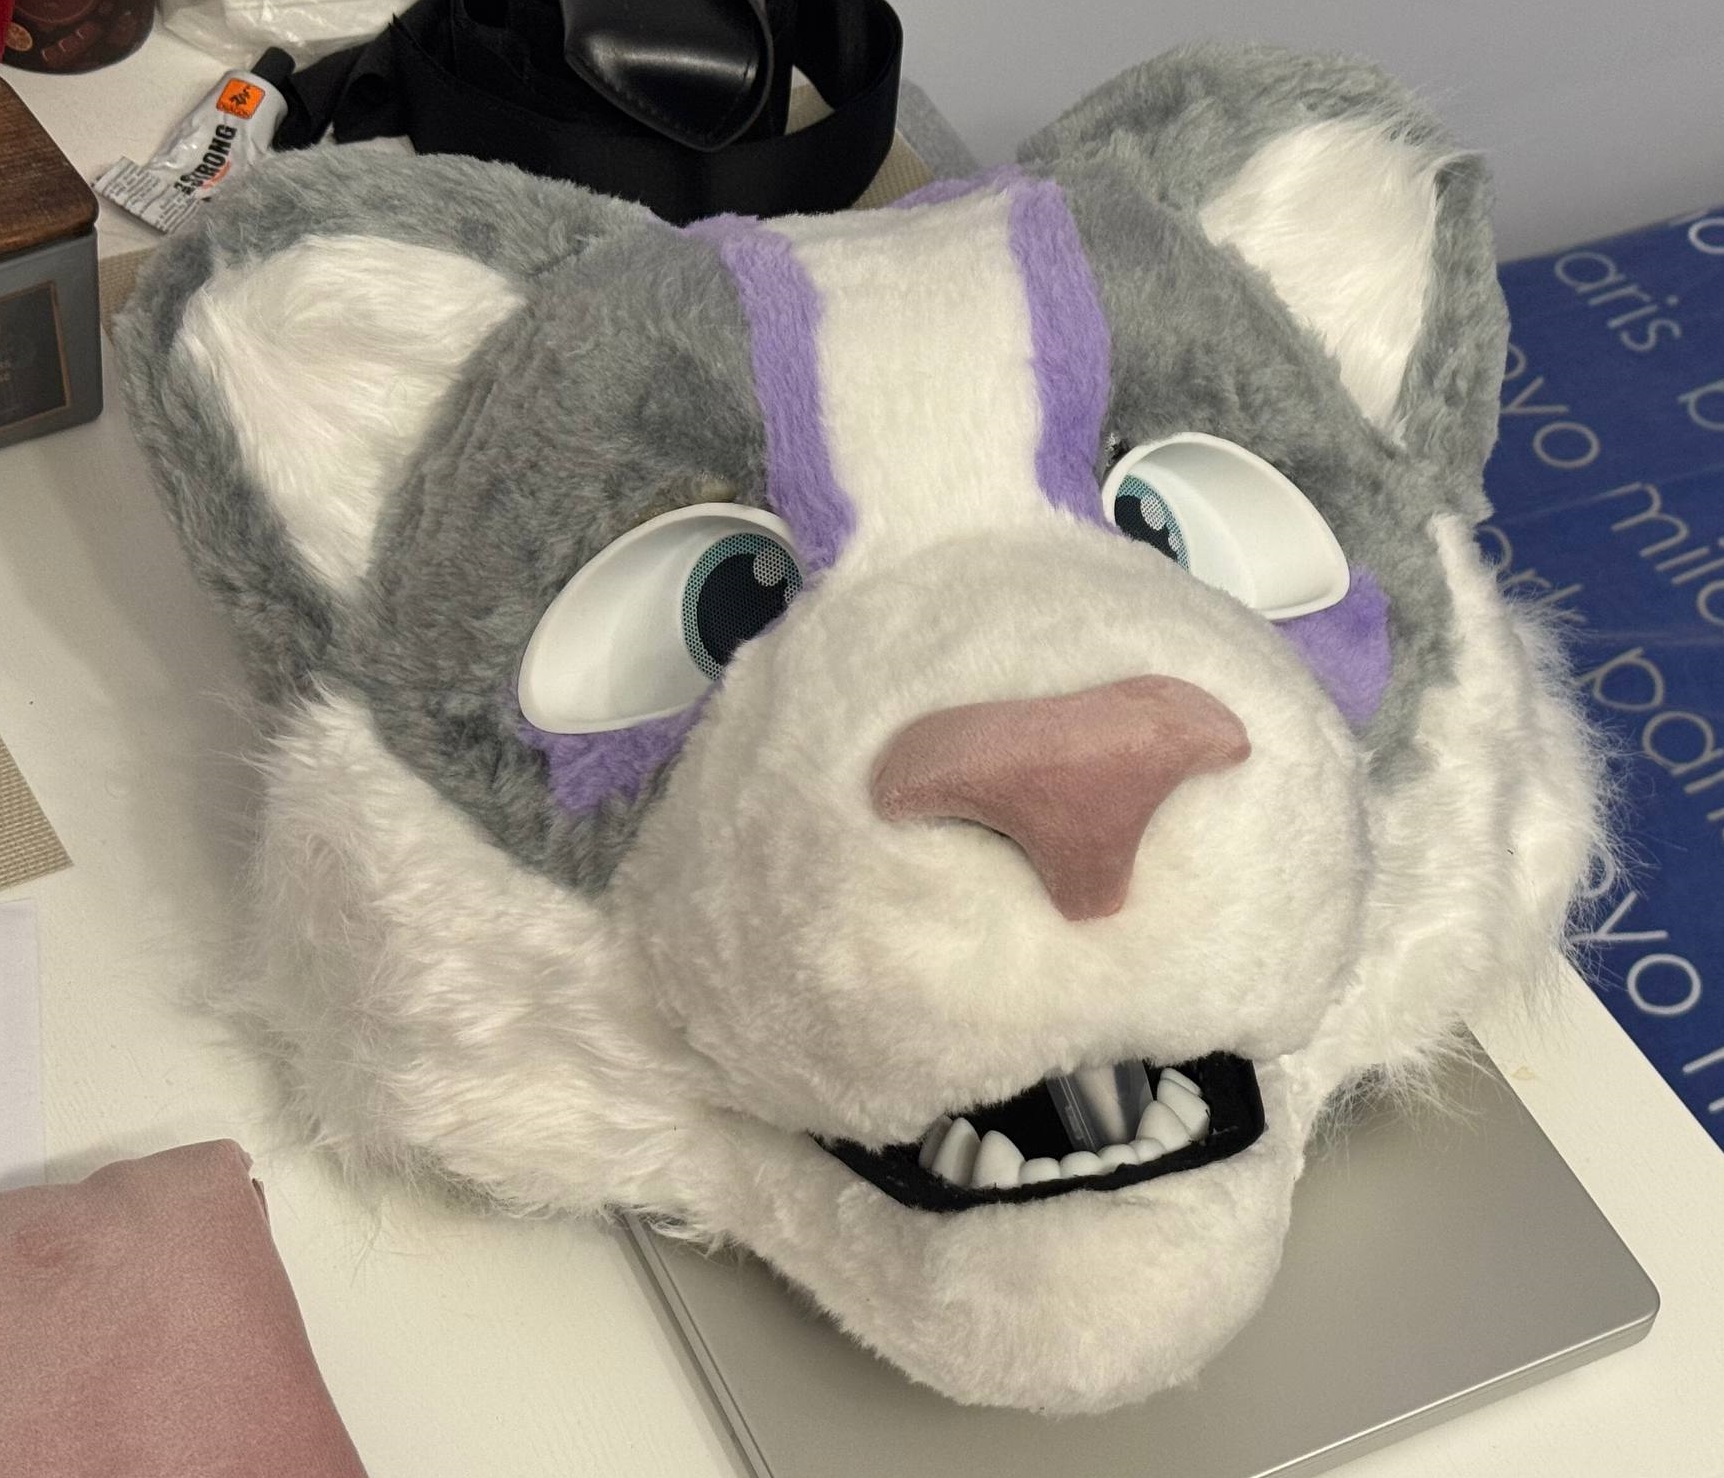
As you may have noticed head already have teeth - I printed them on 3d printer.
As for nose - it was printed and covered using pink smooth fabric, no sewing here, just some hot glue and stretching.
As for eyes accent - I modeled black outline in blender using eye model and printed it, then glued with hot glue gun. It took several attempts to find best fitting one.
And here we are! The final result is here. It may look not good, but it was a first try with zero experience at all xd. After that I understood lot of errors and how to prevent them.